A patio screen door is one of those things you don't think about until it stops working. When it glides smoothly, it’s an invisible hero, letting in the perfect San Diego breeze while keeping pests out. But the moment it sticks, squeals, or gets a tear, it becomes a glaring, maddening frustration. Maybe you need to get it out of the way for a backyard party, take it down for a deep cleaning, or tackle a full-blown screen replacement. Whatever the reason, you're here because you need to know how to remove a patio screen door, and you want to do it without turning a simple task into a costly repair.
Our team at Modern Yardz has worked on countless outdoor living projects across San Diego County, from the coastal homes in Oceanside to sprawling backyards in Chula Vista. While we’re often focused on large-scale Services like installing stunning new patios and outdoor kitchens, we know that a truly great space is a well-maintained one. And that maintenance starts with the details—like a perfectly functioning screen door. We've seen homeowners struggle with this exact task, often leading to bent frames and damaged tracks. So, we're sharing our field-tested process to help you get it done right the first time. It's not complicated, but it does require a bit of patience and knowing where to look.
First Things First: The Essential Prep Work
Before you even touch a screwdriver, let's set the stage for success. Rushing into this is the fastest way to create a bigger problem. Our experience shows that five minutes of preparation can save you an hour of headaches—and a call for repairs.
First, gather your tools. You don't need a sprawling workshop, but having the right items on hand is critical. You'll almost certainly need a Phillips head screwdriver. We recommend having a couple of different sizes, as the screws on these doors can vary. A flathead screwdriver or a stiff putty knife is also indispensable, not just for screws but for gently prying or cleaning the track. Grab a can of a good quality lubricant like WD-40 or a silicone-based spray; you’ll thank us later when you hit a stubborn, rust-fused screw. Lastly, find a safe place to put the door once it's off. A pair of sawhorses or an old blanket on the lawn works perfectly. You don't want to scratch the frame or tear the new screen you might be putting in.
Safety is another non-negotiable for our crew, and it should be for you, too. It might seem like overkill for a screen door, but we always recommend wearing gloves to protect your hands from sharp edges on the frame or track. A pair of safety glasses is also a smart idea. Springs can be under tension, and old, brittle plastic parts can snap and go flying. It's a small precaution that prevents a world of hurt.
And—let's be honest—this is crucial: clear your workspace. Move the patio furniture, sweep the area, and make sure you have plenty of room to maneuver the door. They are more awkward and unwieldy than they look.
Identifying Your Door Type: This Is Where Most People Go Wrong
Okay, here's the most important diagnostic step. Not all patio screen doors are created equal. Trying to remove a top-hung door with instructions for a bottom-rolling one is like trying to fit a square peg in a round hole. It's just not going to work, and you're probably going to break something. We've seen it happen time and time again.
There are two primary types you'll encounter:
Bottom-Rolling Screen Doors: This is the most common design by a long shot. These doors have a set of wheels or rollers at the bottom that sit inside a track on your door sill. They are held in place by a corresponding guide track at the top. They're popular because they're cost-effective, but their biggest weakness is that the bottom track is a magnet for dirt, pet hair, and debris, which is the number one cause of them sticking.
Top-Hung Screen Doors: These are often found on more modern or high-end patio door systems. As the name implies, the door hangs from rollers that run inside a track at the top of the door frame. The bottom of the door usually has a simple guide to keep it from swinging, but it bears no weight. The advantage here is a much smoother glide and an almost complete immunity to track debris. The removal process, however, is completely different.
How do you tell them apart? It's simple, really. Look closely at the bottom of your screen door. If you see small adjustment screws on the bottom corners (either on the face or the edge of the door frame), you have a bottom-rolling door. If you don't see any mechanism at the bottom and the door seems to float above the sill, you're looking at a top-hung model.
To make it even clearer, here’s a quick breakdown our team uses:
| Feature |
Bottom-Rolling Door |
Top-Hung Door |
| Primary Support |
Wheels on the bottom track |
Rollers in the top track |
| Common Issues |
Sticking due to debris in the track, worn wheels |
Smoother operation, less prone to sticking |
| Adjustment Screws |
Almost always visible on the bottom corners |
May have latches or clips at the top; no bottom adjustments |
| Removal Method |
Retract bottom wheels, lift up and out |
Disengage top rollers, often by lifting or sliding |
Taking a moment to correctly identify your door is the single most important thing you can do. It dictates every single step that follows.
The Step-by-Step Guide: Removing a Bottom-Rolling Screen Door
Since this is the door most of you have, we'll dive deep into this process. It’s a straightforward mechanical process—once you understand how it works. The whole system relies on spring-loaded wheels that you can raise and lower with a screwdriver.
Step 1: Locate and Access the Adjustment Screws
First, find the adjustment screws. There will be one for each roller, so one at the top and one at the bottom of the door's vertical frame. Sometimes they are on the inside or outside face of the door, near the corner. On other models, they might be on the edge of the door, accessible only when it's slightly open. They are typically small Phillips head screws set inside a small hole. They can get caked with dirt, so you might need to clean the area out a bit to see them clearly.
Step 2: Retract the Rollers (The Magic Step)
This is the key. You need to turn these screws to retract the wheels up into the door's frame. For almost every door we've ever worked on, turning the screw counter-clockwise will retract the spring-loaded roller. You're effectively lowering the door and creating slack. As you turn the screw, you should feel the tension release. Keep turning until the screw stops or becomes very loose. Do this for both the top and bottom rollers.
What you've just done is create clearance. The door is now sitting lower in its frame, which gives you the wiggle room needed to lift it out of the bottom track. Without this step, you'd have to use brute force, which is a recipe for a bent track.
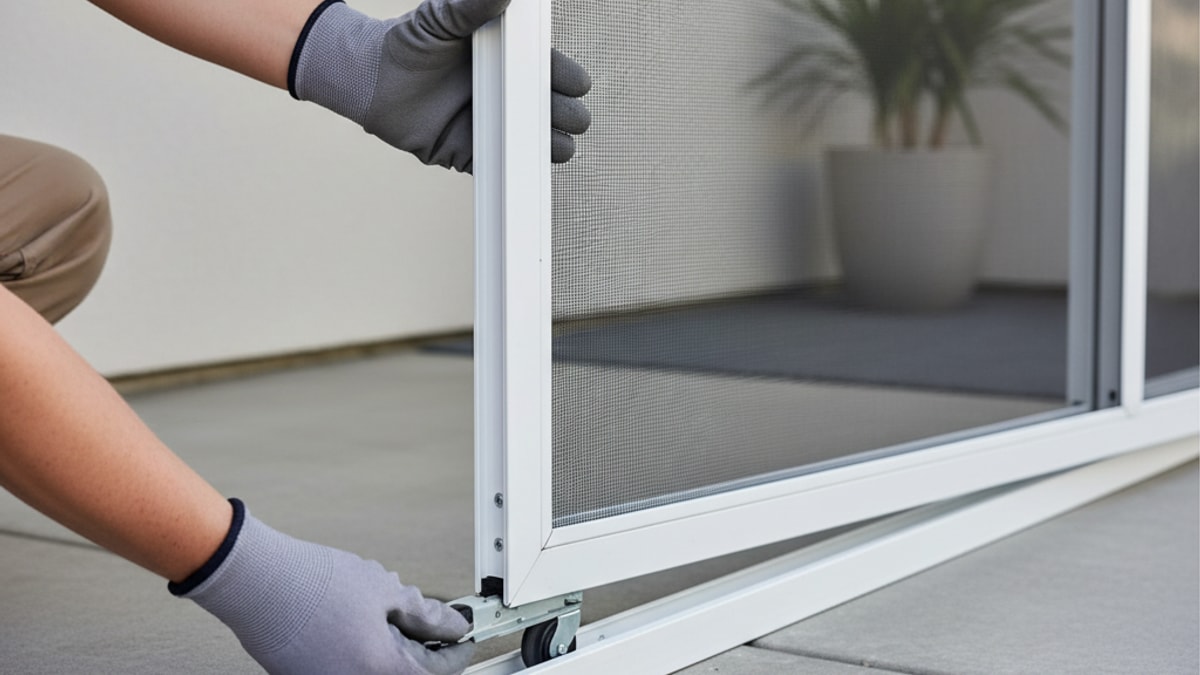
Step 3: Lift, Swing, and Remove
Now for the physical part. Stand on the inside of the door. With both hands, grab the vertical sides of the door frame firmly. Lift the entire door straight up. Because you've retracted the wheels, the door should now have enough room to clear the bottom track. Once the bottom of the door is free, you can swing it towards you, out of the frame. Then, simply lower the door to disengage it from the top track.
And that's it. The door is out. Place it carefully on your prepared surface. It's often more awkward than heavy, so having a second person can make this step much easier and safer.
Troubleshooting: When Things Don't Go Smoothly
Of course, we live in the real world where screws get stripped and metal rusts. What if the rollers won't retract? Our team has a few tricks. First, apply your lubricant liberally to the screw and the area around the wheel. Let it sit for a few minutes. If the screw is just stripped, try using a flathead screwdriver that fits snugly into the damaged head, or use a screw extractor if you have one. If the wheel itself is rusted and stuck, you may need to use your flathead screwdriver to gently pry up on the door frame right above the wheel while a partner tries to lift the door out. We can't stress this enough—be gentle. The aluminum frames of most screen doors are notoriously easy to bend.
A Different Beast: How to Remove a Top-Hung Screen Door
If you've identified your door as a top-hung model, you can forget everything about adjustment screws at the bottom. The entire mechanism is at the top, and your approach needs to be completely different. These can sometimes be trickier because the release mechanism isn't always obvious.
First, get a stable step stool and a flashlight. You need a clear view of the top track. Slide the door to the center of the opening. You're looking for how the rollers are attached. Some have a small plastic or metal latch that you can flip to release the roller. Others have a clip that needs to be depressed. On many models, there is no visible release at all. For these, the removal process is about manipulation.
You often have to lift the entire door panel straight up. This action might disengage the rollers from the track's groove, allowing you to swing the bottom out. Sometimes, there's a specific spot in the track—often a small notch or dip—where the door must be positioned before it can be lifted out. It can feel a bit like solving a puzzle. The key is to avoid force. If it feels stuck, you're likely missing a latch or not lifting at the correct angle. Patience here is paramount.
Once the top is disengaged, the rest is easy. The bottom guide will simply slide free as you remove the door. Because these systems are more complex and varied, if you're feeling unsure, this might be a good time to consult the manufacturer's documentation or even find a video of your specific door model. For a visual walkthrough of some common types, you can often find helpful tutorials on platforms like YouTube where we sometimes share tips from our projects.
Pro Tips from the Field: Avoiding Common Disasters
Over the years, our team has seen every possible mistake when it comes to home maintenance projects. Here are some of the hard-won lessons we've learned about removing patio screen doors.
Don't Force It. Ever.
This is the golden rule. If the door isn't coming out, you have missed a step. The frame is almost always made of thin, lightweight aluminum. Prying or pulling on it with excessive force will bend the frame or, even worse, damage the track of your main glass patio door—a significantly more expensive repair. Stop, take a breath, and re-examine the rollers and track.
The Tiny Parts Matter
Those little screws have a magical ability to vanish the second they're free. We recommend using a magnetic parts tray or even just a simple cup to keep all your hardware in one place. You don't want to be hunting for a single, crucial screw on your hands and knees later.
Inspect While It's Out
With the door off, you have the perfect opportunity to do a full inspection. Is the screen material torn or brittle? Are the rollers cracked or worn down? Are they spinning freely? Replacement roller kits are inexpensive and available at any hardware store. Replacing them now, while the door is off, is a ten-minute job that will make a world of difference. This is also the time to give the track a truly deep cleaning. Use a stiff brush and a vacuum to get out all the gunk. A clean, smooth track is essential for a smooth-gliding door.
This small task can sometimes reveal bigger issues. A bent track might indicate foundation settling, or a constantly failing screen door could mean the entire patio door unit is failing. This is where a simple repair can evolve into a larger project. It might be the catalyst for considering a full patio upgrade, something our team at Modern Yardz specializes in. A beautiful new patio deserves a flawless entry point.
When It's Time to Call for Backup
We're big believers in the power of DIY. But we're also realists. There are times when a seemingly simple task is better left to the professionals. If you're dealing with a door frame that's severely corroded or rusted, a track that's been bent completely out of shape, or a custom-built or oversized door system, it might be time to make a call.
Sometimes, the screen door is just a symptom of a larger design flaw in your outdoor space. If you find yourself frustrated with how your patio functions, maybe the problem isn't just the door. Maybe it's the flow, the layout, or the overall design. That’s where our expertise really shines. We’re passionate about transforming outdoor spaces into functional, beautiful extensions of the home. You can learn more about our philosophy and team on our About page. If you feel like you're fighting with your backyard more than you're enjoying it, we encourage you to BOOK MY FREE CONSULTATION. We can explore how a thoughtful redesign could solve not just your screen door problem, but create a space you truly love.
Ultimately, knowing your limits is a strength, not a weakness. Unlike some companies that only want the big, flashy jobs, we believe in helping homeowners make smart decisions, big or small. If you're in over your head, don't risk causing more damage.
Once your repairs are done, reinstallation is essentially the reverse of removal. Start by guiding the top of the door into the upper track, then push the bottom of the door into place over the bottom track, ensuring the wheels are seated correctly. Then, use your screwdriver to turn the adjustment screws clockwise, which will expand the rollers back down, lifting the door and adding the proper tension. You'll want to adjust it until the door glides smoothly without wobbling and latches correctly. A little bit of tweaking here and there will get you that perfect, satisfying slide.
A well-maintained screen door is a small but significant part of enjoying your outdoor living space. It's the gateway between your home and your personal oasis. Taking the time to handle it correctly ensures it works for you, not against you. For more tips on maintaining and enhancing your outdoor space, be sure to check out our Blog. We’re always sharing insights from our latest projects. For more daily design inspiration and a look at our recent San Diego transformations, follow us on Instagram. If you have a question or are ready to start a bigger conversation about your yard, don't hesitate to Contact us. We're here to help.


.webp)
.webp)