A swimming pool is already a centerpiece, a destination for relaxation and fun. But what if you could elevate it? What if you could add a layer of sensory delight—the gentle, mesmerizing sound of moving water and a dynamic visual element that transforms the entire space? That's exactly what a pool fountain does. It's a significant, sometimes dramatic shift from a static body of water to a living, breathing feature in your backyard.
Here at Modern Yardz, we've designed and built countless custom outdoor spaces, and our team has seen firsthand how a well-chosen water feature can complete a vision. The good news is that adding one isn't always a formidable, construction-heavy project. Some installations are surprisingly simple. But knowing how to install a pool fountain correctly—understanding the different types, the tools you'll need, and when to call for backup—is the critical, non-negotiable element for success. We're here to walk you through it, sharing the insights we've gathered over years of creating stunning backyards.
Why a Pool Fountain is More Than Just a Decoration
Let's be honest, the primary driver for most homeowners is aesthetics. A graceful arc of water catching the sunlight is undeniably beautiful. But the benefits run much deeper than just looks. Our experience shows that the functional advantages are often what clients appreciate most in the long run.
The most immediate effect is auditory. The constant, gentle sound of splashing water has a profound calming effect, effectively masking background noise like traffic or neighbors. It creates a serene, resort-like atmosphere that makes your pool area a true escape. It's a simple change that completely alters the mood of your outdoor space.
Functionally, fountains are fantastic for water circulation. By breaking the surface tension and moving water from lower levels to the top, they help distribute chemicals more evenly throughout the pool. This prevents stagnant spots where algae might be tempted to take hold. This constant movement also introduces oxygen into the water, a process called aeration, which can improve water quality and give it a fresher feel. And on a scorching hot day, that same process can actually help cool the water temperature by a few degrees through evaporative cooling. It’s not air conditioning, but every little bit helps.
First Things First: Understanding the Types of Pool Fountains
Before you can even think about installation, you need to know what you're working with. The term 'pool fountain' covers a sprawling range of products, from simple attachments to complex, integrated systems. Choosing the right one depends entirely on your budget, your pool's existing setup, and your DIY comfort level.
Floating Fountains
These are the easiest to install, hands down. They are self-contained units that, as the name implies, float on the pool's surface. Many are solar-powered, meaning there are no cords or hoses to worry about at all. You just place it in the water, and you're done. Others might connect to a return line with a flexible hose, drawing power from your pool's pump. While they offer a lovely effect, they can drift around and may need to be tethered or removed when the pool is in use.
Spray Fountains (Return-Line Fountains)
This is the most popular category for DIY installation. These fountains attach directly to the threaded return jet fitting (the nozzle where filtered water re-enters your pool). They use the existing pressure from your pump to create a spray of water. They come in a multitude of designs, from simple, single-tier sprays to multi-tiered, flower-shaped displays. The installation is typically straightforward, requiring no special tools. This is the type we'll focus on for our detailed step-by-step guide below.
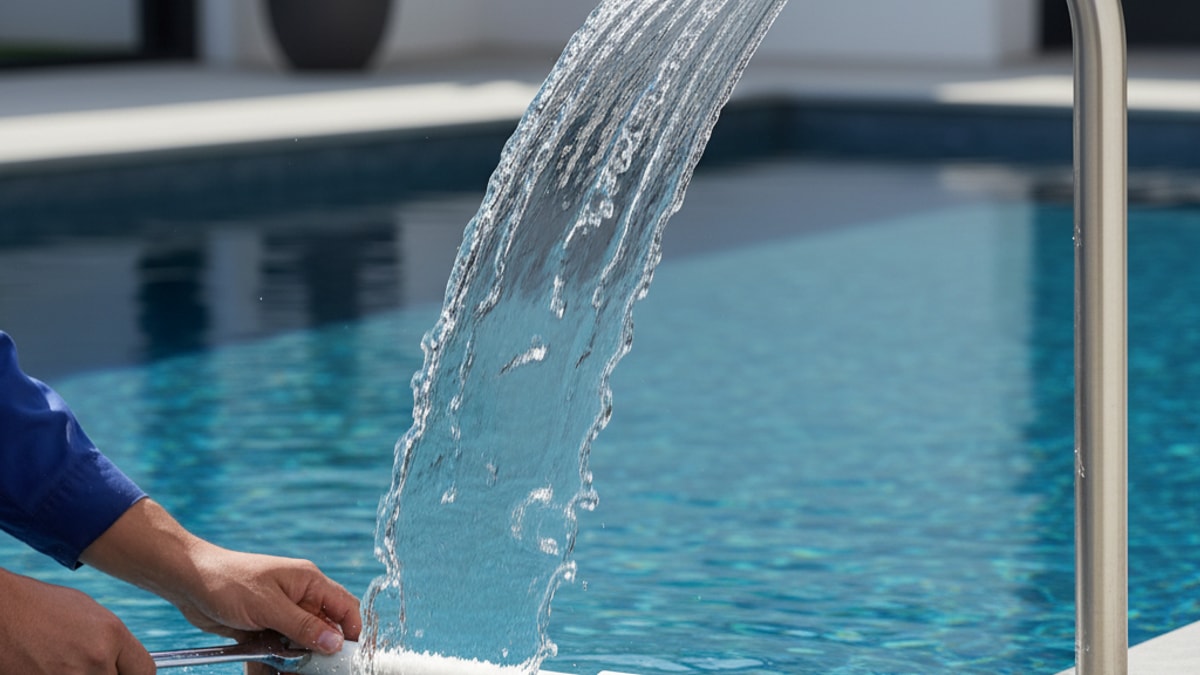
Deck-Mounted Fountains & Waterfalls
Now we're moving into more permanent, professionally installed territory. These features are mounted on the pool deck or coping and cascade water into the pool. Think scuppers, sconces, or sheet-descent waterfalls that create a sheer curtain of water. Installation almost always involves core drilling into your deck's Concrete SAN Diego or stonework and running dedicated plumbing lines back to the pool's circulation system. This is not a casual weekend project; it's a construction task that requires precision to avoid costly damage to your pool shell or deck. Our team integrates these features into our Pools AND Spas designs to ensure they are structurally sound and seamlessly incorporated.
Laminar Jets & Deck Jets
These are the showstoppers. Laminar jets produce a perfect, glass-like rod of water that arcs into the pool without a single splash. They are often backlit with LED lights for a spectacular nighttime effect. Deck jets are similar but produce a more traditional, bubbly stream. Like deck-mounted features, these require dedicated plumbing to be run under the deck and are almost exclusively installed during pool construction or a major renovation. Trying to retrofit these is a complex, often moving-target objective that is best left to a comprehensive Landscape Design SAN Diego plan.
A Quick Comparison of Pool Fountain Types
To make it clearer, here’s a breakdown of what to expect from each type. We've found that seeing the options side-by-side helps homeowners make a much more informed decision.
| Fountain Type |
Installation Difficulty |
Typical Cost |
Visual Impact |
Key Consideration |
| Floating Fountain |
Very Easy (Plug & Play) |
$30 - $200 |
Modest to Good |
Can drift; may need removal during swimming. |
| Spray/Return-Line |
Easy (DIY-friendly) |
$25 - $150 |
Good |
Uses existing pump pressure; easy to install/remove. |
| Deck-Mounted |
Difficult (Pro Install) |
$500 - $5,000+ |
High |
Requires drilling and dedicated plumbing. |
| Laminar/Deck Jets |
Very Difficult (Pro Install) |
$1,000 - $10,000+ |
Very High |
Best installed with a new pool or major remodel. |
The Pre-Installation Checklist: What You Need Before You Start
Okay, so you've decided on a return-line spray fountain. Great choice. Before you rip open the packaging, let's get prepared. A little prep work prevents a lot of frustration. We can't stress this enough: read the manufacturer's instructions first. They will always have model-specific details that are crucial.
Gather Your Tools & Materials:
For most simple spray fountains, you won't need a sprawling toolkit. Here's what we recommend having on hand:
- The fountain kit itself (check that all parts are included)
- Channel-lock pliers or a strap wrench
- Thread seal tape (Teflon tape)
- A flathead screwdriver
- A towel or rag
Safety First. Always.
This is non-negotiable. You're working with your pool's circulation system. The very first step, before you do anything else, is to go to your equipment pad and turn off the pool pump at the breaker. Not just at the timer, but at the main circuit breaker. This ensures there's no chance of the pump kicking on while you're working on the return line, which could send a jet of water right at you and potentially damage the new fitting.
Assess Your Pool's Return Jet:
Take a look at where you plan to install the fountain. Most in-ground pools have standardized 1.5-inch threaded return fittings. Most fountain kits are designed for this. However, some pools might have different sizes or types of fittings. The part you'll be removing is the 'eyeball' fitting, which consists of an outer lock ring and an inner, adjustable nozzle. Unscrew the outer ring (it should turn counter-clockwise) and pull the whole assembly out. Check the threads inside. Are they clean? Is the fitting in good shape? If it's old, cracked, or brittle, now is the time to replace it. You can find replacement fittings at any pool supply store.
The Installation Process: A Step-by-Step Breakdown for Return-Line Fountains
Alright, your pump is off, you have your tools, and you've inspected the return line. Let's get this done. We'll walk through the most common installation process. It's comprehensive.
Step 1: Turn Off the Pump and Relieve Pressure
We've said it before, but it's worth repeating. Go to your circuit breaker and shut down the power to your pool pump. If you have a multiport valve on your filter, you can also turn it to 'Closed' to prevent water from siphoning back out of the pool, though this isn't strictly necessary for a quick job.
Step 2: Remove the Existing Return Jet Fitting
Using your hand or the channel-lock pliers, unscrew the outer lock ring of the eyeball fitting. Lefty-loosey. Once the ring is off, the inner eyeball portion should pull right out. You'll be left with the open, threaded wall fitting.
Step 3: Assemble the Fountain (If Necessary)
Unpack your new fountain kit. Most will have a few parts: a main body that screws into the wall, an adjustable elbow or swivel joint, and the fountain head itself. Follow the manufacturer's instructions to assemble these pieces. Often, they just screw together by hand.
Step 4: Prepare and Attach the Fountain Adapter
Your kit will come with a threaded adapter that's designed to screw into the wall fitting. Take this piece and wrap the threads with 2-3 layers of thread seal tape. Here's a pro tip: wrap the tape in the same direction you'll be tightening the fitting (clockwise). This prevents the tape from bunching up or unraveling as you screw it in. Now, carefully thread the adapter into the wall fitting. Hand-tighten it first, then give it another quarter- to half-turn with your pliers to make it snug. Don't go crazy here. Overtightening can crack the plastic fitting, and that's a much bigger problem.
Step 5: Attach the Fountain and Make Adjustments
Now, attach the main body of the fountain to the adapter you just installed. Most have a swivel joint or an adjustable elbow that allows you to control the direction and angle of the spray. Position it so the fountain head is pointing up and toward the center of the pool. You can make fine-tuned adjustments later when the water is flowing.
Step 6: Prime the Pump and Test for Leaks
This is the moment of truth. Go back to your equipment pad. Make sure all your valves are back in their normal filter positions. Turn the power back on at the breaker. Your pump will start up and prime itself. As water begins to flow through the return line, your new fountain should spring to life!
Walk back to the pool and inspect your work. Check for any leaks around the new fitting. If you see any drips, you may need to tighten the connection slightly or re-apply the thread seal tape. Watch the fountain's spray. Is it too high? Too low? Most fountains have a valve or diverter that allows you to adjust the water flow, controlling the height of the spray. Adjust it to your liking. Simple, right?
When to DIY vs. When to Call the Pros
Our team fully supports the DIY spirit. For a simple, screw-in return-line fountain, a handy homeowner can absolutely tackle the job in under an hour. It's a satisfying project with an immediate payoff.
However, it's just as important to know your limits. The line between a simple project and a potential disaster is very real. We recommend calling in professionals if your project involves any of the following:
- Electrical Work: Installing fountains with integrated lighting requires a licensed electrician. Water and electricity are a catastrophic mix if not handled by an expert.
- New Plumbing Lines: If your desired fountain can't run off an existing return jet, you'll need to run a new plumbing line. This involves trenching and tapping into your main circulation system, a job best left to experienced pool builders.
- Drilling into the Pool Shell or Deck: Installing deck jets, scuppers, or waterfalls requires precise core drilling through concrete, stone, or gunite. A mistake here can compromise your pool's structural integrity, leading to leaks that are incredibly difficult and expensive to fix.
- Complex Water Features: If your vision extends beyond a simple spray to a multi-feature system with waterfalls, bubblers, and jets, you need a cohesive design plan. That's the reality. It all comes down to integrating these elements properly from the start.
If your dream backyard involves any of these more complex elements, that's where we come in. Don't risk a costly mistake. Let our team design a solution that's both beautiful and built to last. You can BOOK MY FREE CONSULTATION and we'll be happy to explore the possibilities with you.
Beyond the Fountain: Creating a Cohesive Outdoor Oasis
A fountain is a fantastic addition, but it's rarely the final piece of the puzzle. The most breathtaking backyards are those where every element works in harmony. Think about how your new water feature will interact with the rest of your space.
Proper Landscape Lighting SAN Diego is crucial. A well-placed uplight can turn your fountain into a dramatic focal point after sunset, highlighting the shimmering water against the night sky. It completely transforms the experience. Similarly, the area around your pool sets the stage. Is your deck looking tired? Upgrading to elegant Pavers SAN Diego can provide a stunning, non-slip surface that complements the new sense of luxury from your fountain.
And why stop there? Imagine pairing the gentle sound of your fountain with the warm glow of custom Fire Features. The elemental contrast of fire and water is a timeless design choice that creates a truly high-end resort feel. It’s these thoughtful combinations—the interplay of light, water, fire, and texture—that elevate a simple backyard into a personal oasis. It's what our design philosophy is all about.


.webp)
.webp)