So, you’ve got a brand-new unibead pool liner, and you're ready to give your above-ground pool a serious facelift. That’s fantastic. A new liner can completely transform your pool's appearance and extend its life for years to come. But standing there with a giant, folded piece of vinyl can feel... well, a little intimidating. We get it. Our teams have installed countless liners, and we know that the difference between a pristine, wrinkle-free finish and a frustrating, lumpy mess comes down to preparation, patience, and a few key techniques.
This isn't just about following steps A, B, and C. It's about understanding the why behind each action. It's about knowing which shortcuts are actually catastrophic traps and which pro-tips will save you hours of headache. We’re here to walk you through the entire process, from prepping the pool floor to that glorious moment you turn on the hose. Think of us as your expert guide, sharing the hard-won knowledge our installation crews use every day. Let's get that liner in.
First Things First: What Makes a Unibead Liner Special?
Before we dive in, it’s critical to understand what you're working with. The term "unibead" is fantastic because it signals versatility. This type of liner is essentially two-in-one, designed to be installed in two different ways. It has a small, hook-shaped component at the top (the "J-hook") and a thicker, wedged bead right below it. This dual design is a game-changer.
- J-Hook Installation: You can simply hang the liner directly on the pool wall using the J-hook. It's a straightforward method that works perfectly for pools without a bead receiver track.
- Standard Beaded Installation: If your pool does have a bead receiver (a track running along the top edge of the wall), you can easily modify the unibead liner. You just tear off the J-hook portion along a perforated seam, and voilà—you’re left with a standard bead that pops right into the track.
This flexibility is why we often recommend them. You get options. But it also means you need to decide which method you're using before you start. Let’s be honest, this is crucial. Trying to switch methods halfway through is a recipe for disaster. Check your pool's construction, determine if you have a bead receiver, and commit to a plan.
The Non-Negotiable Prep Work
We can't stress this enough: the success of your liner installation is determined long before you even open the box. A pristine installation on a poorly prepared pool is impossible. It just is. Rushing this stage is the single biggest mistake we see homeowners make. Don't do it.
Your first step is to completely drain the old pool. Once it's empty, remove the old liner. This is a good time to grab a utility knife and cut it into manageable sections for easier disposal. With the old liner out, it's time for a thorough inspection. You're now looking at the bare bones of your pool, and this is your chance to fix any underlying issues.
Inspect the Walls and Floor:
- Walls: Run your hands along the interior of the pool walls. Are there any significant rust spots? Any sharp metal edges or protruding screw heads? These are liner assassins. They will absolutely tear or puncture your new liner over time. Sand down any rust, patch any serious corrosion, and use duct tape or a similar heavy-duty tape to cover every single screw head or seam on the inside. It might seem like overkill, but our experience shows this is a critical, non-negotiable element of a long-lasting installation.
- Floor: The pool floor needs to be smooth and level. Absolutely smooth. Any rocks, roots, or even small pebbles will be painfully obvious under the new liner and feel terrible underfoot. More importantly, they create pressure points that can lead to premature wear and punctures. Spend a significant amount of time sweeping, raking, and troweling the sand or stone dust base until it's as perfect as you can get it. If you notice significant dips or uneven areas, now is the time to bring in more sand and re-level the entire base.
Check the Cove:
The cove is the angled transition between the pool floor and the pool wall. It's usually made of packed sand or a pre-formed foam strip. Its job is to support the liner and prevent it from stretching into the 90-degree angle at the base, which would put immense stress on the seams. Make sure your cove is intact, uniform, and about 3-4 inches high all the way around the pool. Patch any low spots and ensure it's smooth and well-compacted. A weak cove is a primary cause of liner failure.
This level of prep work is foundational to any great outdoor project, whether it's installing a liner or crafting the perfect base for new [Pavers SAN Diego] around the deck. The structure you can't see is often more important than the one you can.
Your Toolkit: Assembling the Essentials
Having the right tools on hand before you start will make the process infinitely smoother. Scrambling to find a screwdriver while you're balancing on the pool's edge is not a good time. Here’s what our team recommends you have ready to go.
| Tool Category |
Essential Items |
'Nice-to-Have' Upgrades |
Why It's Important |
| Preparation |
Broom, Shovel, Wheelbarrow, Level |
Plate Compactor, Laser Level |
For creating a perfectly smooth and level pool base. The upgrades ensure a professional-grade foundation. |
| Liner Handling |
Utility Knife, Duct Tape, Clothespins |
Soft-soled shoes, Knee Pads |
For cutting the old liner, securing the new one, and protecting it (and yourself) during installation. |
| Setting the Liner |
Shop-Vac (wet/dry vac) |
High-CFM Blower |
Absolutely critical for removing air between the liner and the wall, ensuring a tight, wrinkle-free fit. |
| Fittings |
Phillips & Flathead Screwdrivers |
Cordless Drill with Phillips Bit |
For removing and re-installing the skimmer and return jet faceplates. A cordless drill saves a lot of time. |
| Miscellaneous |
Garden Hose, Gasket Kit |
Liner-safe Pool Vacuum |
For filling the pool and performing the final cleanup. New gaskets for your fittings are highly recommended. |
Getting this kit together is half the battle. We've seen it work time and time again. A prepared installer is a successful installer.
The Main Event: A Step-by-Step Installation Guide
Alright, the prep work is done, your tools are ready, and hopefully, it's a warm, sunny day. Vinyl is much more pliable when it's warm, making it easier to work with and stretch into place. Our team avoids liner installations on cool, overcast days whenever possible. Seriously, wait for a day with temperatures above 70°F (21°C) if you can. It makes a world of difference.
Step 1: Unbox and Position the Liner
Bring the new liner, still in its box, into the center of the pool. Open it carefully, being mindful not to use your utility knife in a way that could slice the vinyl. Unfold it gently. You’ll want to identify the top and bottom. The bottom is usually a solid color, while the patterned side faces up. Spread it out as much as possible, with the seams running from the center out towards the walls, like spokes on a wheel. Don't try to get it perfect yet; just get it roughly centered.
Step 2: Hang the Liner
This is where you execute the plan you made earlier (J-hook or beaded). Grab a partner for this part; it's much, much easier with two people.
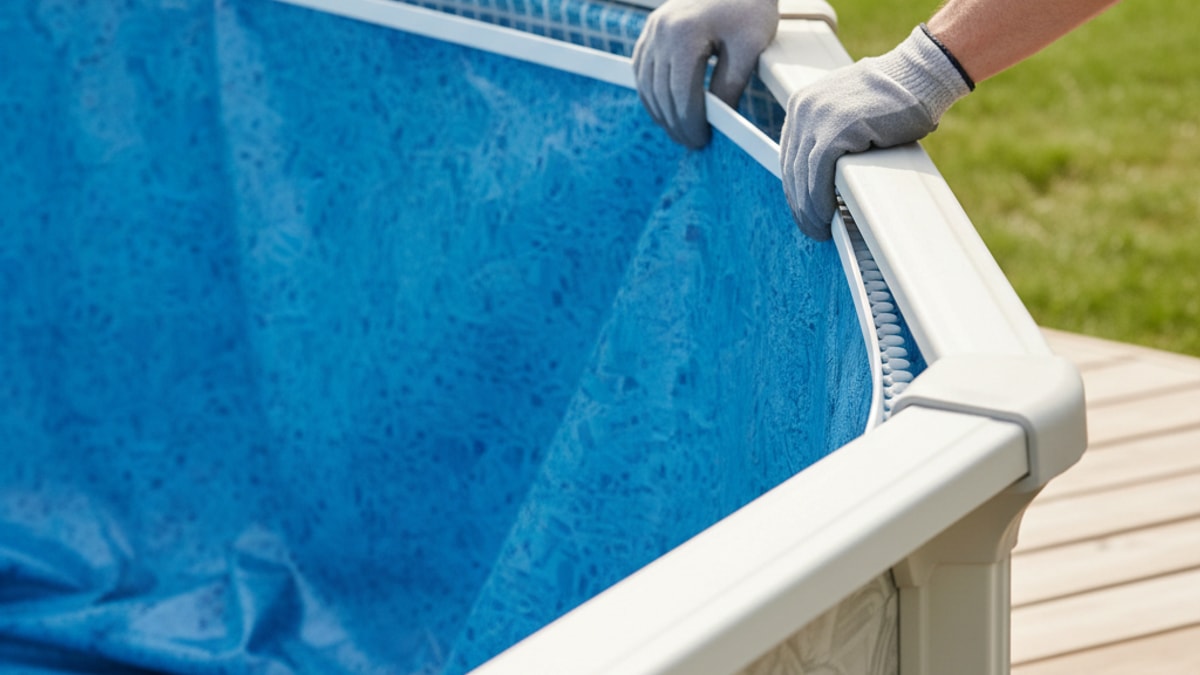
- For a J-Hook Installation: Pick a spot and lift the edge of the liner up to the top of the pool wall. Hook the J-bead directly over the top of the wall. Use clothespins or plastic liner clamps every few feet to hold it in place temporarily. Work your way around the entire pool, gently pulling the liner up and over the wall. You'll have some slack; that's normal.
- For a Beaded Installation: If you're using a bead receiver, you first need to tear off the J-hook portion. It should rip away cleanly along the perforation. Then, starting at one point, begin pushing the bead into the receiver track. Again, have a friend help you work in opposite directions around the pool. The bead should snap firmly into the track.
At this stage, the liner will look baggy and loose inside the pool. Perfect. That's exactly what you want.
Step 3: Set the Liner with a Shop-Vac
This is the professional trick that separates a great installation from an average one. It's also the most satisfying part of the process. You're going to use a shop vac to suck all the air out from between the liner and the pool wall, pulling the liner tight against the structure before a single drop of water goes in.
Take your shop vac and put the hose through the skimmer opening from the outside, pushing it down between the liner and the pool wall. Stop about a foot from the pool floor. Now, use duct tape to seal the skimmer opening completely around the hose, making it as airtight as possible. Turn the vacuum on (make sure it's set to suction!).
Almost immediately, you'll see the liner start to pull back against the wall. It’s like magic. As the air is removed, the liner will conform to the shape of the pool. This is your chance to work out any major wrinkles. With the vac still running, you can get into the pool (with soft shoes or in your socks!) and push any wrinkles from the center out towards the walls. The suction will help hold your adjustments in place. Keep the vac running until the liner is snug and smooth.
This is a game-changer.
Step 4: Start Filling the Pool
With the shop vac still running, place your garden hose in the center of the pool, ideally on a piece of cardboard or an old towel to prevent it from washing out the sand base. Turn on the water.
Do not turn off the shop vac yet. You want to wait until there are about 3-6 inches of water covering the entire pool floor. This small amount of water provides just enough weight to lock the liner in place. Once you have that base of water, you can turn off the shop vac and remove the hose. The water's weight now takes over, holding the liner tight.
Step 5: Cut in the Fittings (The Point of No Return)
Let the pool continue to fill. The time to install the faceplates for your skimmer and return jet is when the water level is about a foot below the fitting. Don't do it before this. If you cut the holes too early, the liner can still shift or stretch as the water fills, potentially misaligning the holes and causing a catastrophic leak.
We mean this sincerely: triple-check this step. Feel from the outside of the pool to locate the screw holes. Using a sharp utility knife or a razor blade, make a small X in the center of the first screw hole from inside the pool. Push the screw through from the outside, through the gasket, through the pool wall, and then through the liner. Attach the faceplate on the inside and loosely tighten the screw. Repeat for the remaining screws, creating a new hole for each one. Once all screws are in place, tighten them in a star pattern, like you would the lug nuts on a tire, to ensure even pressure.
With the faceplate securely attached, you can now carefully cut out the vinyl from the inside of the faceplate. Repeat this meticulous process for the return jet and any other fittings.
Step 6: Finish Filling and Balance
Continue filling the pool until the water level is about halfway up the skimmer opening. As it fills, the immense pressure of the water will smooth out any remaining minor wrinkles. Once it's full, you can start up your filter system and begin the process of balancing your pool chemistry. Your new liner is officially installed.
This entire process is a core component of our [Pools AND Spas] service, ensuring every detail is handled with precision. It's a project that transforms a backyard.
Common Pitfalls We See All the Time
Over the years, our team has been called in to fix a few DIY installations gone wrong. It happens. Usually, it comes down to one of these common, avoidable mistakes:
- Ignoring the Weather: Trying to install a liner on a cold day is a formidable challenge. The vinyl becomes stiff and uncooperative. You'll fight it every step of the way, and it will be nearly impossible to get a wrinkle-free finish. Patience is a virtue here. Wait for a warm, sunny day.
- An Imperfect Base: We mentioned it before, but it bears repeating. Even a tiny stone or root left under the liner will feel like a boulder once the pool is full of water. The base must be impeccable. Don't cut corners on smoothing and leveling the sand.
- Cutting Fittings Too Soon: The excitement to finish the job is real, but cutting the skimmer hole before the water level is high enough is a costly gamble. If the liner shifts even half an inch, that hole is now in the wrong place, and it cannot be repaired reliably. Wait until the water is about a foot below the opening to provide the necessary tension.
- Incorrect Measurements: This happens at the purchasing stage, but it's worth mentioning. Double- and triple-measure your pool's dimensions (diameter, height, etc.) before ordering a liner. An incorrectly sized liner simply will not fit, no matter how much you try to stretch or tuck it.
Avoiding these traps is key to a successful project that not only looks great but also integrates beautifully with your overall outdoor living space, perhaps complementing a new set of [Seat Retaining Walls] or a fresh patio design.
When to Call in the Professionals
Look, we're all for a good DIY project. There's a huge sense of accomplishment in it. But there are times when calling a professional is the smarter, safer, and ultimately more cost-effective choice. So, when should you put down the tools and pick up the phone?
Consider calling a pro if:
- Your pool has a complex shape. Freeform, kidney, or L-shaped pools require a level of precision and experience that's tough to replicate.
- You discovered significant structural issues. If your inspection revealed major rust, wall damage, or a collapsing cove, these foundational problems need to be addressed by an expert before any liner goes in.
- The pool floor is a 'deep end' or 'dished' bottom. These aren't flat bottoms and require special techniques to ensure the liner fits smoothly without massive wrinkles.
- You simply don't have the time or confidence. An improper installation can lead to leaks that damage the pool structure and require a complete do-over. Sometimes, the peace of mind that comes with a professional, warrantied installation is worth every penny.
A professionally installed liner is just one piece of a larger puzzle. When we work on a project, we're not just looking at the pool; we're considering how it connects with the entire environment. Our [Landscape Design SAN Diego] process ensures that the pool, patio, and plantings all work in harmony. Maybe the new liner is the first step toward adding beautiful [Landscape Lighting SAN Diego] to highlight the water at night or building one of our custom [Fire Features] nearby.
It’s about creating a cohesive, beautiful space where you love to spend your time. If you feel your project is getting bigger than just the liner, that's a great time to talk. We can help you see the bigger picture. If you're ready to explore what's possible for your entire backyard, you can always BOOK MY FREE CONSULTATION with our design team.
Installing a unibead liner is a totally achievable project that can save you money and give you a huge sense of pride. The key is to respect the process. Take your time with the preparation, be meticulous in your execution, and don't be afraid to ask for help if you feel you're in over your head. Get it right, and you’ll be rewarded with a beautiful, leak-free pool that will be the centerpiece of your backyard for many summers to come.


.webp)
.webp)