A classic brick patio does more than just add value to your home—it fundamentally changes how you experience your outdoor space. It’s the stage for summer barbecues, the quiet spot for a morning coffee, the foundation for an outdoor kitchen where memories are made. We’ve seen it time and time again across San Diego; a well-built patio becomes the true heart of the yard. But the path from a patch of grass to a beautiful, enduring brick surface is paved with careful planning and some serious sweat equity.
We're Modern Yardz, and for years, our team has been designing and building custom outdoor spaces from Chula Vista to Oceanside. We’ve learned a thing or two about what separates a patio that looks good for a year from one that looks incredible for decades. And—let’s be honest—the difference is almost always in the prep work. So, we're pulling back the curtain to show you how to build a brick patio the right way. Whether you’re a die-hard DIYer or just want to understand the process, we’re here to guide you.
First Things First: Planning Your Perfect Patio
Before you even think about renting a sod cutter, you need a plan. A rock-solid plan. Our experience shows that rushing this stage is the number one cause of costly mistakes and frustrating redos. So, grab a notepad, walk your yard, and let’s think this through together. What is the primary purpose of this patio? Is it an intimate space for two, or will it host large family gatherings? The function dictates the size. A common mistake we see is underestimating the space needed for furniture and foot traffic. A good rule of thumb is to use chalk or spray paint to outline the proposed area, then place your existing outdoor furniture inside the lines. It’s a simple trick, but it gives you a real-world feel for the scale. You might be surprised.
Now, let's talk location. You’ll want to consider sun exposure throughout the day, proximity to the house (especially if you’re planning an outdoor kitchen), and any existing landscape features. And—we can't stress this enough—think about drainage. Water is the nemesis of a level patio. Your patio must slope away from your home’s foundation—a subtle, almost imperceptible grade of about one-quarter inch per foot is the professional standard. Ignoring this can lead to catastrophic water issues down the line. It's a critical, non-negotiable element of the design.
Finally, the fun part: the pattern. The pattern you choose has a significant, sometimes dramatic shift on the overall aesthetic. Here are the classics:
Running Bond: The most common and straightforward pattern, where bricks are laid in staggered rows like a traditional brick wall. It's strong and creates a clean, linear look.
Herringbone: A stunning, zigzag pattern that’s incredibly stable and visually dynamic. It’s more complex to lay, especially for beginners, but the result is impeccable.
Basket Weave: Bricks are laid in pairs, alternating horizontally and vertically to create a checkerboard-like square. It offers a wonderful, textured, old-world feel.
Our Services team often helps clients visualize these patterns with 3D renderings, because seeing it in your space makes all the difference. This planning phase is your blueprint for success. Don’t cut it short.
Gathering Your Arsenal: The Right Tools & Materials
You can’t build a fortress with toothpicks. Getting the right gear and materials from the start saves you countless headaches. This isn’t just about the bricks; it’s about the entire system, from the ground up. You’ll need a mix of rented heavy machinery and basic hand tools.
Essential Tools:
Shovels (flat and pointed)
Wheelbarrow
Tape Measure & Carpenter’s Square
Stakes and String Line
Line Level or Laser Level
Tamper (a hand tamper for small areas, but we strongly recommend a plate compactor for the base)
4-foot Level
Rubber Mallet
Brick Chisel or a rented Wet Saw with a diamond blade (for clean, precise cuts)
Broom (stiff-bristled)
Safety Gear: Gloves, safety glasses, steel-toed boots, and ear protection.
Materials Breakdown:
Bricks/Pavers: The star of the show. You can choose traditional clay bricks or concrete pavers that mimic brick. Always order about 10% more than your square footage calculation to account for cuts and breakage.
Base Material: This is the unseen hero. It’s typically a crushed stone aggregate. This layer provides the primary structural support and drainage.
Bedding Sand: A 1-inch layer of coarse sand goes on top of the base. This is what you’ll actually set the bricks into, allowing for minor adjustments.
Edge Restraints: Absolutely crucial. These can be plastic, steel, or aluminum strips that are staked into the ground to hold the entire patio together and prevent the bricks from shifting over time.
Jointing Sand: After the bricks are laid, you’ll sweep sand into the joints to lock them in place. We almost exclusively use polymeric sand, which contains a binder that hardens when activated with water. It’s a formidable defense against weeds and insect infestations.
Here’s a quick look at how we think about base materials, a choice that heavily depends on your local soil conditions here in Southern California.
Base Material
Pros
Cons
Our Team's Take
Class II Permeable Base
Excellent drainage, industry standard, compacts into a rock-solid base.
Can be heavy and more expensive to have delivered.
This is our go-to for almost every paver and brick project. Its stability is unmatched and essential for longevity.
Decomposed Granite (DG)
More affordable, compacts well, provides a firm surface.
Can have poorer drainage compared to crushed stone, may break down over many years.
A viable option for smaller, less critical projects or areas with naturally sandy, well-draining soil. We use it selectively.
Making the right material choices is foundational. If you’re ever unsure, it’s better to ask than to guess. You can always Contact our team for advice.
The Hard Part: Site Prep & Excavation
Honestly, though. This is where the real work begins. Proper excavation and grading are physically demanding and technically precise. It’s the phase that makes or breaks the entire project.
First, you need to clear the area completely. This means removing all grass, weeds, and large rocks. For larger areas, renting a sod cutter is a lifesaver. Once cleared, use your stakes and string lines to mark out the exact perimeter of your patio. Double-check your measurements and make sure your corners are square using the 3-4-5 triangle method. It’s an old carpenter’s trick that never fails.
Now, you dig. The depth of your excavation depends on the thickness of your materials. Here’s the formula: Depth = Thickness of Brick + 1 inch of Sand + 4-6 inches of Gravel Base. So, for a standard 2.25-inch brick, you’re looking at digging down around 8 inches. That’s a lot of dirt. For a 10x10 patio, you’ll be moving over 2.5 cubic yards of soil. That’s why having a plan for where all that excavated earth will go is part of the prep work.
This is also the point where you establish your slope for drainage. Tie your string lines to the stakes and use a line level to set the initial height at the side closest to your house. Then, lower the string on the opposite stakes by that crucial quarter-inch per foot. This string line is now your guide for a perfectly graded excavation. As you dig, periodically check the depth from the string to ensure a consistent, sloped base. Once you’ve reached your target depth, the entire area needs to be compacted. We use a heavy plate compactor to create a firm, unyielding subgrade. Don’t skip this. A weak subgrade will lead to sinking and unevenness later.
We mean this sincerely—if any part of this process feels overwhelming, it's a good time to pause. The integrity of your entire patio rests on this foundation. Many of our clients start the DIY journey and call us at this stage. And that's perfectly okay. If you're feeling in over your head, it’s the right time to BOOK MY FREE CONSULTATION and let a professional team take over.
How To Install A Brett Paving Brickedge To A Patio
This video provides valuable insights into how to build a brick patio, covering key concepts and practical tips that complement the information in this guide. The visual demonstration helps clarify complex topics and gives you a real-world perspective on implementation.
Building a Base That Won’t Budge
With your site excavated and compacted, it’s time to build the foundation. This happens in two stages: the gravel base and the sand bed.
Start by laying down your gravel base material in layers, or “lifts.” Don’t just dump all 4-6 inches in at once. It won’t compact properly. We recommend spreading a 2-3 inch layer first, raking it out evenly, and then running the plate compactor over it multiple times until it’s solid. You’re aiming for a surface that you can walk on without leaving deep footprints. Repeat the process with the next layer until you’ve reached your desired base thickness. This multi-layer compaction method is a professional technique that ensures a uniformly dense and stable foundation that resists frost heave and settling.
Next comes the screeding sand. This 1-inch layer is what creates the perfectly flat and smooth bed for your bricks. To get it right, you’ll need two parallel pipes or rails (1-inch metal conduit works great) laid directly on your compacted gravel base. Shovel the coarse sand between them, then pull a straight 2x4 board across the top of the rails in a sawing motion. This removes the excess sand and leaves a perfectly smooth, level bed. Once an area is screeded, remove the rails and carefully fill in the voids with more sand. Be extremely careful not to walk on or disturb the screeded sand. It's delicate.
This two-part base system is the unsung hero of every durable brick patio we've built. It provides drainage, stability, and the perfect surface for setting the pavers. It’s a testament to the idea that what you don’t see is often more important than what you do.
The Art of Laying Bricks: Patience and Precision
This is where your patio finally starts to look like a patio. It’s also a test of patience. Start in a corner—preferably against a hard edge like the foundation of your house—and work your way out. Gently place each brick onto the sand bed according to your chosen pattern. Don’t slide them into place, as that will disrupt the sand. Place it, then use a rubber mallet to give it a few firm taps to set it.
Your best friends during this phase are your string lines and your level. We run string lines every few feet to keep our rows perfectly straight. After laying a few square feet, place your long level across the tops of the bricks to check for flatness. If a brick is too high, tap it down. If it’s too low, lift it, add a little sand underneath, and reset it. It’s a meticulous, sometimes slow-going process. But precision here pays off with a flawless, professional-looking surface.
Inevitably, you’ll need to make cuts, especially around the edges. A wet saw with a diamond blade will give you the cleanest, most precise cuts and is absolutely worth the rental cost for a project of this scale. Always measure twice and cut once. And always wear your safety glasses and a mask when cutting masonry—the dust is no joke. Our team has refined this process over years, and it's a skill that combines technical know-how with an artist's eye, which you can learn more about on our Home page.
Locking It All In: Edging, Sand, and the Final Touches
You’re in the home stretch. Your bricks are laid, and the surface looks amazing. But it’s not finished. Without the final locking mechanisms, it’s just a collection of loose bricks waiting to shift apart.
First, install your edge restraints. These are dug in along the entire perimeter of the patio and secured with long metal spikes driven into the ground. The top of the restraint should sit just below the level of the bricks so it will be hidden by soil or mulch later. This framework is what contains the immense lateral pressure of the entire system. It is absolutely mandatory.
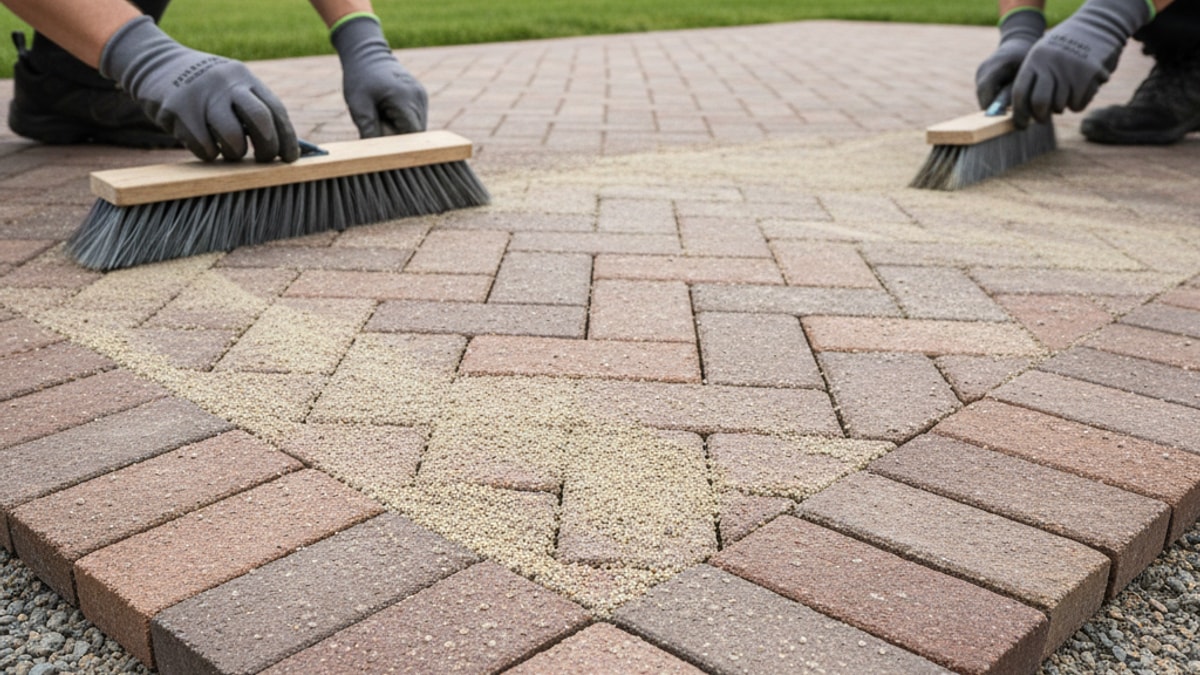
Next, it’s time for the jointing sand. We’re big advocates for polymeric sand. It’s more expensive than regular sand, but its ability to harden and resist weeds and erosion is a game-changer for the longevity and low maintenance of a patio. Pour the sand over the dry patio surface and use a stiff-bristled broom to sweep it into every single joint. Sweep from multiple angles to ensure there are no voids.
Once the joints are full, you need to vibrate the sand down. Carefully run your plate compactor over the top of the bricks. This settles the bricks one final time and vibrates the sand deep into the joints, creating a tight interlock. After compacting, you may need to sweep in a little more sand to top off the joints.
Finally, follow the manufacturer’s instructions for activating the polymeric sand. This usually involves using a leaf blower to remove any excess sand from the surface of the bricks (this is critical—any leftover sand will harden into a permanent haze), then gently misting the patio with a hose. You’ll need to let it cure, typically for 24-48 hours, before walking on it or placing furniture. This final step transforms your field of individual bricks into a single, unified, and incredibly strong surface. It's a satisfying end to a challenging project, reflecting the kind of quality we talk about in our About section.
Building a brick patio is a formidable undertaking, a true blend of brute force and fine detail. It’s a project that demands respect for the process and an unflinching commitment to getting the foundation right. The result, however, is one of the most rewarding home improvements you can make—a beautiful, timeless space that will serve your family for generations. Whether you choose to take on this challenge yourself or decide the expertise of a dedicated crew is the right path for you, we hope this guide has given you the confidence and knowledge to move forward. For more project ideas and inspiration from our work across San Diego, take a look at our Blog. And remember, transforming a yard is a journey. We’re here to help whenever you’re ready to take the next step.
Frequently Asked Questions. Here are some common questions. Find the answers you're looking for below.
How deep do I really need to dig for a brick patio foundation?
For most pedestrian patios in a climate like San Diego's, we recommend excavating 7-9 inches deep. This allows for a solid 4-6 inch compacted gravel base, a 1-inch sand bed, and the height of the brick itself. Skimping on depth is the fastest way to an unstable, sinking patio.
Can I build a brick patio on a slope?
Yes, but it requires more advanced techniques. You can either build a series of terraced, level patios using retaining walls, or create one continuous, sloped patio. The latter is much more complex to ensure stability and proper drainage, and we highly recommend professional consultation for sloped sites.
What's the difference between clay bricks and concrete pavers?
Clay bricks offer a classic, timeless look with color that won't fade because it runs all the way through. Concrete pavers come in a much wider variety of shapes, sizes, and colors, but the surface color can sometimes wear over many years. Both are incredibly durable when installed correctly.
Is polymeric sand really necessary?
While not strictly necessary, our team strongly recommends it. Polymeric sand hardens to lock bricks tightly, which is far superior to regular sand. It dramatically reduces weed growth and prevents insects from nesting between your pavers, saving you a lot of maintenance headaches.
How do I calculate how many bricks I need?
First, calculate the total square footage of your patio (length x width). Then, find the square footage of a single brick. Divide the total patio square footage by the brick's square footage to get the number of bricks. We always advise adding 10% to that total to account for cuts and waste.
Do I have to use a plate compactor?
For any patio larger than a small walkway, yes. A hand tamper simply cannot achieve the level of compaction needed for a stable gravel base. Renting a plate compactor for a day is one of the best investments you can make for the long-term health of your patio.
Should I seal my new brick patio?
Sealing is optional but can be beneficial. A good quality sealer can enhance the color of the bricks, protect against stains (like oil or wine), and make cleaning easier. However, it also adds a maintenance step, as the sealer will need to be reapplied every few years.
How long does it take to build a brick patio?
This depends heavily on the size, complexity, and your experience level. For a dedicated DIYer, a simple 10x12 foot patio could take two full weekends. Professional crews like ours can often complete a project of that size in just a few days due to specialized equipment and experience.
What is the most common mistake people make when building a patio?
The most common and most damaging mistake we see is an inadequate base. People often don't dig deep enough or fail to compact the gravel base properly. This leads to uneven settling, loose bricks, and a patio that fails years before it should.
How much of a slope is needed for proper drainage?
The standard is a slope of one-quarter inch for every one foot of distance away from your house. For a 12-foot patio, the far edge should be 3 inches lower than the edge against your foundation. This is subtle enough to be unnoticeable but critical for directing water away.
Can I lay bricks directly on dirt or sand?
Absolutely not. Laying bricks directly on dirt will result in a completely unstable surface that will shift and become uneven almost immediately. A compacted gravel base is non-negotiable for providing the structural support and drainage needed for a lasting patio.
What kind of sand should I use for the bedding layer?
You should use a coarse, washed concrete sand for the 1-inch bedding layer. Do not use fine masonry sand or play sand, as it holds too much water and won't compact properly, leading to an unstable surface for your bricks.


.webp)
.webp)