How to Keep Outdoor Kitchen Pipes from Freezing: An Expert Guide
An outdoor kitchen is more than just an appliance and some counter space; it’s the heart of your backyard. It's where memories are made over sizzling grills and cool drinks on a warm evening. But when the temperature plummets, that beautiful hub of entertainment can quickly become the source of a catastrophic, wallet-draining nightmare. A single frozen pipe can burst, unleashing water that wrecks custom cabinetry, damages expensive stonework, and turns your patio into an ice rink. We’ve seen it happen, and it’s devastating.
Let's be honest, figuring out how to keep outdoor kitchen pipes from freezing isn't the most glamorous part of owning one, but it’s a critical, non-negotiable element of protecting your investment. Our team at Modern Yardz doesn't just build stunning outdoor living spaces; we build them to last, which means engineering them to handle whatever the seasons throw their way. This is about foresight, preparation, and a little bit of know-how. And we're here to share exactly what we've learned over years of designing and building these intricate systems.
Understanding the Enemy: Why Your Outdoor Pipes Are So Vulnerable
Before we dive into solutions, it’s crucial to understand the problem. It’s simple physics, but the consequences are complex. When water freezes, it expands by about 9%. That might not sound like much, but inside the rigid, unyielding confines of a copper or PVC pipe, that expansion creates immense pressure. It's not the ice itself that bursts the pipe; it's the unfrozen water trapped between the ice blockage and a closed faucet that builds up pressure until something has to give. Your pipe is the weakest link.
Outdoor plumbing is uniquely susceptible for a few obvious reasons. It's exposed. Unlike the pipes nestled inside your home's insulated walls, outdoor lines are subject to ambient air temperature with far less protection. They often have longer, more complex runs from the main house supply, creating more opportunities for cold spots to form. Even a well-built outdoor kitchen island offers limited protection against a sustained, deep freeze. The danger zone typically starts when temperatures dip below 32°F (0°C), but the real risk of a burst pipe escalates dramatically after several hours below 20°F (-6°C). Simple, right? The key is to act before that happens.
The Proactive Shutdown: Your Step-by-Step Winterization Playbook
We can't stress this enough: the most foolproof method for preventing a freeze is to remove the water from the equation entirely. Winterizing your outdoor kitchen plumbing should be a non-negotiable annual ritual, just like cleaning your gutters or servicing your furnace. Doing it right takes a little time, but doing it wrong can cost you thousands. This is the process our team follows and recommends for every single one of our clients.
First, you need to locate the shut-off valve for your outdoor kitchen. During the Landscape Design SAN Diego phase of any project we undertake, we ensure this valve is clearly marked and easily accessible. It's typically located in a basement, crawl space, or utility closet, near where the outdoor water line exits the house. If you don't know where yours is, find it now before you need it in an emergency. Once you've found it, turn the handle clockwise until it's firmly closed. This stops the flow of new water to the outdoor lines.
Next, you need to drain every drop of water from the system. Go to your outdoor sink and open both the hot and cold taps fully. Let them run until the water stops. You'll likely see a gush at first, followed by a trickle, and then nothing. But don't stop there. There's still water trapped in the low points of the plumbing. If your system has a dedicated drain valve (another feature we design into our Outdoor Kitchens SAN Diego), open it. This is usually a small cap or spigot at the lowest point of the pipe run.
Now for the professional touch: blowing out the lines. This is the single step that separates an amateur winterization job from a professional one. Gravity alone will not remove all the water. We use an air compressor with a regulator set to a low pressure (around 40-50 PSI is plenty) to force every last drop out. You'll need an adapter that connects the compressor hose to an outdoor spigot or drain valve. When you introduce the air, you'll see sputtering and mist coming out of the open faucets. Keep the air flowing until only dry air is coming out. Don't forget the less obvious lines—the ice maker supply for the refrigerator, the side burner with a water connection, or any pot fillers. Each one needs to be disconnected and drained.
Finally, protect your fixtures. Once the lines are dry, close the outdoor faucets to prevent critters from nesting inside over the winter. Disconnect any hoses and store them indoors. If you have a high-end faucet, you might consider wrapping it with an insulating cover for an extra layer of protection against the cold. It's a small step that preserves the delicate internal components.
Active Protection: Insulation and Heating Solutions
For some homeowners, a full shutdown isn't practical, or perhaps they live in a climate with only occasional, brief freezes. In these cases, active protection methods can be a viable alternative, though we always see them as a supplement to, not a replacement for, proper winterization in colder regions. These methods aim to keep the pipe temperature above freezing even when the air around it is not.
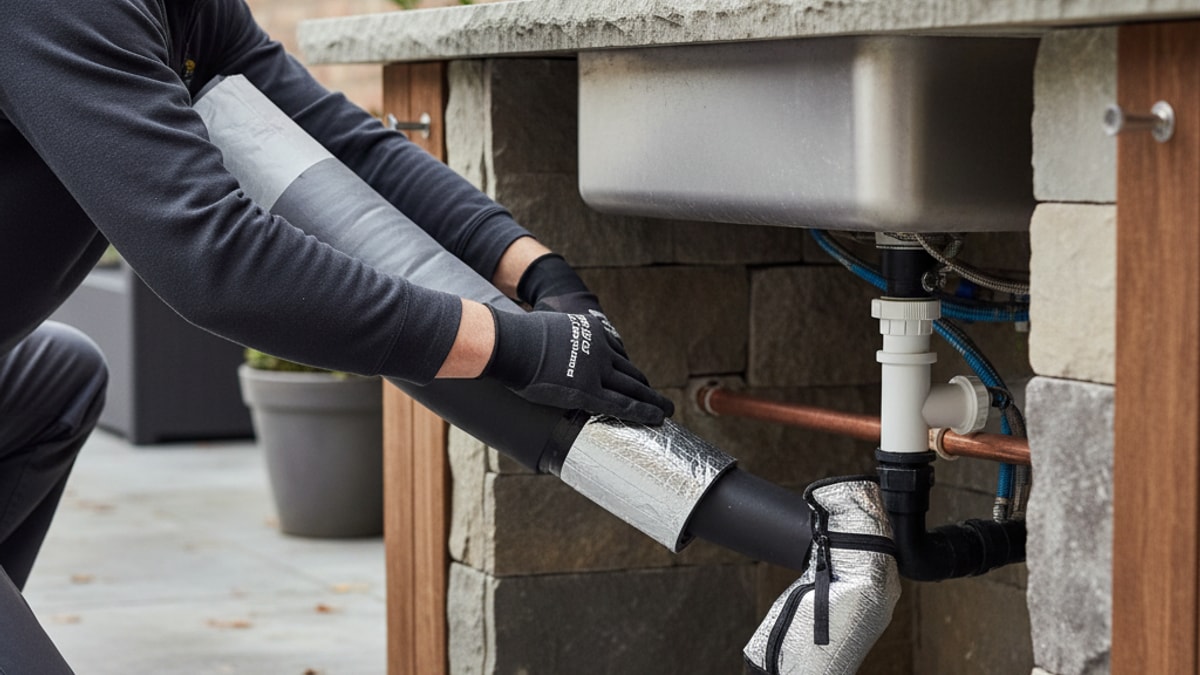
Insulation is your first and most basic tool. Foam pipe sleeves are inexpensive and easy to install. They simply slip over the pipes and are taped at the seams. It's important to use insulation rated for outdoor use, as it will be more resistant to moisture and UV degradation. But here's a critical professional observation: insulation doesn't create heat. It only slows down the rate of heat loss. In a prolonged, deep freeze, insulation alone will eventually fail as the heat from the water inside the pipe radiates away. It buys you time, but it's not a permanent solution without a heat source.
This is where electric heat tape or heat cable comes in. These products are essentially insulated wires that you wrap directly around your pipes. When plugged into a GFCI-protected outlet, they generate a small, consistent amount of heat, enough to keep the water in the pipe from freezing. Many modern versions are self-regulating, meaning they automatically adjust their heat output based on the ambient temperature, making them more energy-efficient. When installing heat tape, you must follow the manufacturer's instructions to the letter. Never overlap the cable, as this can create dangerous hot spots, and always cover it with weatherproof insulation afterward to direct the heat into the pipe.
Another fantastic upgrade is installing frost-proof sillcocks (or spigots). These outdoor faucets are designed with a long stem that places the actual valve seat deep inside the heated wall of your home. When you turn the handle, you're stopping the water flow far from the cold outdoor air, allowing the exposed portion of the spigot to drain completely. It's an elegant solution that we often incorporate when planning new outdoor kitchens or renovating existing spaces.
Here’s a quick comparison of these methods:
Protection Method
Pros
Cons
Best For
Our Team's Take
Full Winterization
Most reliable; 100% effective.
Requires seasonal effort; kitchen is unusable.
All climates with freezing temperatures.
The gold standard. This is the only method we fully endorse for complete protection.
Pipe Insulation
Inexpensive; easy DIY installation.
Only slows heat loss; ineffective in deep freezes.
Mild climates with very rare, brief dips below freezing.
A good first step, but should never be your only defense in a serious winter climate.
Heat Cable/Tape
Actively heats pipes; effective in sustained cold.
Requires electricity; potential fire hazard if installed improperly.
Keeping the kitchen operational in moderate winter climates.
A great solution for those who want year-round use, but requires professional installation and GFCI protection.
Frost-Proof Spigots
Automatic protection; durable and reliable.
Only protects the spigot, not the entire plumbing run.
A necessary upgrade for any home in a cold climate.
We consider this a baseline requirement for any outdoor plumbing. It's a smart, permanent fix.
🚨 Houston, Get Ready to Battle the Freeze! 🥶💪
This video provides valuable insights into how to keep outdoor kitchen pipes from freezing, covering key concepts and practical tips that complement the information in this guide. The visual demonstration helps clarify complex topics and gives you a real-world perspective on implementation.
Designing for Durability: Preventing Problems from Day One
As a design-and-build firm, we believe the best way to solve a problem is to prevent it from ever happening. The choices made during the initial construction of your outdoor living space have a massive impact on how vulnerable it will be to cold weather. Thinking about how to keep outdoor kitchen pipes from freezing should start at the blueprint stage, not on the first cold night of the year.
Pipe material matters. While copper is a traditional choice, we often recommend PEX (cross-linked polyethylene) tubing for outdoor applications. PEX has a significant advantage in cold weather: it's flexible and can expand slightly under pressure. This means it can often withstand the force of freezing water without bursting, giving you a margin of error that rigid copper or PVC pipes simply don't have. It's not invincible, but it's far more forgiving.
The layout of the plumbing is also paramount. When we design the plumbing for our custom Outdoor Kitchens SAN Diego, we strive to minimize the length of exposed pipe runs. We route pipes through the warmest possible areas, often tight against the back of the house. We also design the entire system to have a continuous downward slope to a single, accessible drain point. This makes the annual winterization process incredibly simple and effective. A well-designed system drains with gravity, requiring far less effort to clear completely.
Furthermore, the structure of the kitchen island itself can provide protection. Incorporating enclosed cabinetry, using insulated backing materials, and strategically placing the kitchen against a structure like one of our Seat Retaining Walls can create a microclimate that shields the pipes from the harshest winds and cold. Even the choice of countertop material and how it's sealed can contribute to a more insulated core. It’s this kind of holistic, forward-thinking approach that defines a professionally built outdoor space. We don't just assemble components; we create an integrated system designed for beauty, function, and resilience.
Common and Costly Mistakes We've Seen
Over the years, our team has been called in to repair damage caused by just about every winterization mistake imaginable. Learning from these can save you a world of trouble.
One of the most common errors is simply forgetting a water line. The main sink is obvious, but what about the ice maker in the outdoor refrigerator? Or the small hand-washing sink on the other side of the island? Or the line to a built-in beer tap? Every single line must be shut off and drained. Missing just one can lead to a burst pipe that floods the entire structure.
Another frequent mistake is relying solely on faucet covers. Tossing an insulated foam dome over your spigot does very little if the pipe leading to it is full of water and exposed to the cold. It's a false sense of security. The real work is in draining the line itself.
Using the wrong kind of insulation is also a problem we see. Some homeowners grab leftover fiberglass batt insulation from an attic project and stuff it into their kitchen island. This is a terrible idea. Fiberglass insulation acts like a sponge when it gets wet, and it will get wet in an outdoor environment. Once saturated, it loses all its insulating properties and will actually hold cold moisture against your pipes, making the problem worse.
Finally, the biggest mistake of all is procrastination. Waiting until the first freeze warning is on the news is cutting it too close. By then, you're in a panic, and it's easy to miss a step. Make winterizing your outdoor kitchen a part of your autumn cleanup routine. Do it on a pleasant weekend in October or November, not during a frantic rush as an arctic blast bears down. A little planning goes a long way. If this all feels overwhelming, don't hesitate. You can always BOOK MY FREE CONSULTATION with our team to discuss a long-term, professionally designed solution.
Emergency Response: What to Do If a Pipe Freezes Anyway
Even with the best precautions, accidents can happen. Maybe an unexpected cold snap caught you off guard, or a valve wasn't closed completely. If you suspect a pipe is frozen (for example, you turn on a faucet and only a trickle or nothing comes out), you need to act quickly, but carefully.
First, leave the faucet open. As you begin to thaw the pipe, the melting ice will need somewhere to go. Opening the faucet relieves the pressure that builds up during the thawing process, which is often what causes a pipe that survived the initial freeze to burst.
Next, locate the frozen section. It will often be in the most exposed area of the pipe. You might even see frost on the outside of the pipe itself. Once you've found it, you can begin to apply gentle, even heat. A hairdryer on a low setting is the safest tool for the job. Start at the faucet end of the blockage and work your way back toward the house. This allows melting water to flow out freely. You can also use electric heating pads or towels soaked in hot water. Whatever you do, never use an open flame like a blowtorch. It's an extreme fire hazard and can instantly boil the water inside the pipe, causing it to explode.
As you're working, keep a close eye out for leaks. The pipe may have already developed a small crack or split during the freeze. If you see any water dripping, shut off the main water supply to that line immediately. At that point, the pipe is compromised and will need to be professionally repaired or replaced. Don't try to patch it yourself with tape; it won't hold against water pressure. The investment in a beautiful outdoor space deserves the certainty of a professional fix.
Protecting your outdoor kitchen from the rigors of winter is an essential part of owning it. It ensures that your backyard oasis remains a source of joy, not stress. By understanding the risks, following a thorough winterization process, and incorporating smart design from the very beginning, you can rest easy knowing your investment is safe, ready for another season of unforgettable moments.
Frequently Asked Questions. Here are some common questions. Find the answers you're looking for below.
How cold does it have to be for my outdoor kitchen pipes to freeze?
The danger zone begins when temperatures drop below 32°F (0°C). However, the real risk of a burst pipe increases significantly after several hours of sustained temperatures below 20°F (-6°C), as this allows the cold to fully penetrate any unheated enclosure.
Can I just let the outdoor faucet drip to prevent freezing?
While letting a faucet drip can prevent freezing in indoor pipes during a mild cold snap, our team strongly advises against relying on this for an exposed outdoor kitchen. A sudden, deep freeze can easily overpower a slow drip, and it's not a reliable substitute for proper winterization.
Is PEX tubing really freeze-proof?
No, PEX tubing is not freeze-proof, but it is freeze-resistant. Its flexibility allows it to expand more than rigid pipes like copper or PVC, meaning it can often survive a freeze-thaw cycle without bursting. However, repeated freezes can still damage the pipe or its fittings over time.
Do I need to winterize my outdoor kitchen if I have heat tape installed?
We still recommend it as a best practice. Heat tape is a great active solution, but it relies on a constant power supply. A winter storm that brings freezing temperatures could also cause a power outage, rendering your heat tape useless when you need it most. Winterizing is the only foolproof guarantee.
I forgot to winterize and now my pipes are frozen. What's the first thing I should do?
First, immediately locate and shut off the water supply valve to the outdoor kitchen to prevent any new water from entering the lines. Then, open the outdoor faucets to relieve pressure. After that, you can begin the slow and careful process of thawing the pipes with gentle heat, like a hairdryer.
What kind of insulation is best for outdoor pipes?
We recommend using closed-cell foam pipe insulation sleeves specifically rated for exterior use. Unlike fiberglass, this material resists moisture absorption and provides a durable thermal barrier. Ensure all seams and joints are sealed with weatherproof tape.
How do I drain the water supply line to my outdoor refrigerator's ice maker?
This is a commonly missed step. After shutting off the main water supply, you need to disconnect the small water line from the back of the refrigerator. Place the end of the line in a bucket and allow it to drain completely before blowing it out with compressed air.
Can I pour antifreeze into my outdoor plumbing lines?
You should only use non-toxic RV/marine antifreeze, and only in the drain lines (P-traps) after the water supply has been completely drained and blown out. Never put any kind of antifreeze into your fresh water supply lines, as it can be incredibly difficult to flush out and can contaminate your water.
Should I cover my entire outdoor kitchen for the winter?
Using a high-quality, breathable, waterproof cover for your entire kitchen island is an excellent idea. It not only protects your pipes and fixtures from direct exposure to wind and moisture but also preserves your countertops, cabinets, and appliances from harsh winter weather.
Is professional winterization expensive?
The cost of professional winterization is minimal compared to the potential cost of repairing a burst pipe and the associated water damage. Our experience shows that investing in a professional service provides peace of mind and ensures no critical steps are missed.
How can the design of my kitchen island help protect pipes?
A well-designed island can offer significant protection. Features like fully enclosed and insulated cabinet cavities, routing pipes away from vents, and using materials with better thermal properties all contribute. Thoughtful planning during the `[Landscape Design SAN Diego](https://www.modernyardz.com/services/landscape-design-san-diego)` stage is key.
What's the most common mistake homeowners make?
The most common mistake we see is procrastination. Waiting until the last minute often leads to a rushed job where critical steps, like draining an ice maker line or blowing out the pipes with compressed air, are forgotten. Plan ahead and do it right before the cold weather sets in.


.webp)
.webp)