A swimming pool should be the heart of your backyard—a shimmering oasis for laughter, relaxation, and making memories. But for homeowners with young children or pets, it can also be a source of persistent, nagging anxiety. That's the reality. This is where a pool safety fence shifts from being a good idea to a non-negotiable necessity. It’s the single most effective layer of protection you can add to prevent tragic accidents, transforming that worry back into pure enjoyment.
Our team at Modern Yardz has spent years designing and building complete outdoor environments, and we’ve seen how an impeccably installed safety fence integrates into a landscape. It's not just about compliance; it's about peace of mind. While a professional installation is always the surest path, we also understand the drive to tackle projects yourself. So, we're pulling back the curtain on how to install a pool safety fence with the precision and care it demands. This isn't just another checklist. This is our experience, distilled into a process you can trust.
Before You Even Touch a Drill: The Planning Phase
Let’s be honest, the temptation to jump right into drilling is strong. You’ve got the fence kit, you’ve got the tools, and you want to see results. We can't stress this enough: don't do it. The success or failure of your entire project hinges on what happens before a single hole is made. Meticulous planning is what separates a flimsy, awkward-looking fence from a secure, professional-grade barrier.
First, you need to become a local code detective. Pool barrier regulations can be surprisingly specific and vary widely. They dictate minimum height (usually 48 to 60 inches), the maximum space allowed under the fence, and stringent requirements for gate hardware—specifically, that they must be self-closing and self-latching. Homeowners' Associations (HOAs) often have their own aesthetic rules on top of these safety mandates. A quick online search or a call to your local permitting office is the first, critical step. Ignoring this can lead to a formidable headache, forcing you to tear down your hard work.
Next, it's time to map your battlefield. Walk the perimeter of your pool with a measuring tape and either marking paint or a garden hose to lay out the potential fence line. Think like water—you want the smoothest, most logical path possible. Avoid sharp, unnecessary turns, as they create weak points in tension and just look clumsy. Consider the flow of traffic in your yard. Where do people walk? Where is the grill? Where do you need access? The fence should create a secure zone without making your entire backyard feel like a high-security compound. This is a core principle of good Landscape Design SAN Diego; function and beauty must coexist. The fence line should feel intentional, working with the existing lines of your patio and garden beds, not fighting against them.
Finally, choose your weapon. While glass and aluminum fences offer a permanent, architectural look, removable mesh fencing is the undisputed champion for DIY-friendly, user-focused safety. It's strong (often with a tensile strength that's truly staggering), transparent enough to not obstruct views, and, most importantly, climb-resistant for little hands and feet. The quality of the mesh, the pole construction, and the latching hardware are where you'll see a significant, sometimes dramatic shift in price and performance. Our experience shows that investing in a reputable brand with solid warranties pays for itself in longevity and reliability.
Gathering Your Arsenal: Tools and Materials
Having the right equipment is half the battle. Showing up with a standard cordless drill to bore through a concrete deck is a recipe for frustration and failure. This is a job that demands some serious hardware. You’re not just drilling a hole for a picture frame; you’re creating the foundational anchor for a life-saving device.
Here’s what our team considers essential for the task:
- A Rotary Hammer Drill: This is the hero of the story. It's not just a drill; it combines rotation with a powerful hammering action to pulverize concrete and stone. A standard drill will burn out or simply fail to penetrate.
- A Long Masonry Drill Bit: The bit must match the diameter specified by your fence manufacturer for the sleeves and be long enough to achieve the required depth (usually 4-5 inches).
- High-Powered Shop-Vac or Blower: You absolutely must get every last bit of concrete dust and debris out of the drilled holes. Clean holes are essential for the sleeves to set properly.
- Measuring Tape, Chalk Line, and Marking Pen: Precision is everything. Measure three times, drill once. A chalk line is perfect for snapping long, perfectly straight lines for your fence sections.
- Level: To ensure your posts are plumb, especially the gate posts.
- Rubber Mallet: For gently tapping sleeves and post caps into place without damaging them.
- Safety Gear: This is non-negotiable. Get high-quality safety glasses, hearing protection (a rotary hammer is incredibly loud), and gloves.
When it comes to the drill, the choice can be overwhelming. Here’s a quick breakdown of what we've found works best.
| Drill Type |
Power Source |
Best Use Case |
Professional Insight |
| Corded Rotary Hammer |
AC Power |
Heavy-duty, continuous drilling on hard concrete or stone. |
This is the workhorse. It offers relentless power and won't die mid-job. It's our team's go-to for tough installations. The cord can be a hassle, but the consistent performance is worth it. |
| Cordless Rotary Hammer |
Battery |
Excellent for maneuverability and smaller jobs. |
Modern cordless options are surprisingly powerful. They're perfect if you don't have easy access to an outlet or if the job is straightforward. Just be sure to have at least two fully charged high-amp batteries ready to go. |
| Standard Hammer Drill |
AC or Battery |
Lighter-duty tasks, brick, or softer concrete. |
Honestly, we'd advise against this for a full pool fence install. It lacks the pulverizing force of a true rotary hammer and will make the job significantly longer and more difficult. It's a 'last resort' tool. |
Don't skimp. Renting a high-quality rotary hammer for a day is a far better option than buying a cheap tool that isn't up to the task.
The Core of the Job: Drilling the Post Holes
This is it. The moment of truth. The process of drilling into your pristine pool deck can be nerve-wracking, but with the right technique, it's entirely manageable. Your careful planning and layout marking will pay off dividends here.
First, take your layout markings and make them precise. Use your measuring tape and marking pen to place an exact 'X' where the center of each hole needs to be. The spacing is dictated by the length of your fence panels—typically 30 or 36 inches, but you must adhere to your manufacturer's guide. Double-check the distance from the pool's edge; you need enough clearance to walk and clean, but not so much that you create an unused, awkward space inside the fence. A distance of 24 to 36 inches from the water's edge is a common sweet spot.
Now, let's drill. Put on your safety gear. If you’re drilling into a surface like stamped concrete or beautiful custom Pavers SAN Diego, you might want to start the hole with a smaller pilot bit to prevent the larger bit from 'walking' or chipping the surface. Once you have a small indentation, switch to your full-size bit.
Hold the rotary hammer firmly with both hands and ensure it's perfectly perpendicular to the surface. Let the tool do the work. You don't need to apply immense downward pressure; the hammering action is what pulverizes the material. Applying too much force can cause the bit to bind or break. Drill down to the depth specified in your instructions, periodically pulling the bit out to help clear debris. A piece of tape wrapped around the bit at the correct depth can serve as a simple, effective visual guide.
This is where we see a common DIY mistake: inconsistent angles. Even a slight angle on the hole will translate to a leaning fence post, which compromises the tension and looks terrible. Take your time on each and every hole to ensure you're drilling straight down. It's a repetitive process, but consistency is absolutely key.
Once all holes are drilled, it's time for the cleanup crew. Use your shop-vac or blower to meticulously clean out every single hole. Any remaining dust or debris will prevent the post sleeve from setting correctly and can lead to wobbly posts down the line. We mean this sincerely: the holes need to be impeccably clean.
Setting the Foundation: Installing the Sleeves
The plastic sleeves are the unsung heroes of the entire system. They are the female receptors that will hold your fence posts securely in the deck. A sloppy sleeve installation guarantees a sloppy fence.
After your holes are drilled and spotlessly clean, you'll perform a dry fit. Place a sleeve into each hole. It should be a snug fit, but you shouldn't have to force it aggressively. If it's too tight, you may need to slightly ream the hole. If it's too loose, that's a bigger problem that might require using a hydraulic cement or epoxy to fill the gap—a complication you want to avoid.
Assuming the fit is good, gently tap the top of the sleeve with a rubber mallet until its flange is perfectly flush with the deck surface. A sleeve that sits too high will be a tripping hazard and prevent the post from seating fully. A sleeve that's recessed too low won't provide adequate support. Flush is the goal. Use a level across the top of the sleeve to confirm it's not tilted.
For most concrete installations, the pressure fit of a correctly drilled hole is sufficient. However, for installations in looser materials like dirt (which requires a concrete footing to be poured for each post) or in some paver situations, you may need to set the sleeves in wet concrete or a strong construction epoxy to ensure they never move. This adds a step and curing time to the process but provides unflinching stability.
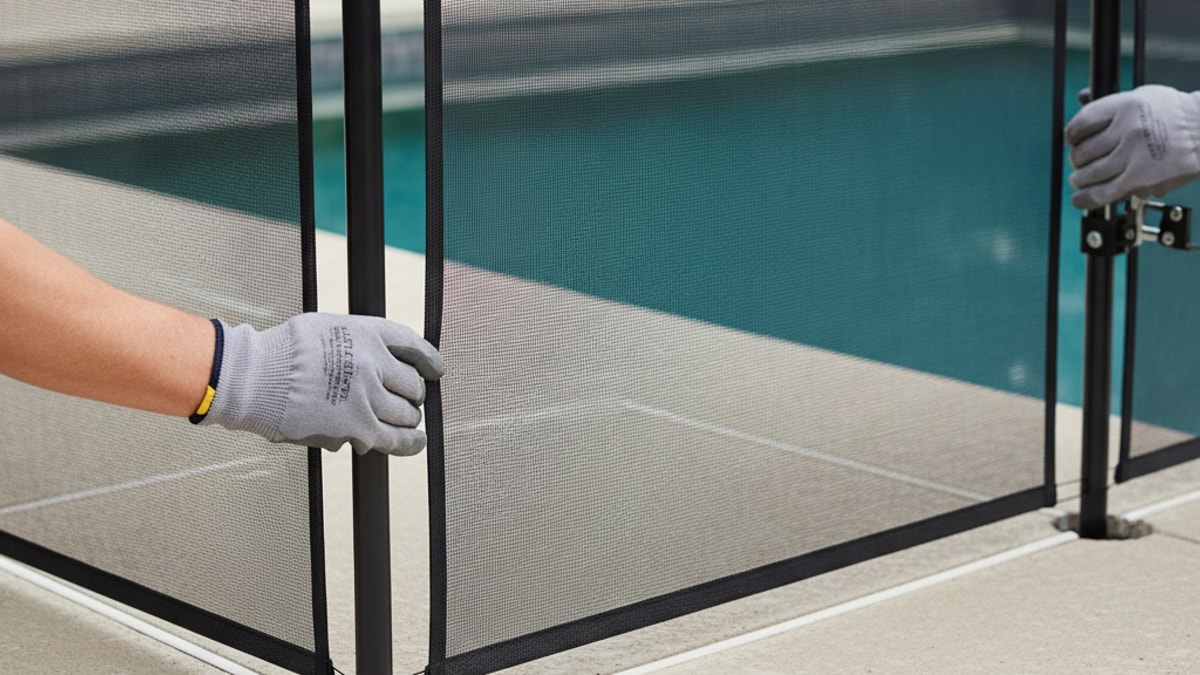
Bringing It All Together: Installing the Fence Sections
With your sleeves perfectly set, the most satisfying part of the project begins: seeing the fence actually take shape. Start at one end, preferably at a gate location. Insert the first post of a fence section into its sleeve. Then, walk the panel down the line, inserting each subsequent post into its corresponding sleeve. It should feel solid and secure.
This is where you'll be introduced to the concept of tension. Mesh safety fences derive their strength from being stretched taut between the poles. As you connect one section to the next, you'll use the latching mechanism to pull them together. This action is what removes any sag from the mesh. It can require a bit of muscle to hook the latch and lock it into place. The goal is a drum-tight panel. If you can easily push the mesh in more than an inch or two, it’s not tight enough.
Work your way around the pool, section by section, always ensuring each post is fully seated in its sleeve and that the tension is consistent across the entire length. You'll quickly develop a rhythm. This process is surprisingly fast once the groundwork of drilling and setting sleeves is complete.
The Final Touches: Gate Installation and Final Checks
The gate is arguably the most important component of your entire pool safety fence. It's the only moving part and the point of entry. A failed gate means a failed fence. We've seen it happen. The gate must be installed with zero compromises.
Most pool fence kits come with pre-assembled gates. The gate posts are typically a bit beefier and must be installed with absolute precision. They need to be perfectly plumb (straight up and down) and parallel to each other for the gate to swing freely and latch correctly. Use your level on all sides of each gate post as you install it.
The critical hardware components are the self-closing hinges and the self-latching mechanism. The hinges are spring-loaded to ensure the gate always swings shut on its own. You can usually adjust the tension on these springs to control the closing speed—you want it to be firm and confident, not slow and lazy, but also not so fast that it slams violently. The latch should be positioned high enough to be out of reach of small children (check your local code for height requirements) and must engage automatically and securely when the gate closes. Test it. Open the gate one inch and let it go. It should close and latch. Open it halfway. It should close and latch. Open it all the way. It should close and latch. Every single time.
Once the gate is perfect, do one final tour of the entire fence line. Give every post a firm shake. They shouldn't wobble. Eyeball the tension on every panel. Check the height from the deck to the bottom of the mesh to ensure there are no gaps a child could squeeze under. Your installation is only complete after this final, meticulous quality check.
When DIY Isn't the Right Call
We champion the spirit of DIY, but we're also realists. There are times when calling in a professional team is the smarter, safer, and ultimately more efficient choice. How do you know when you've reached that point?
If your pool deck has dramatic elevation changes, is made of a challenging material like natural stone, or has a complex, curving shape, the difficulty of the installation increases exponentially. Properly laying out curves and drilling on uneven surfaces requires specialized tools and experience. A mistake here isn't just cosmetic; it can compromise the fence's safety. This is often when a project benefits from a holistic approach, where the fence is considered part of the total design for Pools AND Spas, ensuring a seamless and secure result from day one.
Furthermore, consider the tools. If you don't own and aren't comfortable operating a heavy-duty rotary hammer, this might not be the project for you. And finally, be honest about your time and patience. This is not a one-afternoon job. It requires a full weekend for most first-timers. If that sounds more like a sentence than a satisfying project, it might be time to get a professional quote.
Ready to ensure your pool is as safe as it is beautiful, without the hassle? BOOK MY FREE CONSULTATION and let our team at Modern Yardz talk you through a comprehensive plan that integrates safety seamlessly into your dream backyard.
Installing a pool safety fence is a formidable task, but it's one of the most rewarding projects a homeowner can undertake. It's more than just an improvement to your yard; it’s an active, vigilant guardian for your family. By taking the time to plan carefully, use the right tools, and execute each step with precision, you’re not just building a fence—you’re building a perimeter of peace around your summer fun.


.webp)
.webp)