Your Outdoor Kitchen's Unsung Hero: Getting the Base Perfectly Level
You’ve pictured it a thousand times. The perfect evening, friends gathered around, the sizzle of the grill, and everything you need right at your fingertips in your stunning new outdoor kitchen. It’s a beautiful vision. But what happens when the cabinet doors don't close properly, a hairline crack appears in your gorgeous new countertop, or the grill itself sits at a precarious, unnerving angle? The dream quickly sours. And our team has seen this happen more times than we can count, all stemming from one single, overlooked detail: an unlevel foundation.
Let's be honest, foundation work isn't the glamorous part of building custom Outdoor Kitchens SAN Diego. It's the gritty, behind-the-scenes labor that doesn't get the 'oohs' and 'aahs'. But we're here to tell you it is, without a doubt, the most critical, non-negotiable element of the entire project. Getting this wrong from the start guarantees failure down the road. It’s not a question of if problems will arise, but when. We've built our reputation on creating outdoor spaces that last, and that legacy is built, quite literally, on solid, level ground.
Why a Perfectly Level Base is Everything
Before we dig into the 'how,' it’s crucial to understand the 'why.' Why do we obsess over a fraction of an inch here or there? Because those tiny imperfections cascade into massive problems. A foundation that is out of level creates constant, unseen stress on every single component of your kitchen.
First, there's the catastrophic risk to your materials. Granite, quartz, and poured concrete countertops are incredibly strong under compression but surprisingly vulnerable to torsional stress—that’s a twisting force. An unlevel base means the cabinet frames won't be perfectly square, and when you place a heavy stone slab on top, it introduces torque. This is how you get those heartbreaking cracks that appear seemingly out of nowhere months after installation. We've seen it work. The investment you made in a beautiful surface is completely compromised.
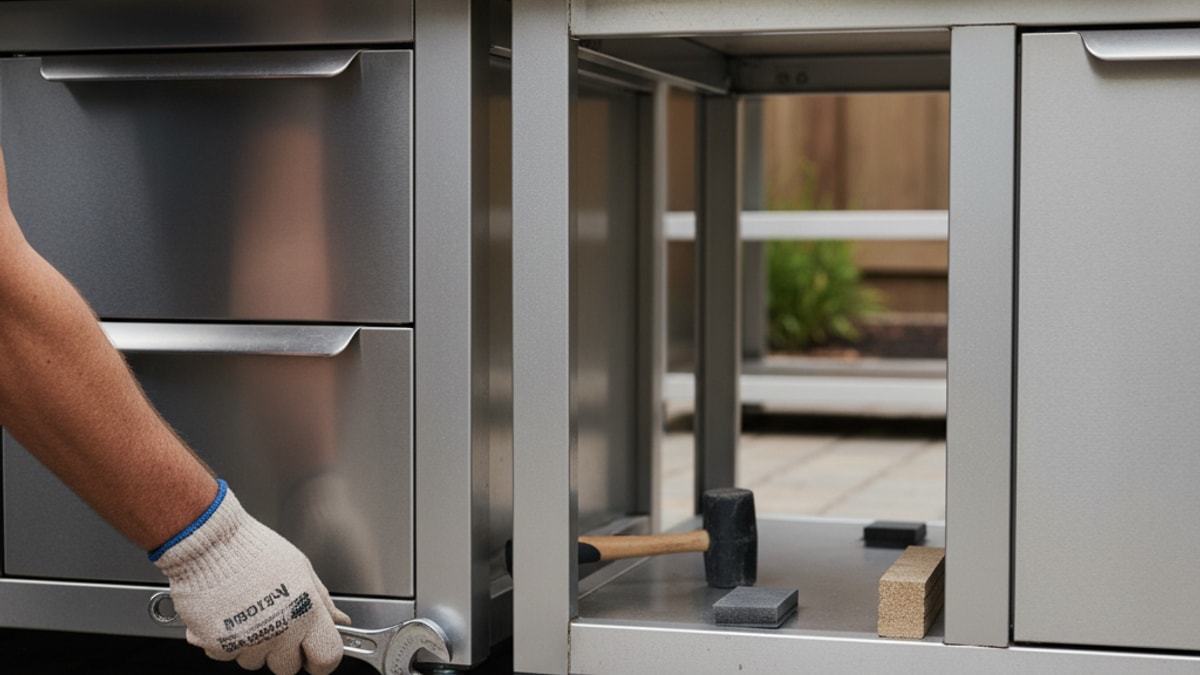
Then comes simple functionality. You want drawers that glide, not grind. You want cabinet doors that hang straight and close flush. When the base isn't level, the entire structure is skewed. This misalignment puts constant strain on hinges and drawer slides, leading to premature wear and tear. It’s the kind of daily annoyance that slowly chips away at the joy of your outdoor space. It’s frustrating. And it’s entirely avoidable.
And we can't stress this enough: safety. A heavy, built-in grill loaded with hot coals or connected to a gas line needs to be impeccably stable. A slight tilt might not seem like a big deal, but over time, as the ground settles, that tilt can worsen. It creates a tipping hazard and puts undue stress on gas fittings and connections, which can be genuinely dangerous. Finally, proper drainage is a huge factor. A level, yet properly sloped, base ensures that water from rain or cleaning flows away from the structure and your home, preventing pooling, water damage, and ice patches in colder climates.
The Groundwork: Prepping for a Flawless Foundation
Success is all in the preparation. Rushing this stage is the single biggest mistake we see homeowners make. Before you even think about mixing concrete or laying pavers, you need a solid plan.
Start by assessing your chosen site with an unflinching eye. Is the ground heavily sloped? Is the soil soft, sandy, or heavy with clay? These factors will dictate how deep you need to excavate and what kind of base material will be most effective. Our experience shows that trying to build on soft, unstable topsoil is a recipe for disaster; you need to dig down to the compacted subsoil, no exceptions. You'll also need to call 811 or your local utility marking service. It's a free and legally required step to ensure you don't accidentally hit a buried gas, water, or electrical line. It's a five-minute call that can prevent a life-threatening accident.
Next, decide on your foundation type. The two most common and reliable methods are a monolithic concrete slab or a compacted paver base. Each has its place.
A poured concrete slab offers unparalleled stability and permanence. For sprawling, heavy kitchens with pizza ovens, sinks, and extensive stonework, we almost always recommend a solid slab of Concrete SAN Diego as the foundation. It creates a single, unified base that distributes weight perfectly. The downside? It's less forgiving of mistakes and more labor-intensive to install.
A base built for Pavers SAN Diego, on the other hand, consists of deep layers of compacted aggregate and a sand setting bed. This method provides excellent drainage and is a bit more DIY-friendly, as you can adjust individual pavers to achieve a level surface. However, it requires relentless compaction at every stage to prevent settling over time.
Here’s a quick breakdown of how they stack up:
Feature
Poured Concrete Slab
Compacted Paver Base
Stability
Exceptional, monolithic structure
Very good, but relies on impeccable compaction
Durability
Extremely high, resistant to settling
High, but can be prone to settling if done poorly
Drainage
Requires careful grading for runoff
Excellent, water drains through joints
DIY Friendliness
Moderate to Difficult
Moderate
Cost
Generally higher material & labor cost
Can be more budget-friendly for DIY
Best For
Heavy, complex kitchens with masonry
Lighter, modular kitchens; areas with drainage concerns
No matter which path you choose, the tools are largely the same: a good shovel, a wheelbarrow, a tape measure, a string line with stakes, a tamper or plate compactor (rent one, it’s worth it), and most importantly, a long level—at least four feet long. A short level will lie to you, showing you level spots within a larger, unlevel area.
The Concrete Slab Method: A Step-by-Step Breakdown
If you're aiming for ultimate permanence, the concrete slab is your answer. It's a formidable project, but the results are rock-solid. Here’s how our team approaches it.
Step 1: Mark and Excavate. First, lay out the exact footprint of your kitchen using stakes and string lines. Make sure your corners are perfectly square. Now, dig. You need to remove all topsoil, grass, and organic matter, digging down to solid, undisturbed subsoil. For a standard slab, this is usually 6-8 inches deep. This depth allows for a 4-inch gravel base and a 4-inch concrete slab. We can't stress this enough: get all the organic stuff out. Roots and grass will decompose, creating voids under your slab that lead to cracking.
Step 2: Build the Formwork. Using 2x4s or 2x6s, build a wooden frame around the perimeter of your excavated area. This form will hold the wet concrete in place as it cures. Brace the outside of the form with stakes driven firmly into the ground. Use a level across the tops of the form boards to ensure the entire frame is perfectly level. This frame dictates the final surface of your slab, so precision here is paramount.
Step 3: Add and Compact the Gravel Base. This is a critical, non-negotiable step. Fill the form with 4 inches of 3/4-inch crushed stone or gravel. This layer provides drainage and a stable base for the concrete. Spread it evenly, then compact it. And we don't mean walking on it. You need to use a hand tamper for small areas or, ideally, a rented plate compactor for a truly professional result. Compact the gravel until it's tightly locked together and completely flat. A poorly compacted base is a primary cause of slab failure.
Step 4: Pour and Spread the Concrete. Whether you're mixing bags or having a truck deliver it, now's the time for the pour. Work quickly to fill the form. As you pour, have a helper use a shovel or rake to spread the concrete evenly, making sure it fills all corners. For larger slabs, it’s wise to add a grid of steel rebar or wire mesh in the middle of the slab for added tensile strength. This helps prevent cracking.
Step 5: Screed the Surface. This is the moment of truth for leveling. Take a very long, very straight 2x4 (called a screed board) and rest it across the top edges of your formwork. Using a side-to-side sawing motion, pull the board towards you, dragging off the excess concrete and leaving a flat, level surface behind. Fill any low spots in front of the board and make another pass. Repeat until the entire surface is flush with the top of your forms. That’s the key.
Step 6: Finish and Cure. After screeding, let the concrete sit until the surface water disappears. Then, use a bull float (a large float on a long handle) to smooth the surface further. For a non-slip finish, you can drag a stiff broom lightly across the surface after it has stiffened slightly. Now, the hard part: waiting. Concrete doesn't 'dry'; it cures through a chemical reaction. It needs to be kept moist for several days. Cover it with plastic or spray it with a fine mist of water periodically for at least 3-7 days. Don't rush this. We've seen people try to build on 'green' concrete, and the results are always catastrophic.
All About Paver Patios — with Danny Lipford
This video provides valuable insights into How to Level an Outdoor Kitchen, covering key concepts and practical tips that complement the information in this guide. The visual demonstration helps clarify complex topics and gives you a real-world perspective on implementation.
The Paver Base Method: A Different Path to Level
For a project with a bit more flexibility and excellent drainage, a paver base is a fantastic option. The process is just as demanding but relies on different techniques.
Step 1: Excavate and Lay Fabric. Similar to the concrete method, you need to excavate down to the subsoil. For a paver base, you'll need to go deeper—typically 7-9 inches to accommodate 4-6 inches of gravel, 1 inch of sand, and the paver's height. After excavating, lay down a sheet of geotextile landscape fabric. This separates your gravel base from the soil below, preventing them from mixing over time and compromising your base.
Step 2: The Gravel Layer and Compaction. This is the backbone of your paver foundation. Add 4-6 inches of the same 3/4-inch crushed stone. The key is to add it in 2-inch layers, compacting each layer thoroughly with a plate compactor before adding the next. This multi-lift compaction is what gives the base its strength and prevents future settling. Check for level as you go.
Step 3: The Sand Bedding Layer. Once your gravel base is compacted and level, you'll add the screeding layer. This is a 1-inch-thick layer of coarse concrete sand. To get the depth perfect, lay down two pieces of 1-inch outer-diameter pipe on top of your gravel base. These will act as rails for your screed board.
Step 4: Screed the Sand. Pour the sand between your pipes and, just like with concrete, use a straight 2x4 resting on the pipes to pull back and create a perfectly smooth, 1-inch-thick bed of sand. Once an area is screeded, carefully remove the pipes and fill in the indentations with more sand, smoothing it with a trowel. Never, ever walk on or compact this sand layer.
Step 5: Lay Pavers and Finish. Start laying your pavers, placing them gently onto the sand bed—don't press them down. Work from a corner outwards. Use a long level frequently to check your progress. If a paver is too high, tap it down with a rubber mallet; if it's too low, lift it and add a little more sand underneath. Once all pavers are laid, spread polymeric sand over the surface, sweeping it into the joints. This special sand contains a polymer that hardens when wet, locking the pavers together and preventing weeds.
When It's Time to Call for Backup
We know the DIY spirit is strong. But there are times when knowing how to level an outdoor kitchen foundation means knowing when to call a professional. If your yard has a significant slope, if you're dealing with notoriously poor soil, or if your design is particularly complex, the margin for error becomes razor-thin. A project of this scale is a significant investment, and a flawed foundation can jeopardize the entire thing.
This is where a holistic approach from a full-service firm makes all the difference. The foundation isn't just an isolated step; it's part of a comprehensive Landscape Design SAN Diego plan that considers drainage, grading, aesthetics, and integration with other features like patios or Seat Retaining Walls. If this all sounds a bit overwhelming, that's perfectly okay. It's a complex job, and getting it right is what our team does every day. For a seamless process from concept to completion, you can always BOOK MY FREE CONSULTATION to have our experts assess your space and build it right the first time.
Building an outdoor kitchen is about more than just adding appliances to your backyard; it's about creating a destination for connection and enjoyment. That experience shouldn't be marred by wobbly countertops or sticking drawers. By giving the foundation the respect and attention it deserves, you're not just building a kitchen—you're building a legacy of flawless function and lasting memories. That's a foundation worth investing in.
Frequently Asked Questions. Here are some common questions. Find the answers you're looking for below.
Can I build an outdoor kitchen on my existing concrete patio?
Yes, you often can, provided the existing patio is in excellent condition, thick enough (at least 4 inches), and perfectly level. Our team always conducts a thorough inspection for cracks or signs of settling before approving construction on an existing slab.
What happens if my outdoor kitchen base isn't level?
An unlevel base can cause a cascade of problems. These include cracked countertops from torsional stress, cabinet doors and drawers that don't align or close properly, premature wear on hardware, and potential safety hazards with appliances like grills.
How much of a slope is acceptable for an outdoor kitchen area?
For the kitchen base itself, you want it to be perfectly level. However, the surrounding area should have a gentle slope of about 1/4 inch per foot, directing water away from the kitchen and your home's foundation to ensure proper drainage.
Do I really need to rent a plate compactor?
We can't stress this enough: yes. For a paver base or the gravel sub-base of a concrete slab, a plate compactor is non-negotiable. It's the only way to achieve the necessary density to prevent the foundation from settling over time.
How deep should I excavate for the foundation?
It depends on your chosen method and soil conditions. Generally, for a concrete slab, you'll excavate 8 inches (for a 4-inch gravel base and 4-inch slab). For a paver base, you'll need to go deeper, around 9-10 inches, to accommodate the gravel, sand, and paver height.
What is the best material for the sub-base?
We almost exclusively use 3/4-inch crushed stone, often called Class II base rock. It consists of angular stones that lock together tightly when compacted, creating an incredibly stable and well-draining foundation for either concrete or pavers.
How long does a new concrete slab need to cure before I can build on it?
While concrete may feel hard to the touch within a day, it takes much longer to reach its full compressive strength. We recommend waiting a minimum of 7 days before starting any construction, and ideally waiting the full 28-day curing period for the heaviest components.
Can I just level the ground with sand or topsoil?
Absolutely not. Sand and topsoil will shift and compact unevenly under the immense weight of an outdoor kitchen, leading to rapid settling and failure. You must excavate down to solid subsoil and build up with properly compacted aggregate.
What does 'screeding' mean?
Screeding is the process of striking off excess wet concrete or sand to make it flat and level. It's done by pulling a long, straight board (a screed) across the top of your forms or guide rails in a sawing motion.
Do I need a permit to build an outdoor kitchen?
This varies widely based on local regulations. Often, if you are running new gas, electrical, or plumbing lines, a permit is required. It's always best to check with your local building department before beginning any work.
How do I ensure proper drainage around my new kitchen?
Proper drainage starts with grading. The foundation itself should be level, but the patio or surrounding hardscape should be sloped gently away from the structure. A landscape design professional can incorporate drainage solutions like French drains if needed.


.webp)
.webp)