A patio isn't just a slab of concrete or a collection of pavers next to your house. It’s bigger than that. It’s the stage for your family’s life outdoors—the spot for morning coffees, sprawling weekend newspapers, impromptu weeknight grilling, and late-night conversations under the stars. Here in San Diego, where our yards are genuine extensions of our living space, getting the patio right is absolutely critical. It’s the foundation of your entire outdoor experience.
But we've seen the other side of it. Our team has been called in to fix countless projects that started with good intentions but went sideways fast. A patio that floods every time it drizzles, pavers that look like a roller coaster after one season, or a space so poorly planned it just never gets used. Honestly, knowing how to do a patio is less about brute force and more about smart, upfront thinking. We’re here to walk you through the process we’ve refined over years of designing and building outdoor spaces from Chula Vista to Oceanside, so you can get it right the first time.
Why Your Patio Plan Matters More Than You Think
Let’s be direct—a patio is a significant investment in your home. It’s a permanent structural addition, and winging it is a recipe for a formidable headache. The planning phase is, without a doubt, the most critical, non-negotiable element of the entire project. It's where you prevent problems before they ever have a chance to exist.
We've seen it all. Drainage nightmares are probably the most common (and catastrophic) issue. A patio that’s graded improperly doesn't just create puddles; it can channel water directly toward your home's foundation, leading to profoundly expensive damage. Then there’s subsidence—the sinking, shifting, and heaving of pavers or the cracking of concrete because the ground underneath wasn't prepared correctly. It’s a slow-motion failure, and it’s heartbreaking to watch.
Our experience shows that a successful project is built on a bedrock of questions. And—let’s be honest—this is crucial. Rushing this part is the single biggest mistake homeowners make. You have to think like a designer before you ever think about lifting a shovel.
Step 1: Defining Your Vision (The Fun Part!)
Before you get bogged down in materials or measurements, just dream for a minute. Close your eyes and picture your ideal weekend morning. What are you doing in your backyard? Who are you with? Answering this question is the key to unlocking your patio’s true purpose.
What is this space for?
Is it a bustling hub for entertaining, complete with a sprawling dining table and maybe even an outdoor kitchen? Is it a tranquil escape, designed for a couple of lounge chairs, a good book, and a bit of peace? Or is it a flexible, multi-purpose zone for kids to play and adults to relax? The function dictates the form. Always.
Our team always starts our landscape design process by mapping out “use zones.” It sounds technical, but it’s simple. We sketch out where the dining will happen, where the lounging will be, and how people will move between those spaces and back into the house. This immediately reveals how big the patio needs to be and what shape might work best. Don't just plan for the patio; plan for the life you'll live on it.
Step 2: Location, Size, and Shape—The Holy Trinity
Once you know the 'why,' you can figure out the 'where' and 'how big.' These three elements are completely intertwined, and they’re heavily influenced by the unique conditions of your San Diego property.
Location is everything. Pay attention to the sun. Where does it hit in the morning versus the scorching afternoon? A patio destined for morning coffee might be perfect on the east side of your house, while one for evening dinners would be better on the west. We also consider proximity to the house—a dining patio located miles from the kitchen is a logistical pain. You want a seamless flow. Privacy from neighbors is another huge consideration. Nobody wants to feel like they’re on display while trying to relax.
Size it right. Here’s a pro tip we share with all our clients: don't guess the size. Measure. Go find the outdoor dining table you love or the sectional you’ve been dreaming of, get their dimensions, and then add at least three feet of clearance around them for chairs and foot traffic. The most common regret we hear from people with pre-existing patios is simple: “I wish we’d made it bigger.” It’s far easier to build it the right size from the start than to add on later.
It’s comprehensive.
Shape creates feel. A simple rectangle is efficient and classic. It’s easy to build and furnishes well. But don't be afraid of curves or more organic shapes, especially if the rest of your landscape is less formal. A curvilinear patio can create a beautiful, meandering path and soften the hard edges of a home, creating a more naturalistic vibe. It really just depends on the architectural style of your home and the feeling you want to evoke.
Step 3: Choosing Your Material—Pavers vs. Concrete vs. Stone
This is where the personality of your patio truly comes to life. The material you choose impacts the look, the feel, the maintenance, and—of course—the budget. There’s no single “best” option; there’s only the best option for you. Our team at Modern Yardz has installed thousands of square feet of every conceivable material, and we’ve learned a few things about how they perform under the Southern California sun.
Let's break down the main contenders.
Interlocking Pavers: This is an incredibly popular choice, and for good reason. Pavers offer a staggering amount of design flexibility. You can choose from concrete pavers in endless shapes and colors, classic brick for a traditional look, or even elegant travertine pavers for a touch of luxury. They are individual units set on a sand bed, which means the surface is flexible and resistant to cracking from minor earth movement. Plus, if a paver ever gets stained or damaged, you can pop it out and replace it. The downside? Weeds can sometimes try to poke through the joints, and they may need to be re-sanded every few years.
Poured Concrete: Don't picture a boring gray sidewalk. Modern concrete patios are sophisticated and versatile. Concrete can be stamped to mimic stone or wood, stained with rich colors, or finished with a simple, clean brush stroke for a minimalist aesthetic. It’s generally one of the more budget-friendly options and is exceptionally durable. The primary drawback is its rigidity. If the ground shifts, concrete will crack, and repairs are almost always visible. Proper installation with control joints is absolutely essential to manage this risk.
Natural Stone: For a truly timeless, high-end look, nothing beats natural stone. Whether it’s the irregular, rustic charm of flagstone or the clean, geometric lines of cut slate, stone offers a connection to the natural world that manufactured products can't quite replicate. It's ridiculously durable and will last a lifetime. The trade-offs are significant, though. Stone is by far the most expensive material, and its installation is incredibly labor-intensive, requiring skilled masons to fit each piece. It's an unflinching investment in premium quality.
Here’s a quick comparison to help you weigh your options:
| Feature |
Interlocking Pavers |
Poured Concrete |
Natural Stone |
| Aesthetics |
Highly customizable, vast color/shape options |
Modern, uniform, can be stamped/colored |
Unique, natural, high-end look |
| Initial Cost |
Moderate to High |
Low to Moderate |
High to Very High |
| Durability |
Very durable, flexible, resistant to cracking |
Strong, but susceptible to cracking over time |
Extremely durable, lasts for decades |
| Maintenance |
Can require re-sanding, weed control |
Needs sealing to prevent stains, crack repair is visible |
Low maintenance, may need sealing depending on stone |
| Repairs |
Easy; individual pavers can be replaced |
Difficult; patches are often noticeable |
Difficult and expensive to match/replace stones |
| San Diego Fit |
Excellent; permeable options help with water runoff |
Good; light colors help reflect heat |
Excellent; classic look that complements many local architectural styles |
Step 4: The Nitty-Gritty of Site Preparation
Now, this is where it gets interesting. And by interesting, we mean this is the part that makes or breaks the entire project. You can have the most expensive, beautiful material in the world, but if the foundation beneath it is garbage, the patio will fail. Period.
We can’t stress this enough.
Proper site preparation is all about creating a stable, well-draining base. It's a grueling, multi-step process.
- Excavation: You have to dig down. A lot. For a standard paver patio, we typically excavate 7 to 9 inches of soil. This removes the unstable topsoil and organic matter and gives us room for the new base materials.
- Grading: This is the nuanced art of sloping the excavated area. The goal is to ensure that water flows away from your house. The standard is a slope of about a quarter-inch for every foot of patio. It’s subtle enough that you won't feel it, but it’s a critical, non-negotiable element for protecting your home's foundation.
- Base Material: We then backfill the excavated area with a crushed stone aggregate—in San Diego, we typically use Class II road base. This isn't just gravel; it's a specific mix of stone and fines that, when compacted, creates an incredibly stable and porous foundation. We lay it in lifts, compacting each layer with a heavy plate compactor until it's rock solid. This compacted base is what prevents your patio from sinking and shifting over time.
Honestly, though. This part is back-breaking work and requires precision. It’s the single biggest reason why DIY patios often fail within a few years. There are no shortcuts here.
Step 5: The Installation Process—A Brief Overview
With a perfect base in place, the final surface can be installed. The exact method depends on the material, but the principle is always precision.
For a paver patio, we install edge restraints to lock the perimeter in place. Then, we spread a one-inch layer of coarse sand, which we meticulously level to create a perfect setting bed. The pavers are then laid in the desired pattern, cut to fit the edges, and locked into place by sweeping polymeric sand into the joints. This special sand hardens and prevents both weed growth and paver movement.
For a concrete patio, we build wooden forms around the perimeter to contain the wet concrete. We also place steel rebar or wire mesh within the forms to add tensile strength and prevent cracking. The concrete is then poured, spread, and smoothed. The finishing process is where the artistry happens—whether it's a simple broom finish for texture or an intricate stamping pattern. It's a race against the clock, because once concrete starts to set, there are no do-overs.
This is where professional experience—the kind our crews bring to every job—becomes invaluable. It’s about muscle memory, an eye for detail, and knowing how to solve the little problems that inevitably pop up.
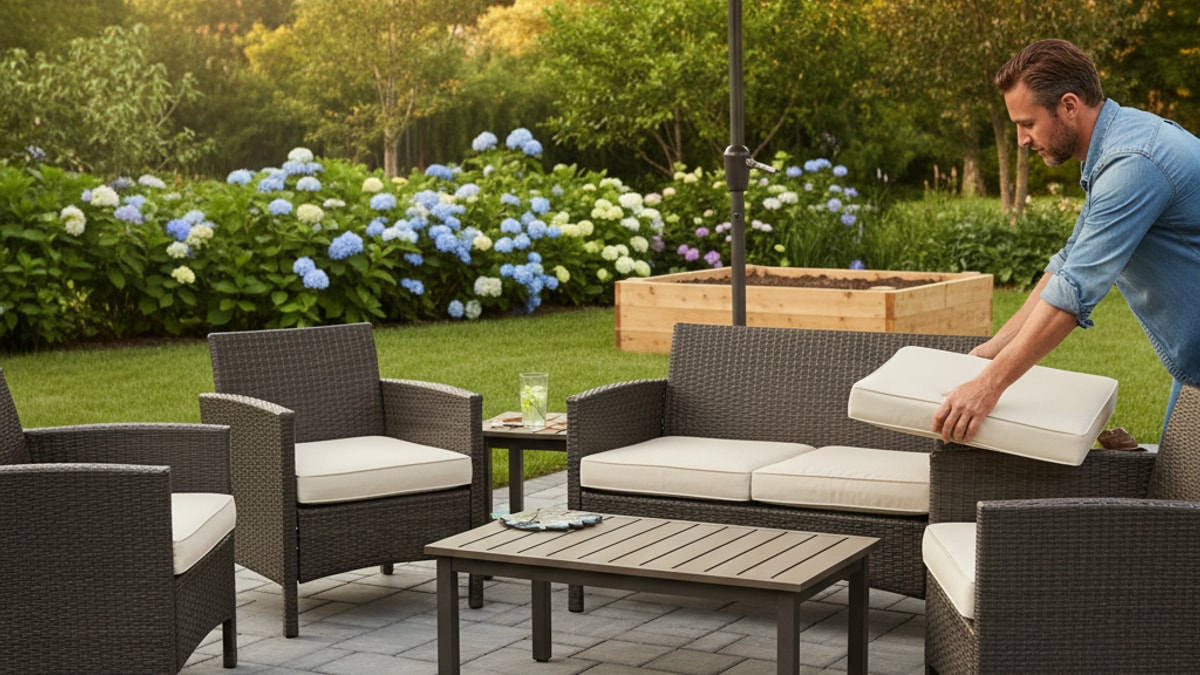
Beyond the Patio Floor: Essential Add-Ons
A patio is a great start, but it's the features you build around it that transform it into a true outdoor room. This is the fun part, where you can layer in personality and function. We've helped countless San Diego homeowners complete their vision with features like:
- Patio Covers & Pergolas: In our sunny climate, shade is not a luxury; it's a necessity. A well-designed cover makes your patio usable even on the hottest days.
- Fire Features: Nothing draws people together like a fire pit or outdoor fireplace. It becomes an instant focal point and extends the usability of your patio into the cooler evenings.
- Landscape Lighting: Thoughtful lighting adds ambiance and safety, turning your patio into a magical space after dark.
- Seat/Retaining Walls: These are brilliant for adding permanent seating and defining the edges of your patio, especially on a sloped yard.
- Outdoor Kitchens: For the ultimate entertainer, an outdoor kitchen with a built-in grill, refrigerator, and countertop space is a game-changer.
Thinking about these elements during the initial design phase ensures they feel integrated, not just tacked on. Check out our main Services page to see how we combine these elements into a cohesive design.
Budgeting for Your Patio: A Realistic Look
So, what does all this cost? It’s the question on everyone’s mind. The answer, of course, is: it depends. The final price tag is a moving-target objective influenced by size, material choice, site accessibility, and any additional features.
As a very general ballpark for the San Diego area, you can expect poured concrete to be the most budget-friendly option, often starting in the $15-$25 per square foot range. Interlocking pavers typically fall in the middle, somewhere between $25-$45 per square foot. Natural stone, given the material cost and intensive labor, is at the premium end, often starting at $40 per square foot and going up significantly from there.
Remember, these are just rough numbers. The only way to get a firm price is to get a detailed quote. When you're ready to explore the possibilities for your own yard, you can Contact Us directly. We recommend you BOOK MY FREE CONSULTATION so our design team can walk your property and provide a precise, no-obligation estimate.
DIY vs. Hiring a Pro: An Honest Conversation
We get it. The temptation to save money and tackle a patio project yourself is strong. And for some very small, simple projects, it might be feasible if you have the right tools, a strong back, and a lot of patience. A lot.
But for most patios of any significant size, the reality is that this is a job best left to professionals. The amount of physical labor involved in excavation and moving materials is immense. The cost of renting the necessary equipment—like a plate compactor and a wet saw—can add up. And the technical knowledge required for proper grading and base preparation is something that can't be learned from a quick online video. The risk of a costly failure is just too high.
When you partner with an experienced company, you're not just paying for labor. You're investing in expertise, efficiency, proper equipment, and peace of mind. You're investing in a guarantee that the job will be done right, look impeccable, and last for decades. Our team at Modern Yardz has built a reputation on that promise, and you can learn more about our philosophy on our About page.
Creating the perfect patio is a journey. It starts with a dream of a better outdoor life and ends with a beautiful, functional space that serves your family for years to come. It requires careful thought, smart planning, and a deep understanding of the craft. Whether you're just starting to gather ideas from our Blog or you're ready to break ground, remember that the effort you put in upfront will pay off tenfold. A well-built patio isn’t an expense; it’s an investment in your home and your happiness. And if you want a partner to guide you through every step, we're here to help. BOOK MY FREE CONSULTATION today, and let's start building your dream yard together.


.webp)
.webp)