The allure of the open road is undeniable. It’s about freedom, exploration, and connecting with the great outdoors. But let's be honest, after a long day of hiking or exploring a new town, being crammed inside a stuffy RV to cook dinner can feel… limiting. The smells of bacon and onions linger for days, the heat from the stove turns your small space into a sauna, and you’re constantly bumping elbows. It’s not exactly the serene experience you were dreaming of, is it?
This is precisely why the idea of adding an outdoor kitchen to an RV has exploded in popularity. It's a game-changer. Here at Modern Yardz, while our day-to-day involves creating sprawling, permanent Outdoor Kitchens SAN Diego for homes, our team has spent decades mastering the core principles of functional, durable, and beautiful outdoor living. And we've found that these principles—of smart design, material science, and user experience—translate directly to the mobile world. The scale is different, but the goal is the same: creating a space that enhances your life outdoors. So, let's dive into how to add an outdoor kitchen to an RV, using the hard-won lessons from the world of professional landscape architecture.
First Things First: Why Do You Really Want One?
Before you start sketching designs or shopping for mini-fridges, it’s critical to get clear on your 'why'. Understanding your motivation will guide every decision you make down the line. For most people we talk to, the benefits are immediate and obvious.
First, you keep the mess, heat, and potent cooking odors outside. No more waking up to the ghost of last night's garlic shrimp. Cooking outdoors preserves the clean, calm atmosphere inside your RV, which is your sanctuary. Second, it dramatically expands your living and entertaining space. Suddenly, your campsite isn't just a place to park; it's a functional patio. You can host campground neighbors for a cookout or simply enjoy more elbow room while you prep meals. It's a significant, sometimes dramatic shift in how you use your space.
And let's not forget the pure joy of it. There's something elemental and deeply satisfying about cooking in the fresh air, with a breeze at your back and a view that isn't the wall of your dinette. It connects you to your surroundings in a way that indoor cooking just can't. It transforms a simple meal into an experience. That's the real magic.
The Two Paths: Pre-Built Kits vs. A Full Custom DIY
When it comes to actually adding the kitchen, you're generally looking at two distinct routes: buying a pre-fabricated slide-out or bay kitchen unit, or building a custom solution from scratch. Neither is universally 'better'—the right choice depends entirely on your skills, budget, and vision.
Pre-built units are designed for convenience. They're engineered to be relatively lightweight and are often made to fit in specific RV storage bays. The installation is more straightforward, though it still requires careful work. The downside? You're limited to the manufacturer's layout, appliance choices, and materials. Customization is minimal.
A full DIY build, on the other hand, offers complete freedom. You control every single element, from the height of the countertops to the type of grill and the finish on the cabinets. This allows you to create something perfectly tailored to your cooking style and your RV's specific constraints. The challenge, of course, is that it demands a much higher level of skill in carpentry, electrical work, and plumbing. It's a formidable project, and mistakes can be costly or even dangerous.
Here’s a breakdown our team put together to help clarify the decision:
| Feature |
Pre-Built Slide-Out Kits |
Full Custom DIY Build |
| Cost |
Generally higher upfront cost for the unit itself. |
Potentially lower material cost, but can escalate. Sweat equity is the major factor. |
| Installation Time |
Faster. Measured in hours or a weekend. |
Much slower. Can take weeks or even months of dedicated work. |
| Skill Level Required |
Intermediate. Basic tools, ability to follow instructions, some electrical/plumbing knowledge. |
Advanced. Requires carpentry, metalworking, 12V/120V electrical, and propane plumbing skills. |
| Customization |
Very low. You get what the manufacturer offers. |
Limitless. Your imagination and skills are the only constraints. |
| Weight |
Engineered to be as light as possible for RV use. |
Entirely dependent on your material choices. Requires careful calculation. |
| Resale Value |
Can be a positive selling point if it's a known brand. |
May or may not add value; depends heavily on the quality of the craftsmanship. |
Our professional observation? If you're not deeply confident in your fabrication skills, a pre-built unit is often the safer, faster bet. But if you have the vision and the know-how, a custom build can be incredibly rewarding and result in a truly unique setup.
Planning Your Build: Lessons from Professional Design
This is where the real work begins. A successful project is 90% planning. In our Landscape Design SAN Diego practice, we spend weeks or months in the design phase before a single shovel hits the ground. The same diligence applies here, just on a smaller scale.
Layout and Workflow: The Mobile Kitchen Triangle
The classic 'kitchen triangle' concept (the efficient path between sink, stove, and fridge) still applies, but it gets squashed into a line. Think about your process. Where will you place raw ingredients? Where is your main prep space? Where does the cooked food go? You want a logical flow. We recommend mapping it out: Refrigerator -> Sink/Prep Area -> Grill/Cooktop -> Serving Area. Even if these zones are just a foot apart, defining them mentally ensures the layout is intuitive and not frustrating to use. You don't want to be constantly reaching over a hot grill to get to your spices.
Weight and Balance: The Unforgiving Laws of Physics
This is the single most critical, non-negotiable element of an RV kitchen project. In stationary construction, weight is rarely a primary concern. We can build massive fireplaces and use heavy Concrete SAN Diego because the foundation is the earth itself. In an RV, every single ounce matters. You have to know your RV's Gross Vehicle Weight Rating (GVWR) and its current weight to understand how much capacity you have to work with. Overloading one side of your rig can lead to catastrophic tire blowouts, suspension failure, and dangerously poor handling. We can't stress this enough: weigh your RV before you start, and weigh every component you plan to add. Use a spreadsheet. Be meticulous.
Material Selection: Durability Meets Diet
Choosing materials is a balancing act between durability and weight. Your outdoor kitchen will be exposed to relentless sun, driving rain, road vibrations, and temperature swings. The materials have to be tough.
- Framing: Forget wood. It's heavy and prone to rot. The gold standard for DIY builds is aluminum tubing (either square or C-channel). It's incredibly strong for its weight, easy to work with if you have the right tools, and will never rust.
- Cabinetry & Cladding: Marine-grade HDPE (like StarBoard) is a fantastic choice. It's a high-density plastic that's impervious to water, UV-stable, and relatively lightweight. For a more industrial look, you can use aluminum sheeting or stainless steel. Avoid MDF or particleboard at all costs—they will swell and disintegrate at the first sign of moisture.
- Countertops: This is tricky. Granite or the stone we might use in our high-end Outdoor Kitchens SAN Diego is completely out of the question. You need something light. A high-quality butcher block, sealed meticulously with marine varnish, can work. Thin-profile stainless steel is a classic for a reason: it's durable, hygienic, and light. Some builders even fabricate countertops from aluminum and cover them with a resilient laminate or coating.
The Core Components: Equipping Your Galley
Now for the fun part: the gear. Your choices here will define your kitchen's functionality.
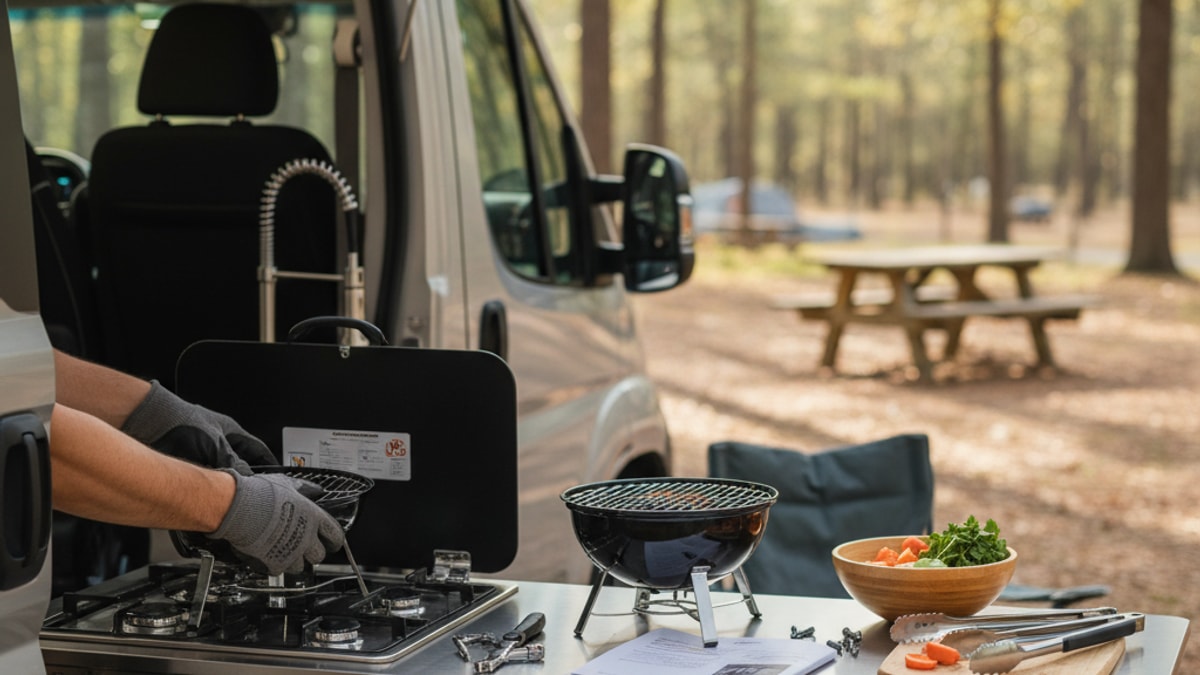
The Cooktop: Most RVers opt for a propane cooktop. A built-in griddle or flat-top (like a Blackstone) is incredibly versatile for everything from pancakes to smash burgers. You can also install a traditional grill. Just ensure whatever you choose is rated for RV use and has proper ventilation.
The Sink: A small bar sink is usually sufficient. The real challenge is the plumbing. You'll need to tap into your RV's fresh water lines (using PEX tubing and appropriate fittings) and figure out drainage. Most outdoor kitchens drain into a separate portable grey water tank to avoid filling up the RV's main tank too quickly. Never, ever drain grey water onto the ground.
Refrigeration: A high-efficiency 12V electric cooler or refrigerator is the best option. They sip power and can run off your RV's battery bank. A small 120V dorm fridge is cheaper but requires you to be plugged into shore power or running a generator, which isn't always practical.
Storage: Think smart. Use drawers instead of cupboards where possible, as they make it easier to access items in the back. Use strong magnetic latches on all doors and drawers to ensure they don't fly open while you're barreling down the highway. Our experience designing compact spaces has taught us that every inch counts, so plan for vertical storage where you can.
Installation Deep Dive: Tapping Into Your RV's Veins
This is where theory meets reality, and where you need to be uncompromisingly careful. If you're not comfortable with this, hire a certified RV technician. Seriously.
Propane: This is not a place to guess. You'll likely need to install a 'tee' fitting into your main propane line, followed by a dedicated shut-off valve for the kitchen. Use yellow gas-rated Teflon tape on all threaded fittings. After installation, you must perform a thorough leak test using soapy water on every single connection. Bubbles mean you have a leak, and a propane leak is a fire waiting to happen.
Electrical: Your primary source of power will be your RV's 12V battery system. This is what will run your fridge, water pump, and any Landscape Lighting SAN Diego you install. You must run appropriately sized wires from your fuse block, and every circuit needs to be protected by a fuse. If you're adding 120V outlets for things like a blender, you need to tap into your AC system, and that circuit must be GFCI-protected for safety around water. The complexity is similar to planning a whole-yard lighting system, just with much higher stakes if done wrong.
Mounting the Unit: How you attach the kitchen to the RV is critical. You can't just screw it into the thin exterior wall (the 'skin'). The unit must be securely bolted to the actual metal frame of the RV. This might require removing some of the exterior cladding to access the frame members. Every connection point needs to be sealed with a high-quality RV sealant (like Dicor) to prevent water intrusion, which is the mortal enemy of every RV.
Elevating the Experience: Beyond the Basics
Once the core kitchen is installed, you can think about the details that transform it from a utility into a luxury.
Lighting is Everything: Good task lighting over the prep area and grill is essential for cooking after dark. We recommend warm white LED strip lighting mounted under an upper cabinet or shelf. It provides excellent, non-glaring light and consumes very little power. Just as with our permanent landscape lighting projects, the goal is to create ambiance and functionality simultaneously.
Create a Defined 'Room': An outdoor rug or some interlocking deck tiles can define the kitchen area and make it feel more like a dedicated patio. It also helps keep dirt and mud from being tracked into the RV. It’s the same principle we use with Pavers SAN Diego to create distinct 'rooms' in a backyard.
Overhead Cover: Your main RV awning might provide enough cover, but if your kitchen is on the opposite side, consider a separate, smaller awning just for that area. It provides crucial shade on hot days and protection from light rain, extending the usability of your investment.
This entire process, from initial concept to final installation, is a significant undertaking. It requires patience, precision, and a healthy respect for the unique challenges of a mobile environment. But the payoff is immense. You're not just adding appliances; you're fundamentally changing how you travel, how you interact with your environment, and how you create memories on the road. It's an investment in a lifestyle of greater freedom and enjoyment. And while we specialize in creating that feeling in a permanent backyard, we know that the desire for a beautiful, functional outdoor space is universal. If you're ever planning a project for your home base, you can always BOOK MY FREE CONSULTATION with our team to explore the possibilities.


.webp)
.webp)