A swimming pool is the heart of a backyard, a shimmering centerpiece for relaxation and family fun. But when the swimming season winds down or you’re just looking to protect your investment, a pool cover becomes an absolute necessity. We’ve seen it time and time again: a homeowner invests in a stunning pool, but overlooks the crucial final step of a properly installed cover. It's not just about keeping leaves out. It's about safety, conservation, and peace of mind. Let's be honest, this is crucial.
Installing a pool cover might seem like a straightforward weekend project, but the reality can be a bit more nuanced. The difference between a taut, secure cover and a sagging, ineffective one often comes down to details—details our team at Modern Yardz has mastered over years of designing and building complete outdoor environments. This isn't just a set of instructions; this is our professional playbook, designed to walk you through the process so you get it right the first time. We'll show you how to install a pool cover with the precision it deserves.
First, Let’s Talk About Why This Matters So Much
Before we even touch a drill or an anchor, it’s vital to understand what you’re really achieving with a good pool cover. This isn't just a tarp. A high-quality, properly installed cover is a formidable piece of safety equipment. For families with children or pets, a certified safety cover provides a barrier that can literally be a lifesaver. We can't stress this enough. It’s the kind of feature that lets you breathe a little easier.
But the benefits are also economic and environmental. A good cover dramatically reduces water evaporation. Think about that. You're not just saving water (a precious resource); you're also saving the money you'd spend on refilling the pool and rebalancing chemicals. The cover acts as a shield against the sun, which means your chlorine lasts significantly longer instead of being burned off by UV rays. And, of course, there’s the cleanliness factor. You'll spend far less time skimming debris and more time enjoying your pristine water. It's a win-win-win.
The Different Types of Pool Covers: A Head-to-Head Comparison
Not all pool covers are created equal. The type you choose will dictate the installation process, the level of safety, and the overall maintenance effort. Our experience shows that understanding these differences is the first—and most critical—step in the entire project. Making the wrong choice here can lead to frustration down the road. It's a choice that directly impacts the functionality of your entire pool area, which is a core component of any successful Landscape Design SAN Diego project.
Here’s a breakdown of the most common options:
| Cover Type |
Primary Use |
Installation Difficulty |
Key Advantage |
Professional Insight |
| Solid Safety Cover |
Safety, Winterizing, Debris |
Moderate to Difficult |
Blocks 100% of sunlight, preventing algae growth. Excellent safety barrier. |
Requires a cover pump to remove rainwater. The heavy vinyl can be cumbersome to handle alone. We've found these are best for long-term winterization. |
| Mesh Safety Cover |
Safety, Winterizing, Debris |
Moderate |
Lightweight and easier to handle. Allows water to pass through, eliminating the need for a pump. |
Allows some silt and UV rays to pass through, which may mean a greener pool at opening. However, its safety rating is top-notch. |
| Solar Cover (Bubble Cover) |
Heating, Water Conservation |
Easy |
Inexpensive and effective at raising water temperature by trapping solar heat. |
Offers zero safety protection. It's essentially a sheet of bubble wrap that should be removed completely during pool use. Not a winter cover. |
| Automatic Cover |
Daily Use, Safety, Heating |
Professional Installation Only |
Ultimate convenience and safety at the push of a button. Excellent heat retention. |
The most expensive option, requiring built-in tracks and a motor. It’s a complex system that needs to be part of the initial Pools AND Spas construction plan. |
For the purpose of this guide, we’re going to focus on installing the most common type that homeowners tackle themselves: the anchor-in-deck safety cover (both mesh and solid, as the process is very similar).
Your Pre-Installation Game Plan
Success here is all about preparation. Rushing into this is a recipe for a crooked cover or, worse, a cracked patio paver. Before you even unbox the cover, you need a plan. Here's what we tell our clients to do.
First, take meticulous measurements. Measure the longest and widest points of your pool. Don’t just assume your 20'x40' pool is exactly 20'x40'. Measure it. For freeform pools, this is even more critical. Your cover should have at least 12-15 inches of overlap on all sides onto the deck or patio. This overlap area is where your anchors will go. It needs to be a solid, stable surface like concrete or well-set Pavers SAN Diego.
Next, gather your tools. You’re going to need more than a screwdriver. A professional installation requires a heavy-duty rotary hammer drill, not a standard power drill. The concrete around your pool is tough stuff. You'll also need a specific size masonry bit (check the cover's instructions), a tape measure, chalk or a masonry pencil, a mallet or hammer, safety glasses, and the anchor installation tool that should come with your cover hardware.
Finally, clean the area. And we mean really clean it. Clear the deck of all furniture, planters, and toys. Sweep the deck surface thoroughly to remove any dirt, pebbles, or debris that could get trapped under the cover or interfere with your measurements. A clean workspace is a safe and efficient workspace. It's a simple step, but one that gets skipped surprisingly often.
How to Install a Pool Cover: The Step-by-Step Breakdown
Okay, the prep work is done. You have your cover, your tools, and a clear deck. It’s time for the main event. Take a deep breath. This process requires patience and precision. We’re going to walk you through it just like we would with our own team.
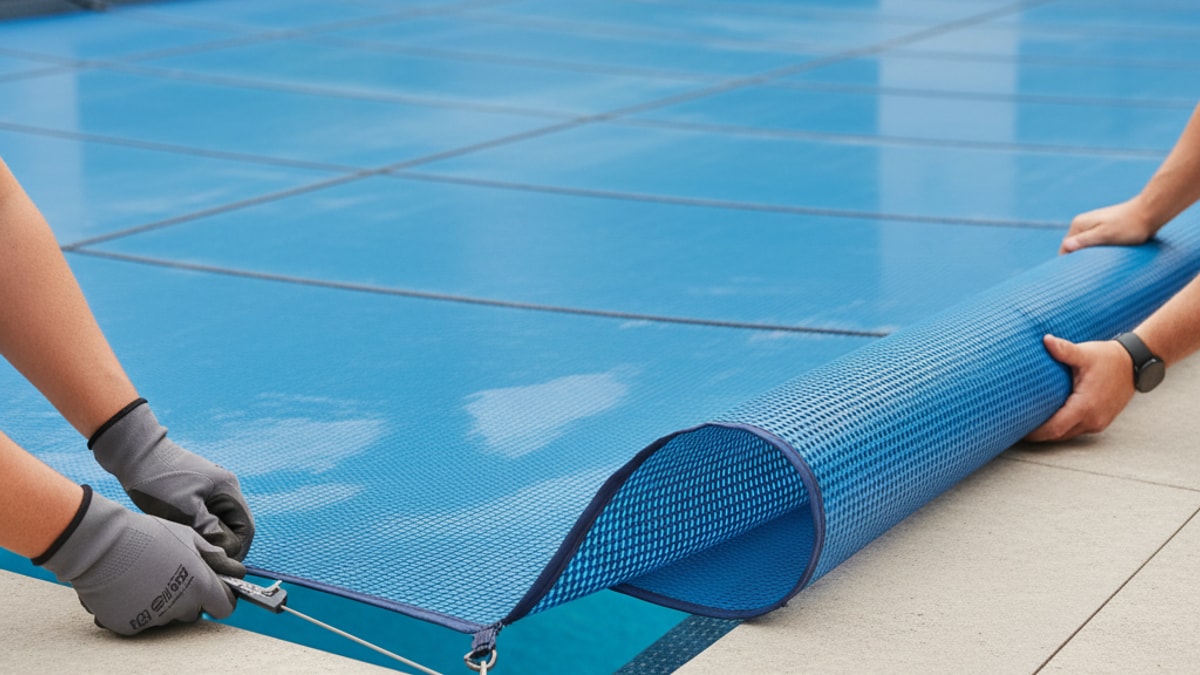
Step 1: Unpack and Position the Cover
Carefully unpack the cover and lay it over the pool. Don't just throw it on. Unfold it and try to get it as centered as possible. You should see an even amount of overlap on all sides. This might take two people, especially for larger pools. Look for any tags that indicate the “shallow end” or “step side” to orient it correctly. Get this part right, and everything else becomes easier.
Step 2: The First Four Anchors (Your Foundation)
This is where precision is paramount. Start by loosely pulling the four corner straps taut. Don't try to get them drum-tight yet, just snug enough to see where the cover wants to sit naturally. The goal is to create a perfect rectangle with the corner straps.
Take the first corner strap and pull it straight out from the pool. Using your chalk, mark the deck about 18-24 inches back from the end of the spring. Do the same for the other three corners. Now, use your tape measure. Measure the distance between your two marks on the long side of the pool. Then measure the distance between the two marks on the short side. A perfectly square installation means the two long-side measurements are equal, and the two short-side measurements are equal. Adjust your marks until they are. This is the secret. We've seen countless DIY jobs where the cover looks skewed simply because this step was rushed.
Step 3: Drilling the Anchor Holes
This is the point of no return. Double-check your corner marks one last time.
Put on your safety glasses. Using your rotary hammer drill and the correct masonry bit, drill your first corner hole at the mark you made. The instructions will specify the depth, but it’s typically around 2 inches. Drill straight down—an angled hole will cause the anchor to sit improperly. A great trick our team uses is to wrap a piece of tape around the drill bit at the correct depth. When the tape touches the concrete, you stop drilling. Simple, right?
Once the hole is drilled, use a vacuum or a blower to completely clear out the concrete dust. This is non-negotiable. Any dust left in the hole will prevent the anchor from seating correctly and could cause it to fail later.
Step 4: Setting the Anchors and Springs
Take your first brass anchor. It will have two parts: the outer sleeve and the inner screw insert. Place the sleeve into the hole you drilled. It should be a snug fit. Gently tap it with a mallet until the top flange is flush with the deck surface. Don't force it. If it's too tight, the hole might not be wide or clean enough. Once the sleeve is flush, use the installation tool to screw the inner insert down into the sleeve until it stops. This expands the sleeve, locking it into the concrete.
Now, attach the spring from the corner strap to the anchor. Repeat this entire process—drilling, cleaning, and setting—for the other three corners.
Step 5: Marking and Drilling the Remaining Anchors
With the four corners anchored, the rest of the process becomes systematic. Work your way down one of the long sides. Pull the next strap straight out from the pool until the spring is about halfway compressed. Mark your spot, drill, clean the hole, and set the anchor. Move to the next strap and repeat. Then do the other long side. Finally, do the two short sides.
We recommend a 'star pattern' approach after the corners are set. Instead of going in a circle, do the middle anchor on one long side, then the middle anchor on the opposite long side. Then the middle of a short side, and the opposite. This helps distribute the tension evenly as you go, preventing wrinkles and pulling.
Step 6: The Final Tensioning
Once all the anchors are installed and all the straps are attached, you'll need to do a final tensioning adjustment. Go around the entire pool and adjust each strap using the buckle. The goal is for every spring to be compressed by about 50-60%. You want the cover to be taut, with no significant sagging, but not so tight that it puts extreme stress on the springs and anchors. It should be tight enough to support weight (per its safety rating), but have just enough give.
Step back and admire your work. The cover should look flat and smooth, like a trampoline stretched over your pool. All the lines of the straps should be straight and perpendicular to the pool's edge. This professional finish is what separates a great installation from an average one.
A Note on Automatic Pool Covers
What about automatic covers? Honestly, they are a game-changer for pool ownership. They offer unparalleled convenience and safety. However, their installation is a completely different beast. It involves installing recessed tracks, running electrical wiring, and mounting a powerful motor system. This is not a DIY project. We mean this sincerely: this is a job for seasoned professionals.
When we design and build Pools AND Spas, integrating an automatic cover is planned from the very beginning. The housing for the cover roll is often built right into the pool deck, creating a seamless, hidden system. If you're considering one, the best time to decide is during the initial design phase. Trying to retrofit an automatic cover can be a formidable, often moving-target objective. It's much cleaner when it's part of the holistic backyard vision, which might also include features like beautiful Patio Covers Pergolas SAN Diego or strategic Landscape Lighting SAN Diego for evening ambiance.
The Most Common Installation Mistakes We See
Over the years, our team has been called in to fix a few DIY installations gone wrong. Learning from these mistakes can save you a world of headache.
- Drilling into a Return Line: This is the catastrophic one. People forget that plumbing lines often run under the concrete deck around the pool. Drilling without knowing what's underneath can lead to a very expensive repair. Always consult your pool's construction plans if you have them.
- Uneven Tension: This is the most common issue. If some straps are guitar-string tight and others are loose, the cover won't be safe or effective. It can cause premature wear on the straps and springs and allow debris to get in.
- Angled Anchors: Drilling at an angle puts sideways stress on the anchor. Over time, with the tension of the cover and changes in temperature, this can cause the concrete around the anchor to chip and fail.
- Improper Overlap: Not leaving enough cover material overlapping the deck is a frequent mistake. It makes it incredibly difficult to get proper tension and can leave gaps along the edges.
Avoiding these pitfalls comes down to that one word again: patience. Measure twice, drill once. It’s an old saying for a reason.
Taking on a project like this can be incredibly rewarding. It’s a tangible improvement to your home's safety and functionality. A well-installed pool cover is the finishing touch that protects your investment and provides invaluable peace of mind. It’s the final step in creating a backyard oasis that is as safe as it is beautiful. If you ever feel the project is beyond your scope, or if you're looking to integrate a pool and cover into a larger backyard transformation, that's where we come in. You can always BOOK MY FREE CONSULTATION to discuss how all these elements can work together in perfect harmony.


.webp)
.webp)