Your Brand-New Pool Liner is In. So Are the Wrinkles. Now What?
There it is. The culmination of weeks, maybe months, of planning. The centerpiece of your backyard oasis is finally taking shape. The pool is dug, the walls are up, and the vibrant new liner is unfurled, promising countless days of summer fun. But then you see it. A stubborn crease along the wall. A network of tiny wrinkles spreading across the floor. It’s a gut-punch moment for any homeowner.
Let’s be honest, seeing wrinkles in a freshly installed pool liner is more than just a minor cosmetic issue. It can affect the longevity of the liner, make cleaning more difficult, and frankly, it just doesn’t look right. Our team has seen this scenario play out countless times, and we've learned that preventing and removing these wrinkles isn't about luck; it’s about a meticulous, proven process. It's about understanding the material, the environment, and the physics of the installation itself. We're here to pull back the curtain on how to get wrinkles out of a pool liner when installing, sharing the techniques we use to ensure every project is impeccable.
Why Wrinkles Happen in the First Place
Before we dive into the fixes, it’s crucial to understand the 'why.' Wrinkles aren't just a random nuisance; they're the result of specific conditions. Knowing the cause is half the battle. Our experience shows it almost always boils down to a handful of culprits.
First and foremost is improper measurement and fit. A liner that's even slightly too large for the pool's dimensions has nowhere to go but to fold and bunch. This is a catastrophic, yet surprisingly common, error. It’s why professional measurement is a non-negotiable part of our process for all our Pools AND Spas projects. A liner that's too small, on the other hand, will be overstretched, which is a whole different set of problems waiting to happen.
Another major factor is the preparation of the pool base. The floor of your pool—whether it's sand, vermiculite, or a grout-like bottom—must be perfectly smooth and compacted. Any divots, footprints, or uneven spots create voids where the liner can settle improperly, leading directly to wrinkles. Think of it like trying to put a screen protector on a dirty phone screen; you'll never get a smooth finish if the surface underneath isn't flawless.
Temperature plays a surprisingly significant role. Vinyl is a thermoplastic material, meaning its flexibility is directly tied to its temperature. A cold, stiff liner is a nightmare to work with. It won't stretch or conform to the pool's shape, making wrinkles almost inevitable. Conversely, a liner that's been warmed by the sun becomes pliable and cooperative. This is one of the simplest yet most effective secrets in the business. We can't stress this enough: work with the weather, not against it.
Finally, the installation technique itself is paramount. Simply dropping the liner in and hoping for the best is a recipe for disaster. There's a nuanced process of setting the liner, securing it, and using a vacuum to pull it taut against the walls and floor before a single drop of water is added. This step, often called 'setting the liner,' is where professionals truly separate themselves from amateurs.
The Pre-Installation Ritual: Your Foundation for Success
Success is all in the prep work. A wrinkle-free installation begins long before the liner even comes out of the box. Rushing this stage is the single biggest mistake we see homeowners and less experienced installers make.
Your first task is to ensure the pool base is immaculate. We mean it. Every pebble, root, and clump of dirt must be removed. Once cleared, the base material needs to be troweled to a glass-smooth finish and then compacted. Walk over it gently, tamping it down to create a firm, unyielding surface. Any imperfections here will telegraph directly through the liner once the water pressure builds.
Next, inspect the pool walls and cove (the curved transition between the wall and the floor). Run your hands along all the seams and panels. Are there any rough spots, bolt heads, or sharp edges? These need to be covered with duct tape or a specialized wall foam. A tiny snag can become a huge tear under thousands of pounds of water pressure.
Now, let's talk about the liner itself. On a warm, sunny day (ideally between 75°F and 90°F), carefully unbox the liner and lay it out on a clean, soft surface like a lawn or a large tarp. Never lay it out on abrasive surfaces like concrete or pavers, as this can cause scuffs or punctures. The goal here is to let the sun warm the vinyl, making it soft and malleable. This 'relaxing' period can take an hour or two, and it makes a world of difference. You'll literally feel the material transform from a stiff sheet into a pliable fabric.
This entire preparation process is foundational to a great backyard. When we undertake a full Landscape Design SAN Diego, we're not just thinking about the aesthetics; we're meticulously planning the execution of every element, from the pool base to the surrounding Pavers SAN Diego that will frame your new oasis. It all has to work together perfectly.
The Installation Playbook for a Silky-Smooth Liner
With your prep work done, it's time for the main event. This is where technique and patience pay off.
1. Positioning the Liner: With the help of at least one other person (this is not a solo job), carefully lift the warmed liner and carry it into the pool. Don't drag it. Center it as best you can, identifying the 'deep end' and 'shallow end' markings if applicable. Unfold it gently, spreading it out towards the walls.
2. Securing the Bead: Start in the shallow end. Lift the edge of the liner and insert the 'bead' (the thick vinyl ridge at the top) into the liner track or coping at the top of the pool wall. Work your way around the perimeter, securing a few feet at a time. Leave some slack; don't pull it drum-tight just yet. Use liner locks or wedges if needed to keep it from popping out.
3. The Shop-Vac Trick (The Game-Changer): This is the most critical professional technique for how to get wrinkles out of a pool liner when installing. You'll need a strong shop-style vacuum. Place the vacuum hose between the liner and the pool wall, extending it down to about a foot from the pool floor. Use duct tape to seal the opening around the hose at the top of the coping. This creates a closed system.
Turn on the vacuum. You'll see something amazing happen. The vacuum will begin to suck the air out from behind the liner, pulling the vinyl tight against the walls and floor. It essentially shrink-wraps the liner to the pool's interior surface. It’s comprehensive. That's the key.
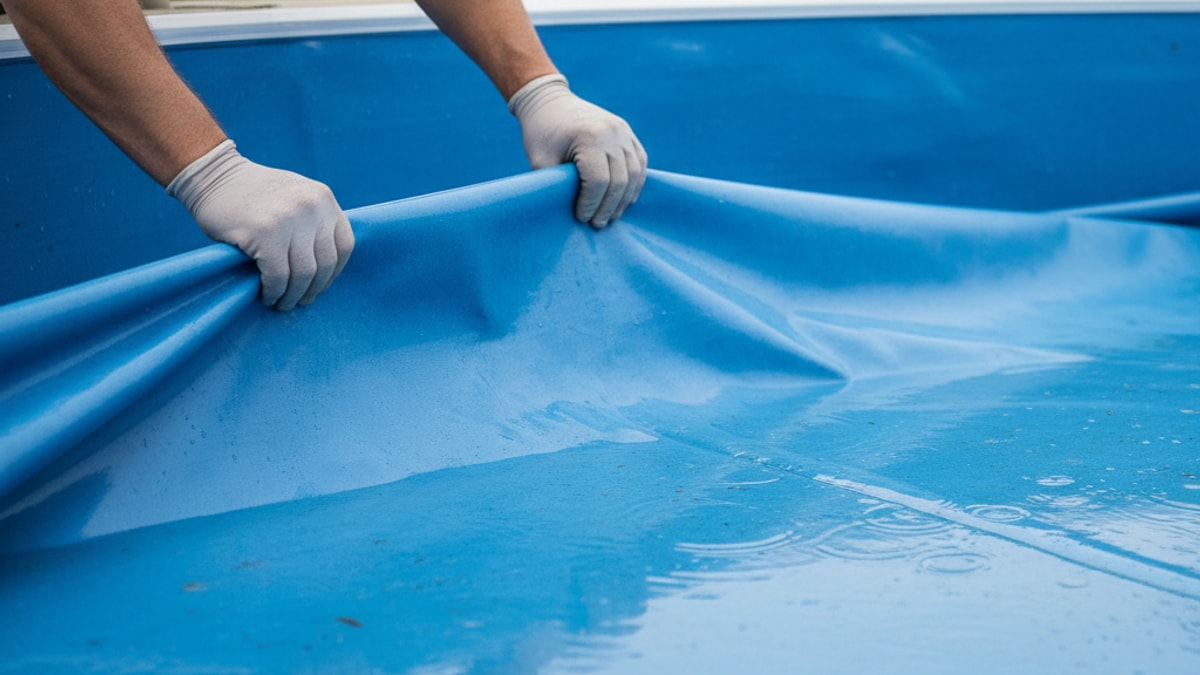
4. The Wrinkle Hunt: With the vacuum running and the liner pulled taut, you can now see exactly where the wrinkles are. Get into the pool (with clean, soft-soled shoes or just your socks) and start working them out. Push the wrinkles with your feet and hands, always moving them from the center of the pool outwards towards the walls. The suction from the vacuum will help the liner conform as you smooth it out. This is a physical job. You'll be pushing, pulling, and adjusting. For stubborn wrinkles on the floor, you may need to briefly turn off the vacuum, pull the liner towards the wall to create slack, and then restart the vacuum to suck the newly positioned liner into place.
This process is nuanced and requires a feel for the material. You're not just eliminating wrinkles; you're ensuring the liner is perfectly seated in every corner and curve of the pool structure.
Using Water's Weight: The Final Press
Once the liner is vacuum-sealed and you've manually smoothed out every visible wrinkle, it's time to introduce water. But not all at once.
Begin filling the pool with a garden hose placed in the center of the deep end. We recommend putting a soft cloth or foam pad under the hose nozzle to prevent it from creating a divot in the pool base. As the water level rises to about 6-12 inches on the floor, the weight of the water will begin to set the liner permanently. This is your final chance to work out any small, lingering wrinkles on the floor. The water weight makes the liner much harder to move, so act quickly.
Leave the vacuum running until the water is about 6 inches deep in the shallow end. At this point, the water pressure is sufficient to hold the liner in place. You can then turn off and remove the vacuum, tape, and hose. Continue filling the pool.
As the water level rises up the walls, you'll need to install the faceplates for your skimmer, returns, and lights. Do this only when the water level is just below each opening. Doing it too early can cause the liner to stretch and tear around the gaskets. Doing it too late means you'll be working underwater. Timing is everything.
Comparing Wrinkle Removal Techniques
While the vacuum method is our gold standard, there are other approaches. Here’s a quick comparison of the common methods we've seen and used over the years.
| Method |
Description |
Pros |
Cons |
Our Team's Take |
| Shop-Vac Suction |
Uses a vacuum to suck air from behind the liner, pulling it taut against the pool structure before filling. |
Extremely effective; removes wrinkles from both floor and walls; allows for precise adjustments. |
Requires a powerful vacuum and careful sealing of the system. |
The undeniable professional standard. We use this on virtually every installation. It provides the most control and the best results. |
| Hot Water Treatment |
Pouring buckets of very hot (not boiling) water onto a stubborn wrinkle to make the vinyl more pliable and easier to push out. |
Good for spot-treating isolated, stubborn wrinkles after the pool has some water in it. |
Can be risky if water is too hot; less effective on large areas; requires careful handling. |
A useful trick for minor, last-minute fixes, but not a primary strategy. Use with extreme caution. |
| The 'Foot Push' Method |
Manually pushing and smoothing wrinkles out with your feet as the pool begins to fill, without using a vacuum. |
No special equipment needed; simple in concept. |
Very difficult to get a truly smooth finish; ineffective on wall wrinkles; high risk of leaving wrinkles trapped under water. |
We strongly advise against relying on this. It's what leads to most of the wrinkle problems we're called in to fix. |
| Plunger Method |
Using a clean toilet plunger to create suction on a wrinkle and pull it straight. |
Can sometimes work on small, isolated wrinkles on the pool floor once there's water. |
Can easily damage or stretch the liner; not very effective; looks unprofessional. |
A last-ditch effort that carries a high risk of damaging the liner. We do not recommend this. |
What If Wrinkles Appear After Filling?
This is the scenario every DIY installer dreads. You’ve filled the pool, and a new wrinkle has appeared. What now? Your options are far more limited, but not entirely gone.
For a wrinkle on the floor, you might get lucky with the hot water trick mentioned above. Get in the pool, pour hot water on the area to soften the vinyl, and try to push the wrinkle towards the nearest wall with your feet. It’s a low-percentage shot, but sometimes it works.
Another option is to use a pool brush on an extension pole. Try to gently 'sweep' the wrinkle towards the wall. This is more effective on very small, minor creases than on large, set-in folds. You have to be careful not to be too aggressive and scuff the liner's pattern.
If the wrinkles are significant or on the walls, the unfortunate reality is that the pool will likely need to be drained—at least partially—to fix the issue properly. Draining a vinyl liner pool is risky business. The liner can shrink, and you risk re-creating the same problem or even new ones upon refilling. This is a situation where professional intervention is almost always the wisest and most cost-effective path forward.
Honestly, if you're at this stage, it's a clear sign that something went wrong in the foundational steps. It’s why we emphasize the pre-installation and vacuum-setting process so heavily. An ounce of prevention is truly worth a ton of cure (and thousands of gallons of water).
Creating the perfect backyard is a holistic process. The pool is often the star, but its success is supported by everything around it, from the stability of the surrounding Seat Retaining Walls to the ambiance created by integrated Landscape Lighting SAN Diego. When you're facing complex installation challenges, it might be time to take a step back and consider the bigger picture. If you're feeling overwhelmed, that's a perfect time to BOOK MY FREE CONSULTATION with our design experts to discuss how to bring all the pieces of your vision together flawlessly.
Getting a pool liner installed without wrinkles is less about brute force and more about finesse, preparation, and using the right techniques at the right time. It's a process that demands patience and an understanding of the materials you're working with. By following these professional guidelines, you can dramatically increase your chances of achieving that perfect, glass-smooth finish that will make your new pool the envy of the neighborhood.
Frequently Asked Questions About Pool Liner Wrinkles
Our team fields questions about liner installation all the time. Here are some of the most common ones we hear, along with our straight-to-the-point answers.


.webp)
.webp)