Your pool's pump and filter system is, without a doubt, its heart and lungs. It’s the tireless workhorse that keeps the water clear, safe, and inviting. When it's time for a replacement or a new installation, the task can feel formidable. You're dealing with water, electricity, and precise plumbing—a combination that demands respect and careful planning. It's a project that straddles the line between an ambitious DIY weekend and a job for the pros.
Here at Modern Yardz, we've designed and built countless backyard retreats, and the circulation system is a critical, non-negotiable element of every single one. Our experience shows that a successful installation isn't just about connecting pipes; it's about understanding the hydraulics, ensuring safety, and building a system that will perform reliably for years. So, whether you're a seasoned DIYer ready for a challenge or just want to understand what's involved, we're pulling back the curtain. Let's walk through how to install a pool pump and filter the right way.
First Things First: Planning and Preparation
Let's be honest, the temptation is to rip open the boxes and start cutting pipes. We've seen the aftermath of that approach, and it’s rarely pretty. A successful installation is 90% preparation. Rushing this stage is the single biggest mistake we see homeowners make.
First, safety. We can't stress this enough: you are working with electricity and water in very close proximity. Before you do anything else, turn off the power to the pool equipment at the main circuit breaker. Lock it out and tag it if you can, especially if other people are home. There are no second chances here. Verify the power is off with a voltage tester before touching a single wire.
Next, gather your tools and materials. This isn’t a project where you want to be making frantic runs to the hardware store mid-glue-up. You'll need PVC pipe cutters, a deburring tool, PVC primer (the purple stuff) and cement, channel locks, a tape measure, a level, and a hacksaw. For the electrical side, you'll need wire strippers, screwdrivers, and conduit fittings. Having everything laid out and ready to go transforms the job from a chaotic scramble into a methodical process.
Finally, understand your pool's specific needs. A pump and filter aren't one-size-fits-all. The system must be properly sized for your pool's volume to ensure an adequate turnover rate (the time it takes to circulate the entire volume of water). An undersized pump will struggle to keep the water clean, while an oversized one will waste a staggering amount of energy and can even damage the filter. This is a crucial calculation that forms the foundation of a healthy pool. It’s a core part of our initial Landscape Design SAN Diego process when a water feature is involved, ensuring the engineering matches the aesthetics.
Choosing Your Champion: The Right Pump and Filter Combo
The market for pool equipment is sprawling, and the technology has evolved dramatically. The pump and filter you choose will have a long-term impact on your energy bills, water clarity, and the amount of time you spend on maintenance. It's a big decision.
Let’s talk pumps. For years, single-speed pumps were the standard. They turn on, run at one high speed, and turn off. Simple, but incredibly inefficient. The modern standard, and what we almost exclusively install, is the variable-speed pump (VSP). These are a game-changer. They allow you to run the pump at very low speeds for long periods, consuming a fraction of the electricity while achieving superior filtration. The energy savings are not just significant; they're often dramatic, paying for the higher upfront cost of the pump within a couple of seasons. It’s one of the best investments a pool owner can make.
Then you have the filter. The three main types—sand, cartridge, and diatomaceous earth (D.E.)—each have their own pros and cons.
- Sand Filters: The classic workhorse. They use specially graded sand to trap debris. They are the most forgiving and require the least frequent maintenance, which involves a process called 'backwashing' to flush the trapped dirt out. They filter down to about 20-40 microns.
- Cartridge Filters: These use a pleated fabric cartridge, much like the air filter in your car, to catch debris. They offer finer filtration than sand (10-20 microns) and don't require backwashing, which saves a lot of water. Instead, you remove the cartridges and hose them down periodically. They have a larger surface area, allowing for lower pressure and better energy efficiency.
- D.E. Filters: The gold standard for water clarity. They use grids coated in the fossilized remains of diatoms to filter out microscopic particles, down to an impeccable 1-3 microns. The water quality is unmatched. However, they require more hands-on maintenance, including backwashing and recharging the grids with new D.E. powder.
Here’s a quick breakdown our team uses to help clients decide:
| Filter Type |
Filtration Level (Microns) |
Maintenance Demand |
Water Conservation |
Upfront Cost |
| Sand |
20-40 (Good) |
Low (Backwashing every few weeks) |
Poor (Uses water) |
Low |
| Cartridge |
10-20 (Better) |
Medium (Hose off cartridges 2-4 times/season) |
Excellent (No backwashing) |
Medium |
| D.E. |
1-3 (Best) |
High (Backwashing & recharging with D.E. powder) |
Poor (Uses water) |
High |
Your choice depends on your budget, how much time you want to spend on maintenance, and how pristine you want your water to be. We've found that for most homeowners, a variable-speed pump paired with a large-capacity cartridge filter offers the best balance of performance, efficiency, and ease of use.
The Foundation: Setting Up the Equipment Pad
This seems like a minor detail, but our field teams will tell you it's absolutely critical. The pump and filter need to sit on a perfectly level, solid, and stable surface. A pump vibrating on an uneven patch of dirt is a recipe for premature failure. The vibrations will destroy the motor bearings and can cause plumbing joints to crack and leak over time.
Never, ever, set your equipment directly on the ground.
Ideally, you should have a dedicated concrete slab. A properly poured pad of Concrete SAN Diego is the professional standard. It provides the unwavering stability needed for decades of operation. If a full slab isn't feasible, a base constructed from well-compacted gravel and level Pavers SAN Diego can also work, provided it's built correctly. Use a long level to check that the pad is flat in all directions. Your future self will thank you when you're not trying to shim a 100-pound filter to stop it from wobbling.
Positioning matters, too. The pump should be as close to the pool as practical to reduce the work it has to do. Shorter pipe runs mean better hydraulic efficiency. However, you also need to consider noise and accessibility for future maintenance. This is where holistic design comes into play, ensuring the functional elements don't detract from the beauty of your outdoor living space, whether it's near your Outdoor Kitchens SAN Diego or tucked away behind a custom screen.
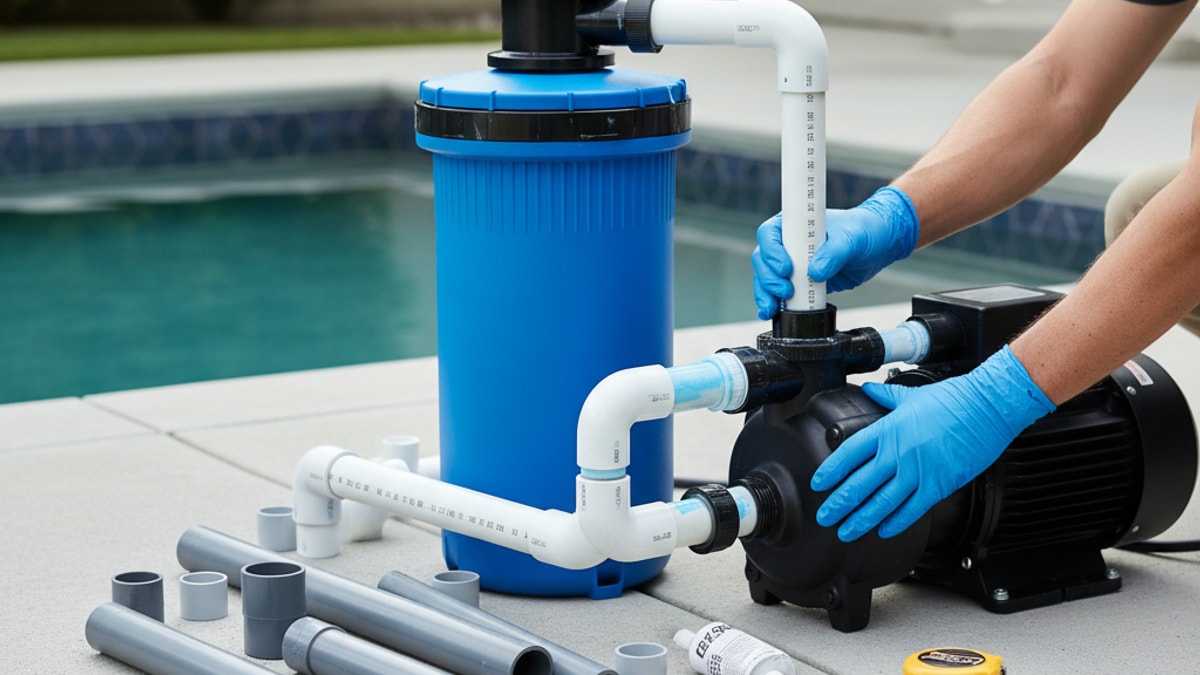
Making the Connections: The Art of Pool Plumbing
Now for the main event. Plumbing your new system can be deeply satisfying when done right. The key is to be methodical. Measure twice, cut once. Better yet, measure three times.
Step 1: The Dry Fit.
Before a single drop of glue is opened, you must dry-fit every single pipe and fitting. Lay out the entire assembly, connecting the pump to the filter and the filter to any additional equipment like heaters or chlorinators. This allows you to see how everything lines up and make adjustments. Use a permanent marker to draw alignment lines across the joints of each fitting and pipe. These lines will be your guide to ensure everything is perfectly oriented during the final, fast-paced gluing process.
We've found that this is where most DIY plumbing jobs go wrong. Once the cement is applied, you have only a few seconds to get the joint right before it sets permanently. Without those alignment marks, it's easy to end up with a crooked valve or a pipe pointing in the wrong direction.
Step 2: Cutting and Prepping the Pipe.
Use a dedicated PVC cutter for clean, square cuts. A hacksaw will work in a pinch, but it often leaves a rough edge. After cutting, use a deburring tool (or even just a utility knife) to bevel the inside and outside edges of the pipe. This is a critical step that many people skip. Those little burrs of plastic can prevent the pipe from seating fully into the fitting, creating a weak joint that's destined to fail. It also scrapes the primer and cement away as you push the pipe in. Don't skip this.
Step 3: Primer and Cement.
Working one joint at a time, apply the purple PVC primer to the outside of the pipe and the inside of the fitting. The primer isn't just a cleaner; it chemically softens the PVC, preparing it to fuse. It's an essential part of the chemical weld.
Immediately follow with a liberal, even coat of PVC cement to both surfaces. Don't be shy with it. Insert the pipe into the fitting with a slight twisting motion—about a quarter turn—until it bottoms out, aligning your marks. Hold it firmly in place for at least 30 seconds. The chemical reaction will try to push the pipe back out, so you need to hold it steady until that initial bond forms. That's it. Don't disturb the joint. Move on to the next one.
Allow the joints to cure for the manufacturer's recommended time before introducing any water pressure. We recommend waiting at least 24 hours to be completely safe. A premature pressure test can blow out a joint that hasn't fully cured, forcing you to cut it out and start over.
The Electrical Work: When to Call a Professional
This is the part of the job that carries the most significant risk. We mean this sincerely: if you are not 100% confident and experienced in working with electrical circuits, this is the time to hire a licensed electrician.
Modern pool pumps, especially variable-speed models, have specific power requirements. They typically run on 230 volts and require a dedicated circuit with a proper GFCI (Ground Fault Circuit Interrupter) breaker for safety. The wiring must be correctly sized and run through an approved conduit to protect it from the elements.
Two critical concepts here are bonding and grounding. They are not the same thing. Grounding is a safety measure to protect against electrical faults. Bonding involves connecting all the metal components of the pool—the pump, ladder, light fixtures, rebar in the pool shell—with a solid copper wire. This equalizes the electrical potential of all these parts, preventing dangerous stray voltage from building up in the water. Both are required by code and are absolutely essential for safety.
When we manage a full Pools AND Spas installation, we coordinate with licensed electricians to ensure every connection is done to code and is impeccably safe. It's not an area for compromise. For the ambitious DIYer, this is our strongest recommendation: handle the pad and the plumbing yourself, but leave the final electrical hookup to a certified pro. It's a small price to pay for absolute peace of mind.
The Moment of Truth: Priming and System Startup
You've done the hard work. The plumbing is cured, the electrical is safely connected. It's time to bring your new system to life.
First, you need to prime the pump. A pool pump is designed to move water, not air. Running it dry for even a short period can overheat and destroy the shaft seal. To prime it, make sure the pool is filled to its normal operating level. Open the lid on the pump's strainer basket and slowly fill it with water from a garden hose until it's completely full. This purges most of the air from the suction line. Put the lid back on, making sure the O-ring is clean and properly seated to create an airtight seal.
Next, set your filter's multiport valve to the "Filter" position. Open all the necessary valves on both the suction side (from the skimmer and main drain) and the return side (back to the pool jets). Now, you're ready.
Go to the breaker and turn on the power. Head back to the pump and listen. You should hear it kick on and start moving water. It might take a minute or two for all the air to be purged from the system. You can often see air bubbles coming out of the return jets in the pool. Once you have a solid, steady stream of water returning to the pool, the pump is primed.
Now, do a thorough inspection. Carefully check every single plumbing joint you made for any drips or leaks. Even a tiny, slow drip can become a major problem over time. Check the pressure gauge on your filter. Take note of the clean operating pressure; this is your baseline. When the pressure rises 8-10 PSI above this baseline, you'll know it's time to clean your filter. For a new variable-speed pump, you'll also need to program its schedule, setting different speeds and run times for optimal efficiency.
Thinking Beyond the Pad: System Integration
A truly great backyard design considers every element. The pool equipment, while essential, isn't usually something you want as a focal point. Integrating the equipment pad thoughtfully into the landscape is the final touch that separates a professional job from an amateur one.
Consider building a small enclosure or a decorative screen wall to hide the equipment from view and, just as importantly, to dampen the noise. This can be constructed from wood, composite materials, or even masonry to match your home's aesthetic. Ensure any enclosure has plenty of ventilation, as pumps generate heat. Another great approach is to use strategic planting with shrubs and ornamental grasses to soften the area and make it blend seamlessly into the garden.
This holistic view is at the core of our philosophy. The circulation system for your Pools AND Spas should work in harmony with the surrounding Patio Covers Pergolas SAN Diego and the glow from your Landscape Lighting SAN Diego. It's all part of one cohesive outdoor living experience.
Installing a pool pump and filter is a substantial project, but it’s absolutely achievable with careful planning, patience, and a deep respect for the materials you're working with. It gives you an intimate understanding of how your pool operates. However, if any part of this process feels overwhelming, don't hesitate. A project of this importance is worth doing perfectly. If you'd rather leave it to the experts and ensure it's integrated flawlessly into your dream backyard, you can always BOOK MY FREE CONSULTATION with our design team.
Taking the time to get this foundational system right ensures that your pool remains a source of joy and relaxation, not a source of stress. A quiet, efficient, and reliable pump and filter combination is the unsung hero of every perfect pool day, working tirelessly behind the scenes so you can simply enjoy the water.


.webp)
.webp)