A flawless, evergreen lawn that asks for almost nothing in return. No mowing, no watering, no fertilizing. It sounds like a dream, right? That’s the promise of modern artificial turf, and it’s a promise we’ve helped countless homeowners realize. But transforming that dream into reality involves more than just rolling out a green carpet. The difference between a lumpy, poorly-draining eyesore and a sprawling, impeccable green space lies entirely in the installation process.
We get it. The appeal of a weekend DIY project is strong. But our team has also been called in to fix more than a few installations that started with good intentions but ended in frustration. We believe in empowering homeowners with real knowledge. So, we're pulling back the curtain to show you how to install modern turf the way the pros do it. This is our process, refined over years of experience, designed to create outdoor spaces that last. Let’s walk through what it really takes.
Before You Even Touch a Shovel: The Planning Phase
Honestly, this is where most mistakes are born. Rushing into the physical work without a rock-solid plan is a recipe for disaster. We can't stress this enough: meticulous planning is the critical, non-negotiable element of a successful turf installation. It saves you time, money, and a world of headaches down the road.
First, you need to measure your space. And we mean really measure it. Get out the tape measure and map out the exact dimensions of the area you want to cover. Sketch it out on paper, noting any curves, corners, or permanent fixtures like trees or patios. Once you have your square footage, always add 10-15% to your order. Why? Because turf comes in standard roll widths (usually 12 or 15 feet), and you’ll need extra material for trimming, seaming, and accounting for the grain direction. You absolutely do not want to be two feet short on the last section.
Next comes the fun part: choosing your turf. The technology behind our artificial turf services has come a long, long way from the astroturf of the 70s. Today’s options are incredibly realistic, with varying pile heights, blade shapes, colors, and thatch layers (the curly, brownish fibers at the base that mimic dead grass). Think about its primary use. Will it be a gentle, ornamental space, or does it need to withstand the relentless energy of kids and pets? A shorter, denser pile is fantastic for high-traffic zones, while a longer, lusher pile offers a more luxurious look for less-traveled areas. Our design team often helps clients navigate these choices, ensuring the final product not only looks great but performs flawlessly for their specific lifestyle.
Gathering Your Arsenal: Tools and Materials
Having the right equipment is half the battle. Trying to tackle this project with just a shovel and a rake is going to be a grueling, often moving-target objective. Here’s what we consider essential for a professional-grade installation. Some of these can be rented, which is a great option for one-off projects.
Essential Tools & Materials:
- Sod Cutter: For removing existing grass. You can do it with a shovel, but a sod cutter will save your back and hours of your life.
- Wheelbarrow: For moving soil, base material, and debris.
- Shovels & Rakes: For excavation and grading.
- Plate Compactor: This is a heavy-hitter and it's absolutely crucial. It compacts the sub-base into a stable, level foundation. Hand tamping is not a viable substitute for areas larger than a postage stamp.
- Landscape Fabric/Weed Barrier: A high-quality, non-woven geotextile fabric is what you want.
- Sub-Base Material: The foundation of your new lawn. The choice here is important.
- Utility Knife & Extra Blades: For cutting and trimming the turf. You will go through more blades than you think.
- Measuring Tape: A long one (100 ft) is ideal.
- Turf Seaming Tape & Adhesive: If your area is wider than a single roll, you'll need this to create invisible seams.
- Landscaping Stakes: 5- to 6-inch galvanized nails to secure the perimeter.
- Hammer: For the stakes.
- Drop Spreader: For evenly distributing the infill material.
- Power Broom or Stiff-Bristled Push Broom: A power broom is the professional’s choice for working the infill into the turf fibers. It makes a dramatic difference.
- Infill: The granular material (like silica sand) that supports the turf blades.
Now, let's talk about that sub-base material. It’s the unsung hero of your entire project. We've found that the choice here can significantly impact the longevity and stability of the turf.
| Base Material Type |
Composition |
Pros |
Cons |
Best For |
| Decomposed Granite (DG) |
Fine, crushed granite rock |
Excellent compaction, creates a very hard and stable surface. |
Can be more expensive, may not drain as quickly as larger aggregates. |
Areas requiring maximum stability and a firm feel underfoot. |
| Class II Road Base |
A mix of sand and rock (3/4" down to fines) |
Great drainage, excellent compaction, typically more affordable. |
The mix can vary by supplier; consistency is key. |
All-purpose applications; it's our team's go-to for most residential projects. |
| Crushed Miscellaneous Base (CMB) |
Recycled concrete and asphalt |
Often the most budget-friendly option, good for the environment. |
Can contain foreign materials, compaction quality might be less consistent. |
Budget-conscious projects where perfect uniformity is less critical. |
The Groundwork: Site Preparation is Everything
We're not exaggerating. 80% of a turf installation's success is determined before you even unroll the grass. The preparation of the ground underneath is what separates a professional, long-lasting lawn from one that fails in a year or two. This is the hard labor part of the job, and there are no shortcuts.
It all starts with demolition. You need to clear the entire area of any existing grass, weeds, plants, and large rocks. A sod cutter is your best friend here. Set the blade depth to about 1.5 to 2 inches to remove the grass and its immediate root system. Once the sod is up, it's time to dig. You need to excavate the entire area to a depth of 3 to 4 inches below your desired final turf height. This depth is critical—it provides the necessary space for your sub-base, which is the key to stability and, most importantly, drainage.
And that brings us to the most overlooked step in DIY installations: creating a proper grade. Water needs to go somewhere, and if your turf area is perfectly flat or, worse, slopes toward your house, you're going to have a big, soggy problem. Our teams create a very subtle grade, typically a 1-2% slope, directing water away from structures and towards appropriate runoff areas. This doesn't mean your lawn will look tilted. It's an almost imperceptible slope that makes a world of difference during a heavy downpour.
Building the Foundation: The Sub-Base Installation
With your area cleared and graded, you can now build the foundation that will support your turf for years to come. This process is methodical. Don't rush it.
First, roll out your landscape fabric over the entire excavated area, overlapping the edges by about 6 inches. This barrier is your primary defense against weeds trying to push up from below. It also helps to stabilize the soil and separate it from your new base material.
Now, bring in your sub-base material—whether it's DG, Class II base, or another aggregate. Start dumping it in with your wheelbarrow and spreading it evenly with a rake. You'll add it in layers, or 'lifts.' We recommend a layer of about 2 inches, which you'll then moisten slightly (this helps with compaction) and go over multiple times with the plate compactor. You're aiming for a base that is solid and unyielding. After the first layer is compacted, add the next 1-2 inches and repeat the process until you've reached your desired depth. The goal is to achieve about 95% compaction. You'll know it's ready when you can walk on it without leaving significant footprints.
Once compacted, the final step is to screed the surface. This means using a long, straight board to drag across the top of the base material, scraping off high spots and filling in low ones. The result should be a surface that is as smooth and flat as a tabletop. Any inconsistencies here will be visible and felt through the finished turf. It's a tedious process, but it's absolutely worth the effort.
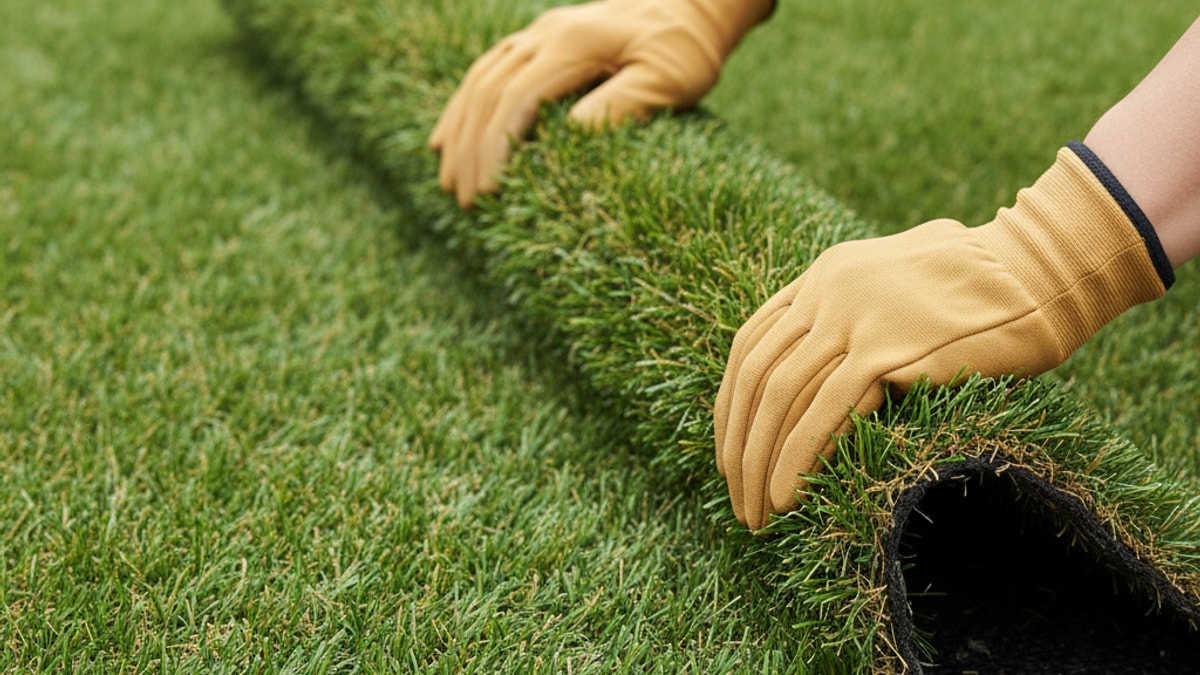
The Main Event: Laying and Securing Your Turf
Finally, the moment you've been waiting for. It’s time to go green. Before you unroll the turf, let's talk about grain direction. Just like a carpet, artificial turf has a directional pile. For the most natural look, you want the blades of grass pointing towards the primary viewing area, like your house or patio. Make sure all your pieces are laid with the grain running in the same direction.
Carefully unroll your turf over the prepared base. Let it lie in the sun for an hour or two if possible. This helps the backing relax and removes any creases or ripples from being rolled up. Position the pieces, making sure to slightly overlap any edges that will need to be seamed. When it comes to trimming, patience is a virtue. Use a sharp utility knife with a fresh blade and always cut from the back side of the turf. Cut a little extra at first—you can always trim more off, but you can't add it back on.
Seaming is an art form. It's the step that truly distinguishes a professional job from an amateur one. To create an invisible seam, you'll trim the factory edge off both pieces of turf you're joining. You want the rows of stitched turf fibers to be as close as possible without overlapping. Once they're perfectly aligned, fold back the edges and lay your seaming tape down the middle, directly on the sub-base. Apply a generous, zig-zag bead of turf adhesive to the tape, then carefully press both sides of the turf down onto the glue. Be careful not to get any adhesive on the grass blades themselves. Weigh the seam down with something heavy while it cures.
With your pieces laid and seamed, the final construction step is to secure the perimeter. Using 6-inch galvanized stakes, nail down the edges of the turf every 6 to 8 inches. Drive them deep enough so they don't create a divot but are flush with the base, preventing any tripping hazards.
The Finishing Touches That Make All the Difference
You might think you're done, but these last steps are what give your new lawn that professional, finished look and feel. They are not optional.
First is the infill. Infill is a granular material, most commonly silica sand or a specialized coated sand, that you spread over the top of the turf. It serves several critical functions: it adds ballast to weigh the turf down, it helps keep the grass blades standing upright, it protects the backing from UV rays, and it provides a soft, cushioned feel underfoot. For homeowners with pets, we often recommend a specific type of infill with antimicrobial properties to help control odors.
Using a drop spreader, apply the infill evenly across the entire surface. The amount you'll need depends on the manufacturer's recommendation for your specific turf, but it's usually between 1 to 3 pounds per square foot. It's a lot more than you think.
Once the infill is down, you need to work it deep into the fibers. This is where a power broom is a game-changer. The rotating bristles effortlessly brush the turf, forcing the infill down to the base and making the grass blades stand up perfectly. You can use a very stiff push broom, but it requires a significant amount of effort and the results are rarely as good. After brushing, a final light rinse with a hose will help settle the infill and clean off any dust from the installation. Stand back and admire your work. You've earned it.
Why a Professional Install Can Save You Headaches (and Money)
As you can see, a proper turf installation is a complex, labor-intensive process that demands precision and specialized tools. While a DIY approach is possible, it's fraught with potential pitfalls. We've seen it all: improper grading leading to swampy yards, visible seams that scream 'fake grass,' and bases that settle and create ugly depressions. Fixing these issues often costs more than getting it done right the first time.
When you work with a team like ours at Modern Yardz, you're not just paying for labor; you're investing in experience. You're getting a team that understands the nuances of drainage, the art of the invisible seam, and the importance of a perfectly compacted base. We have the professional-grade equipment, like heavy-duty plate compactors and power brooms, that make a tangible difference in the final quality and longevity of your lawn. Our expertise in artificial turf installation ensures the project is done efficiently and correctly, integrating seamlessly with your overall landscape vision, whether it includes new custom pavers or beautiful retaining walls. Ready to Transform Your Yard?
An outdoor space should be a source of relaxation, not a constant reminder of a project gone wrong. It’s about creating a beautiful, functional extension of your home where you can make memories. Whether you decide to take on the challenge yourself or bring in experts, understanding the right way to do it is the first step toward that perfect green lawn.
And that's what we're all about—building spaces where memories are made. If you’re considering a project, we hope this guide has been helpful. We believe a well-informed client is the best partner in creating something truly special. Let’s Bring Your Vision to Life.


.webp)
.webp)