So, you've made a fantastic decision for your pool. A solar cover is one of the single most effective investments you can make, not just for extending your swim season but for conserving water and chemicals. It's a true workhorse. But now it’s sitting in a giant box on your deck, and you're faced with the task of turning that rolled-up sheet of high-tech plastic into a perfectly fitted blanket for your aquatic oasis. We get it. It can feel a bit daunting.
Here at Modern Yardz, we've designed and built countless [Pools AND Spas], and we’ve seen firsthand how a properly installed solar cover transforms the ownership experience. It’s the difference between a pool that’s always 'a little too chilly' and one that’s perpetually inviting. The good news? You can absolutely do this yourself. It just takes a bit of patience and the right technique. We're here to walk you through the process, step-by-step, sharing the same insights our team uses to ensure a perfect, professional-grade fit every time.
Before You Begin: Gathering Your Tools and Prepping the Cover
Alright, let's get organized. Rushing into this is the fastest way to make a mistake you can't undo (like an accidental, jagged cut). A little prep work goes a long, long way. Seriously, we can't stress this enough. Before you even think about unrolling that cover, let's get your toolkit in order.
You don’t need a sprawling workshop’s worth of equipment. Simple is best.
Your Essential Toolkit:
- A Sharp Pair of Scissors: We mean sharp. A dull pair will chew and tear the material, leaving you with a ragged, unprofessional edge. Heavy-duty workshop scissors or even high-quality fabric shears are ideal.
- A Utility Knife (Optional but Recommended): For those who are confident with a blade, a utility knife with a fresh, sharp blade can make beautifully clean cuts. Just be extra cautious.
- A Friend: This isn't technically a tool, but it's probably the most important item on the list. Wrestling a large, unwieldy solar cover by yourself is a recipe for frustration. An extra set of hands makes the entire process smoother, faster, and far more accurate.
- A Soft Broom or Pool Brush: You'll use this later to smooth out the cover on the water.
- Patience: Yes, we're listing it again. It's that crucial.
Once you have your tools, find a clean, flat area near the pool—a lawn or a patio is perfect. Carefully unbox your new solar cover. It's going to have creases and memory from being folded up. This is completely normal. Unroll it completely and let it rest in the sun for at least an hour or two. What does this do? The warmth from the sun softens the material, allowing it to relax and lay much flatter. Trying to work with a stiff, wrinkled cover is a nightmare; it won’t sit properly on the water, which makes getting an accurate cut nearly impossible. This small waiting period is a non-negotiable step for a professional result.
The Initial Placement: Laying the Foundation for a Perfect Cut
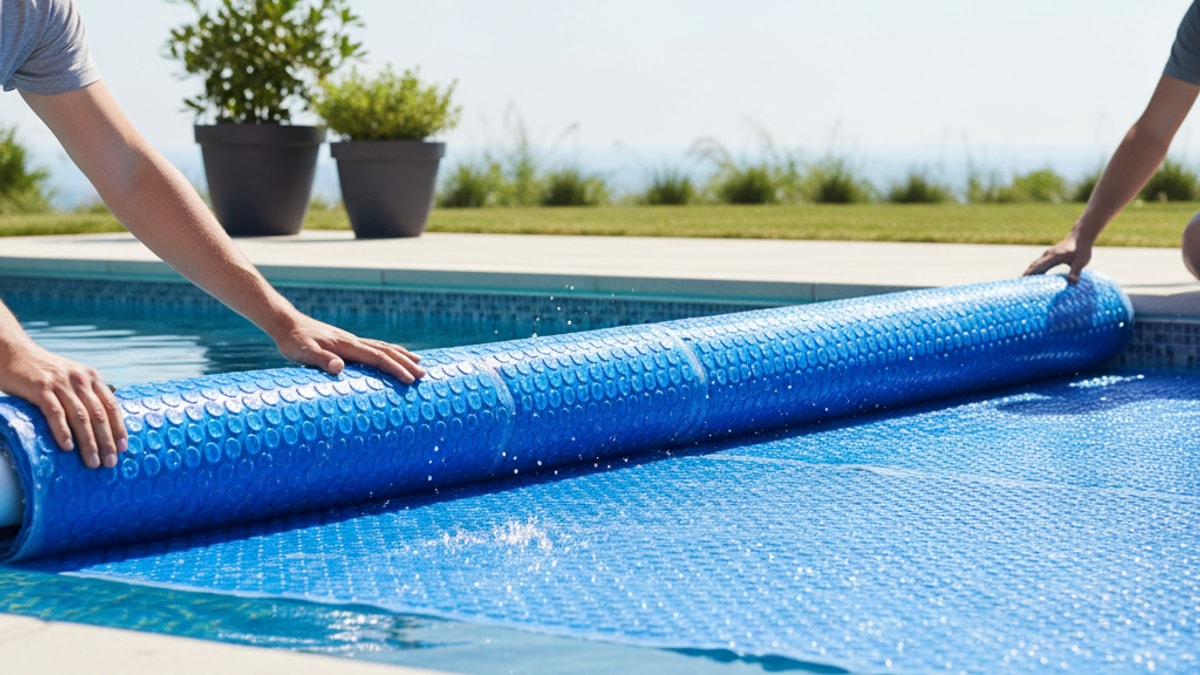
Now that your cover has had a chance to relax, it's time to get it on the water. This is where your helper becomes invaluable. Each of you take an end and carefully walk the cover over the pool, letting it settle onto the surface. Don’t just throw it on. Guide it gently.
Here's a critical point that trips up a lot of first-timers: bubbles down.
The flat, smooth side of the cover should be facing up towards the sky. The bubbly side must face down into the water. It seems counterintuitive, right? But there’s solid science behind it. The bubbles create an insulating layer of air, trapping the sun’s heat and transferring it into the water. They also help the cover float properly. Putting it on bubble-side-up dramatically reduces its effectiveness.
With the cover on the water, use your soft broom or pool brush to gently push it around. Your goal is to smooth out any large air pockets trapped underneath and ensure the material is as flat as possible against the surface. You'll also want to make sure the cover rides up the sides of the pool wall by an inch or two all the way around. This excess material is your safety net for the trimming phase. It's much, much better to have too much material than too little.
Let it sit. Again. We recommend leaving the cover on the water for another hour or even a full day if you can. This allows the water to support the material and lets any remaining wrinkles from packaging completely disappear. It ensures the cover has settled into its final, relaxed shape before you make the first cut.
The Trimming Process: Where Patience Pays Off
This is the moment of truth. All the prep work leads to this. The golden rule here is simple: cut less than you think you need to. You can always trim more off, but you can never add material back on. We've seen homeowners get a little too confident and trim too much, leaving frustrating gaps where debris can get in and heat can escape.
Start at one point of the pool. Using your sharp scissors, begin trimming the excess material. The best method our team has found is to use the pool's edge or coping as your guide. You want the final cut to be flush with the vertical wall of the pool, just at the waterline. Some people prefer to have it ride up the wall by a tiny fraction of an inch, which can help it seal against debris. It's a matter of preference, but flush is standard.
For a rectangular pool, this is relatively straightforward. Kneel on the cover (it will support you) and work your way slowly along one edge. Make smooth, deliberate cuts. Don't try to rush it. Cut a few feet, check your line, and continue. That helper you recruited? They can help by providing gentle tension on the section you're about to cut, which helps create a cleaner line.
Remember, the cover will expand slightly in the hot sun and contract a bit when it's cool. Cutting it to be perfectly, tightly flush might mean it's too small on a cooler day. Leaving just a whisper of extra material—we're talking millimeters—can be a smart move. But don't overdo it. A cover that's too large will bunch up, get caught in the skimmer, and won't lay flat, which defeats the purpose.
It’s a delicate balance. Take your time. Work your way around the entire perimeter of the pool until you're back where you started. Done. Simple, right?
| Feature |
8 Mil Cover |
12 Mil Cover |
16 Mil Cover |
| Durability |
Good |
Better |
Best |
| Heat Retention |
Effective |
Very Effective |
Maximum Effectiveness |
| Lifespan |
2-3 seasons |
3-5 seasons |
5-7+ seasons |
| Weight & Handling |
Easiest to handle |
Moderate weight |
Heaviest, best with a reel |
| Initial Cost |
Lowest |
Mid-range |
Highest |
| Our Recommendation |
Best for budget-conscious owners or smaller pools. |
The most popular choice, a great balance of performance and cost. |
Ideal for those seeking maximum heat and the longest possible lifespan. |
Dealing with Irregular Shapes: A Modern Yardz Approach
Now, what if your pool isn't a simple rectangle? What if you have a beautiful, free-flowing kidney, lagoon, or Roman-end pool? This is where the art of trimming really comes into play, and where most DIY installations go wrong.
The principle is exactly the same: use the pool wall as your guide. However, the execution requires even more finesse.
For curved sections, you need to make smaller, more controlled cuts. Instead of long, sweeping scissor strokes, think of it as a series of short, connected snips. Follow the curve of the pool wall meticulously. This is another area where kneeling on the cover near the edge you're cutting provides the stability you need to be precise. Don't try to cut a curve by reaching from the pool deck; you'll never get a clean line.
If you have tight inside corners or unique features like built-in steps or a Baja shelf, approach them methodically. For a step area, you have two choices: cut a separate piece for the steps or create a flap. Our team generally recommends cutting the main cover to go straight across the step opening and then using the leftover material to cut a custom piece for the steps themselves. This is often cleaner and easier to manage.
For any complex pool shape, the key is to not get overwhelmed by the whole thing. Focus on one small section at a time. Cut a three-foot curve, then pause and assess. Move to the next section. By breaking a complex shape down into a series of manageable smaller shapes, the task becomes far less intimidating. This meticulous approach is central to our philosophy, whether we're installing a solar cover or executing a full [Landscape Design SAN Diego] project. Details matter.
Installing a Solar Cover Reel: The Ultimate Convenience
Let's be honest. Taking a solar cover on and off by hand is a chore. It's wet, it's heavy, and it's awkward. You end up dragging it across the patio, potentially picking up dirt and debris that then ends up in your pool. For any pool of a decent size, a solar cover reel isn't a luxury; it's a necessity.
It transforms a two-person job into a one-person, 30-second task. This convenience means you'll actually use the cover consistently, which is the only way to get the benefits you paid for.
Installation of the reel system itself will vary by manufacturer, so always follow their specific instructions. But attaching the cover to the reel follows a general process. The reel will come with a set of straps and connectors.
- Lay Out the Straps: Evenly space the straps along the edge of your pool cover that is closest to where the reel will be positioned.
- Attach to the Cover: The straps will have a plate or clip system. You'll typically punch a small hole in the cover (some come with a tool for this) and secure the plate or connector through it. Ensure they are firmly attached.
- Attach to the Reel: The other end of the straps will loop or clip onto the reel's aluminum tube. Make sure all the straps are the same length from the tube to the cover. If they aren't, the cover will roll up unevenly and create a lopsided, messy bundle.
Once attached, you can slowly crank the reel to roll the cover up for the first time. Watch it carefully to ensure it's tracking straight. If it starts to veer to one side, you may need to adjust the strap placement slightly. A perfectly aligned set of straps is the secret to a smooth, one-person operation. It makes all the difference.
Common Mistakes to Avoid When Installing Your Cover
Over the years, our team has seen it all. We've been called in to consult on projects where a simple installation went sideways. Learning from these common missteps can save you a world of headache.
- Cutting the Cover Off the Pool: Never, ever try to measure your pool and then cut the cover on your lawn or driveway. It will be wrong. Every single time. The only way to get a perfect fit is to cut it in place, on the water.
- Forgetting to Let It Relax: As we mentioned, this is a critical, non-negotiable element. A tense, wrinkled cover will lead to an undersized final product once it finally settles.
- Using Dull Scissors: This results in a chewed-up, ugly edge that can even start to degrade faster. A sharp tool is a safe tool and provides a much cleaner result.
- Cutting Too Much at Once: This is the most common and heartbreaking mistake. You get a little overzealous, snip off six inches instead of one, and now you have a permanent gap. Go slow. Trim a little, check it, and trim again if needed.
- Installing It Bubble-Side-Up: An easy mistake to make, but one that completely undermines the cover's heating and insulating capabilities. Bubbles always go down.
Beyond Installation: Caring for Your New Solar Cover
A solar cover is a durable piece of equipment, but it's not indestructible. A little care will dramatically extend its lifespan, protecting your investment. When you roll the cover off the pool using your reel, it's best to cover it with a protective sheet (many reels come with one). Prolonged, direct exposure of the rolled-up cover to intense sunlight can cause the layers to fuse together and degrade the material rapidly.
When it's time to close the pool for the season, clean the cover thoroughly with a pool-safe cleaner and a soft brush. Let it dry completely before folding or rolling it for storage. Store it in a sheltered area, like a garage or shed, where it won't be exposed to freezing temperatures or pests.
Proper care ensures your cover will be ready to go season after season, saving you money and letting you jump into a warm pool sooner. It’s an integral part of maintaining the beautiful [Pools AND Spas] that often serve as the centerpiece of a backyard retreat.
How a Solar Cover Fits into Your Total Backyard Design
A pool is rarely just a standalone feature. It’s the heart of a larger outdoor living environment. A well-maintained pool, kept warm and clean with a properly installed solar cover, becomes infinitely more usable. It encourages more time spent outdoors, connecting with family and friends. And that's what a great backyard is all about.
At Modern Yardz, our [Landscape Design SAN Diego] philosophy is holistic. We think about how all the elements work together. How the afternoon sun hits the patio, making [Patio Covers Pergolas SAN Diego] essential for comfortable dining. How strategically placed [Landscape Lighting SAN Diego] can transform the pool area into a dramatic, resort-like setting at night. How the soft, clean lines of modern [Concrete SAN Diego] work with the vibrant green of [Artificial Turf SAN Diego] to create a low-maintenance, high-impact space.
Your solar cover is a functional piece of this puzzle. By keeping your pool warmer, you're making the entire space more inviting. It complements the cozy ambiance of nearby [Fire Features] on a cool evening and makes an afternoon swim before firing up one of our custom [Outdoor Kitchens SAN Diego] that much more appealing. It’s all connected. Taking the time to install your cover correctly is an investment in the overall enjoyment of the beautiful, functional outdoor world you've created.
Taking pride in the details, like a perfectly trimmed solar cover, is a reflection of the pride you take in your entire home. It’s a small project that delivers an outsized return in comfort, savings, and enjoyment. And if you ever feel like the bigger picture of your backyard could use a professional eye, don't hesitate to BOOK MY FREE CONSULTATION. We're passionate about helping people create outdoor spaces they truly love to live in.


.webp)
.webp)