A patio cover is more than just a roof. It’s a declaration. It’s the architectural handshake between your home and your yard, creating a true outdoor room where life happens. Here in San Diego, where the sun is a constant and welcome companion, a well-designed patio cover isn't a luxury; it's a critical, non-negotiable element of a functional landscape. It’s the difference between a sun-scorched patch of concrete you avoid and a cool, shaded oasis where you gather for morning coffee, evening cocktails, and everything in between. We’ve seen this transformation hundreds of times across San Diego county, from the coastal breezes of Oceanside to the inland warmth of Chula Vista.
But the question of how to make a patio cover is a big one. A really big one. It’s a project that straddles the line between a rewarding weekend warrior challenge and a structurally complex undertaking best left to seasoned professionals. Our team at Modern Yardz has designed and built countless custom patio covers, and we've learned a thing or two—and sometimes the hard way—about what it takes to get it right. So, let's pull back the curtain and talk about what this project really entails, from the first sketch to the final screw.
Before You Even Lift a Hammer: The Planning Phase
Honestly, this is where most DIY patio cover projects go sideways. The excitement to start building often steamrolls the meticulous, sometimes tedious, work of planning. But our experience shows that 90% of a project's success is locked in before a single post hole is dug. This is the unglamorous part, but it’s everything.
First, let's talk legality and logistics. San Diego has its own set of building codes and permitting requirements. A freestanding patio cover under a certain size might not need a permit, but one attached to your house almost certainly will. These aren't just suggestions; they are regulations designed to ensure the structure is safe and won't come crashing down in a winter storm or during a seismic event. Navigating the city or county permitting office can be a formidable task, and a misstep here can lead to costly fines and teardowns. We can't stress this enough—check with your local building department first. Always.
Then there’s the design itself. A patio cover should look like it belongs to your home, not like an afterthought that landed in your backyard. What's the architectural style of your house? A modern, minimalist aluminum cover might look jarring against a Spanish-style stucco home. Conversely, a heavy timber-frame structure might overwhelm a sleek, contemporary ranch. The goal is cohesion. You need to consider rooflines, materials, colors, and scale. This is the core of what we do in our professional Services, blending new structures seamlessly with existing ones. The design dictates the materials, the engineering, and ultimately, the entire feel of your outdoor space.
And let's not forget the sun. Where does it hit your patio at 9 AM? What about at 4 PM during the hottest part of a summer day? The orientation of your cover, and whether you choose a solid or lattice roof, depends entirely on how you want to control that sunlight. A poorly placed cover might cast your kitchen into perpetual shadow or fail to block the relentless afternoon glare. We use design software to model sun paths throughout the day and year, ensuring the shade lands exactly where you want it, when you want it. It’s a nuanced but absolutely critical step.
Choosing Your Materials: Wood, Vinyl, or Aluminum?
The material you choose for your patio cover is a decision that impacts aesthetics, maintenance, longevity, and budget. There's no single 'best' choice—only the best choice for your home, your lifestyle, and your tolerance for upkeep. Here in San Diego, the intense sun and, for coastal homes, the salt air are major factors to consider.
Natural wood, like Redwood or Cedar, offers a timeless, organic beauty that is hard to replicate. It’s strong, can be stained or painted any color, and gives off a classic, sturdy vibe. The downside? Maintenance. Wood requires regular sealing or staining to protect it from moisture, UV degradation, and termites. If you’re near the coast, salt can accelerate this process. It’s a commitment, but for many, the aesthetic payoff is worth the annual work.
Aluminum is the polar opposite in many ways. It’s sleek, modern, and requires virtually zero maintenance. It won't rust, rot, or fall prey to insects. Modern aluminum patio covers come with high-quality, factory-applied finishes that last for decades and can even be embossed with a wood-grain texture for a more traditional look. Our team has found that for homeowners seeking a low-hassle, long-term solution, aluminum is often the top contender. Its one potential drawback is that it can dent, and in direct, intense sun, the metal can get quite hot to the touch.
Then there’s vinyl (or PVC), which strikes a balance between the two. It’s a cost-effective, low-maintenance option that won’t rot, peel, or need painting. It's a durable workhorse material. However, your color choices are typically limited to lighter shades (like white and tan), and it lacks the structural rigidity of wood or aluminum, often requiring internal wood or metal reinforcements for larger spans. It doesn't offer the warmth of wood or the sharp, modern lines of aluminum, but it’s an incredibly practical choice.
Here’s a quick breakdown our team often uses to help clients decide:
| Feature |
Natural Wood (e.g., Cedar, Redwood) |
Aluminum |
Vinyl (PVC) |
| Aesthetics |
Classic, warm, highly customizable |
Modern, clean lines, baked-on finish |
Clean, traditional look, limited colors |
| Maintenance |
High (requires regular staining/sealing) |
Virtually zero (rinse to clean) |
Very low (occasional washing) |
| Durability |
Good, but susceptible to rot, termites, warping |
Excellent, rust-proof, won't warp or crack |
Excellent, won't rot, peel, or blister |
| Cost |
Moderate to High (initial cost + ongoing maintenance) |
Moderate to High (initial cost) |
Low to Moderate (initial cost) |
| Heat Transfer |
Good insulator, stays cooler |
Conducts heat, can get hot in direct sun |
Good insulator, stays relatively cool |
| Our Team's Take |
Unbeatable natural beauty, but be ready for the upkeep. A true labor of love. |
The "set it and forget it" champion. Perfect for a sleek, modern look. |
A fantastic, budget-conscious workhorse that stands up to the elements. |
The Foundation: Setting Posts for Unflinching Stability
Everything—literally everything—depends on the foundation. A patio cover is a heavy structure that has to withstand wind, rain, and time. The posts are what transfer that entire load safely to the ground. Skimp here, and you're risking a catastrophic failure down the road.
It all starts with digging the footings. The depth and diameter of these holes are not guesswork; they're dictated by local building codes, soil type, and the size and weight of the cover. In San Diego, code typically requires a footing depth of at least 18-24 inches for a standard patio cover, but this can change. It has to be deep enough to get below any loose topsoil and into stable, compacted earth.
This is back-breaking work. We're talking about digging precise, clean holes with a post-hole digger or auger. Once dug, you'll place a cardboard forming tube (a Sonotube) into the hole and ensure it's perfectly plumb—meaning perfectly vertical. This is critical. A post that is even slightly out of plumb will transfer weight unevenly and compromise the entire structure's integrity.
Next comes the concrete. You'll need to mix bags of concrete mix with water to the proper consistency (think thick oatmeal, not soup) and pour it into the tubes. As you pour, you need to set your metal post anchor into the wet concrete. This anchor is what the wooden post will attach to, keeping the wood itself from making direct contact with the ground, which is the number one cause of rot. The anchor must be set to the perfect height and aligned precisely with the other post locations. You have one shot to get this right before the concrete starts to set.
This is a step where professional experience makes a significant, sometimes dramatic, difference. Our crews have set thousands of posts. We know how to read the soil, calculate the exact amount of concrete needed, and ensure every single post anchor is perfectly aligned and level before the concrete hardens. It’s a science and an art form, and it's the bedrock of a safe, permanent structure.
Framing the Structure: Beams, Rafters, and Ledger Boards
With your posts firmly anchored in cured concrete, it’s time to build the skeleton of your patio cover. This involves beams, which run horizontally on top of the posts, and rafters, which sit on top of the beams and create the plane of the roof.
If you're attaching the cover to your house—the most common approach—your first piece of the puzzle is the ledger board. This is a long, straight board (typically a 2x8 or larger) that is bolted directly to the framing of your house. This is not a place for shortcuts. The ledger board must be attached to the house's band joist or wall studs with heavy-duty lag screws, not just into the siding. Proper flashing must be installed behind and over the ledger to prevent water from getting between the board and your house, which can lead to devastating rot and structural damage. Our team has been called in to fix far too many leaky, improperly installed ledgers. It’s a critical connection point.
Once the ledger is securely in place, you’ll attach the support posts to their concrete anchors and then lift the main support beam into place, resting it on the posts. This beam needs to be perfectly level and secured to the posts with heavy-duty metal connectors. Getting a long, heavy beam into place is often a two or three-person job. It’s heavy, awkward, and has to be done with precision.
Next, you'll install the rafters. These smaller boards span the distance from the ledger board on the house to the support beam. Their spacing (typically 16 or 24 inches on-center) is determined by the roofing material you plan to use and the load it needs to support. Each rafter is attached at both ends using metal joist hangers for a secure, lasting connection. The process is repetitive, but every single rafter must be cut to the exact same length and installed perfectly parallel to its neighbors. The visual quality and structural soundness of your roof depend on this precision. This is what transforms a collection of parts into a cohesive, strong frame, the kind we build for every project on our Home page.
The Roofing Decision: Solid vs. Lattice
Now for the part that defines the function and feel of your new outdoor room: the roof itself. You have two primary options, and the choice comes down to your goals for the space.
A solid roof offers complete protection. It blocks 100% of the sun's UV rays, creating a cool, deep shade. And—most importantly in our occasionally rainy winters—it provides total rain protection. This allows you to have true outdoor living, with cushioned furniture, outdoor rugs, and even electronics like a TV, without worrying about them getting soaked. Solid roofs can be made from insulated aluminum panels, wood planks with traditional roofing material on top, or even polycarbonate panels that block UV but allow some light through. A solid roof effectively creates a year-round extension of your home.
On the other hand, you have a lattice roof (often called a pergola, though the terms are used interchangeably). This style uses smaller strips of material (like 2x2s) spaced across the top of the rafters. It doesn't block all the sun, but instead creates a beautiful interplay of light and shadow. It provides partial shade, cutting the harshness of the direct sun while still allowing for a bright, airy feel. You get relief from the heat, but you don't lose the feeling of being outdoors. A lattice cover is perfect for homeowners who want to grow climbing plants like bougainvillea or jasmine up the posts, weaving them through the lattice for a stunning, natural canopy.
Which one is right for you? Ask yourself: Do I want a cozy, protected room or a bright, open-air space? Do I need rain protection for my furniture? Does the area get so much sun that partial shade won't be enough? We often discuss these lifestyle questions during our design consultations. You can find more inspiration on how different styles fit different yards on our Blog.
Finishing Touches That Make All the Difference
The structure is up. It’s strong, it’s level, and it’s ready. But it isn't finished. The final details are what elevate a basic structure into a beautiful, integrated part of your home and landscape.
For a wood patio cover, this means protecting the wood. You'll need to apply a high-quality primer followed by at least two coats of exterior paint, or several coats of a penetrating stain and sealer. This isn't just for looks; it's the wood's only line of defense against the elements. It’s tedious work, getting into every corner and crevice, but it's essential for longevity.
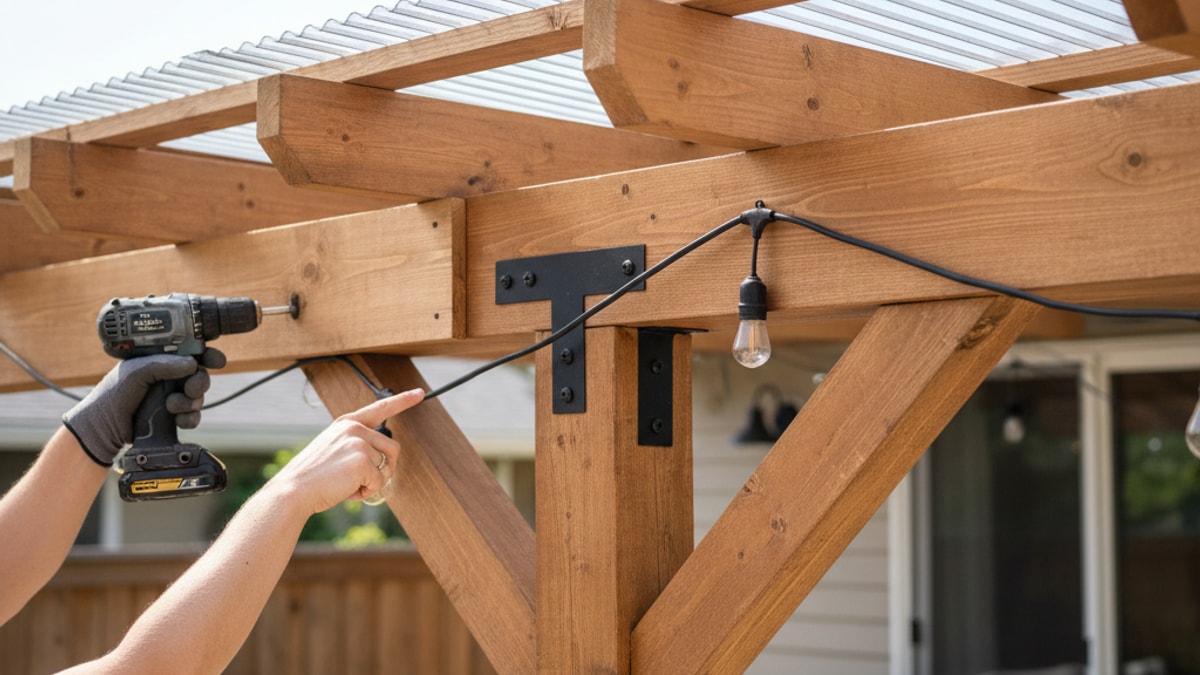
Then think about utilities. Do you want a ceiling fan for a gentle breeze on those still, hot summer days? Do you want recessed lighting for evening ambiance, or maybe some stylish café string lights? All the electrical wiring for these features needs to be run before the final roofing material goes on. This requires careful planning and, unless you are a licensed electrician, is a job that absolutely must be handled by a professional. Poorly installed outdoor wiring is a serious fire and safety hazard.
Finally, consider how the patio cover connects to the rest of your yard. Does it transition smoothly to a paver patio or a lush lawn? Do you want to build in a seating wall or planters around the base of the posts? This is where a holistic design approach shines. We don't just build patio covers; we design entire outdoor environments. Our whole philosophy, which you can read more about on our About page, is about creating spaces where every element works in harmony. A patio cover is a dominant feature, and it should feel anchored and connected to the landscape around it.
DIY vs. Hiring a Pro: An Honest Conversation
So, after all that, can you build your own patio cover? The answer is a qualified maybe. If you have significant carpentry experience, a full set of professional-grade tools, a strong back (and a few equally strong friends), and an abundance of time and patience, it is certainly possible. There's a deep sense of satisfaction that comes from building something substantial with your own two hands.
However, it's crucial to be unflinchingly honest about the scale and risks of this project. This isn’t like assembling a piece of furniture. A small mistake in measurement can cascade into major fitment issues. A poorly secured ledger board can cause catastrophic damage to your home. An improperly designed foundation can lead to a structure that shifts, sags, or fails entirely. We've seen it happen, and the cost to fix a botched job is often far greater than the cost of hiring a professional in the first place.
When you partner with a design-build firm like Modern Yardz, you're not just paying for labor. You're investing in expertise, efficiency, and peace of mind. You're getting a professionally engineered design that is tailored to your home and guaranteed to pass permit inspection. You're getting a seasoned crew that can execute that plan flawlessly in a fraction of the time it would take a DIYer. You're getting access to wholesale material pricing. And, perhaps most importantly, you're getting a warranty and the assurance that the job is done right, safely, and to code. We handle everything from the initial design concepts to the final cleanup.
If you're weighing your options and want to understand what's involved in a professional build, we're here to help. You can BOOK MY FREE CONSULTATION through our Contact page, and our team can walk you through the process, answer your questions, and provide a clear, no-obligation estimate.
Building a patio cover is a fantastic investment in your home and your quality of life. Whether you decide to take on the challenge yourself or entrust it to a team of experts, the goal is the same: to create a beautiful, durable space where you can make memories for years to come. It’s about extending your home, embracing the San Diego lifestyle, and creating your own private oasis, right in your backyard.


.webp)
.webp)