How to Level Ground for Pavers | Ground Prep & Soil Flattening Made Easy
However, the truth is that the most important part of a paver installation is what is underneath the pavers. A proper base is what gives your patio its strength and makes it last for decades. Knowing how to level ground for pavers is the single most crucial part of the entire project.
Without a properly leveled and compacted base, your pavers will not be able to do their job correctly. The individual pieces of the pavers need a solid, even surface to rest on. If the ground underneath is uneven or soft, the pavers will shift, sink, and create an unsafe, bumpy surface. This is a very common problem with bad paver installations, and it can be a nightmare to fix. A proper base, which includes a layer of compacted gravel and a layer of sand, is what allows the pavers to stay in place and handle a lot of traffic. The process of ground prep for paver installation is what ensures that your new patio will be a great investment and not a constant headache.
Another huge reason for a proper base is drainage. You might not think about it, but a paver patio needs to have a slight slope to it so that water can drain away from your house. If the ground is not leveled correctly, water can pool on the surface of your patio, which can cause problems with the pavers and the base underneath. Over time, a bad drainage system can lead to the pavers shifting and can even cause damage to the foundation of your house. So, when you are learning how to flatten soil for pavers, you also need to make sure you are creating a proper grade for drainage. This is a very technical part of the job that requires a lot of precision. Our team at Modern Yardz is expert at this part of the process. We have years of experience creating a solid foundation for all our paver projects. We take pride in our work and we know that a great patio starts from the ground up. You can see the quality of our paver services in San Diego by looking at our build portfolio.
Don't risk a bumpy, unstable patio with an improper foundation. Many homeowners trust our team to get the job done right the first time, ensuring their patio lasts for decades. Contact Modern Yardz today for a free quote and let us build a professional, long-lasting patio for you.
How Do I Mark and Measure the Area for Ground Leveling?
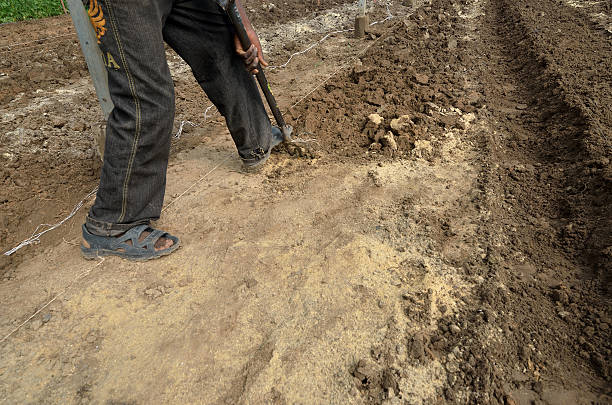
Before you can even begin digging, you need to know how to mark and measure the area for ground leveling. This is a very important part of the ground prep for paver installation process. The goal is to make sure you have a clear outline of the area you are working on and to figure out how much dirt needs to be removed. If you get this part wrong, you can end up with a patio that is the wrong size or one that is not level. A professional paver installation starts with a lot of careful planning and measuring.
Here is a step-by-step guide on how to mark and measure the area:
Step 1: Outline the Area. You should start by using marking paint or string and stakes to outline the exact shape of your patio or walkway. You should make sure all the lines are straight and that the corners are a perfect 90-degree angle. This is your first chance to make sure the dimensions are correct and that the patio will fit in the space.
Step 2: Determine the Grade. You should never have a perfectly flat patio. A patio needs a slight slope to allow water to drain off of it. The general rule is to have a slope of about 1/4 of an inch for every foot of patio. The slope should always be going away from your house or any other structure. You can use a line level to check your grade and make sure you have the right slope.
Step 3: Excavate the Area. You will need to dig down to a certain depth to make room for all the base materials. The depth of the excavation depends on the thickness of your pavers and the thickness of your base layers. You should always make sure you are digging down to a point where you will have enough room for the compacted soil, the compacted gravel base, the sand layer, and the pavers.
This part of the process is very technical, and it can be difficult to get it right. Knowing how to flatten soil for pavers requires a lot of precision. A professional team has the right tools and expertise to make sure the area is marked, measured, and excavated correctly. At Modern Yardz, we have years of experience with this process. We can help you with the initial design of your patio and make sure all the measurements are perfect before we even begin digging. Our team is committed to a perfect installation from start to finish. You can see examples of our detailed planning in our design portfolio. We also offer other great services like beautiful landscape lighting in San Diego that can make your new patio a great place to be at night.
Don't let the technical aspects of marking and measuring hold you back. Our professional team handles all the details, ensuring a precise and perfect installation from day one. Contact Modern Yardz for a free consultation and let us handle your project with the utmost care.
What Tools Do I Need to Flatten Soil for Pavers?
Knowing what tools you need to flatten soil for pavers is a big part of the preparation process. It can be a very physically demanding job, and having the right tools can make it a lot easier and ensure you get a professional result. The goal of this part of the process is to make sure the ground is perfectly flat and compacted before you lay any of the base materials. If the ground is not compacted properly, it can sink over time and cause the pavers to shift.
Here is a list of the essential tools you will need for ground prep for paver installation:
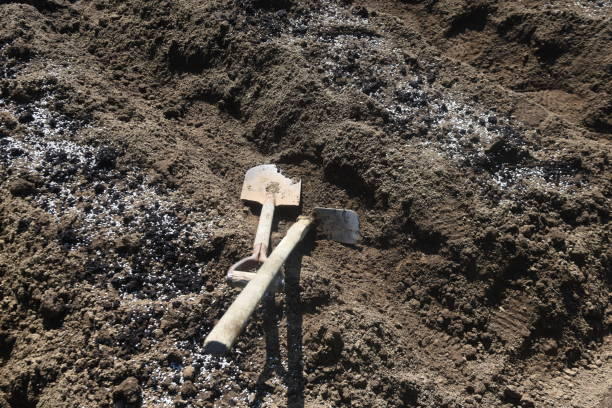
Shovels and Rakes: You will need a shovel for digging and a rake for spreading the soil and gravel. It is a good idea to have a couple of different types of rakes, one for digging and one for leveling.
String Line and Stakes: These are essential for marking the area and for checking the grade. You should use a strong string line and sturdy stakes to make sure your lines are straight and accurate.
Long Straightedge and Level: A long, straight piece of lumber or metal is perfect for leveling the ground. You should have a bubble level with it to make sure the ground is perfectly flat and has the right slope.
Plate Compactor: This is the most important tool you will need. A plate compactor is a machine that vibrates and compacts the soil and the base materials. You can rent a plate compactor from a home improvement store, but they are very heavy and can be difficult to use. A professional team will have a professional-grade plate compactor that will do a much better job.
Screed Board: A screed board is a long, straight piece of lumber or metal that is used to level the sand layer. It is used to create a perfect, even layer of sand for the pavers to rest on.
The process of how to level ground for pavers is a very physical and technical job. It requires a lot of time, effort, and the right tools to get it right. A professional team has all the tools and expertise to do the job correctly the first time. At Modern Yardz, we have years of experience with paver installation, and we know that a great patio starts with a great foundation. We can handle all the hard work and heavy lifting for you, so you can just enjoy the finished result. If you are ready to get started on your dream yard and want a professional team to handle the entire project for you, contact us for a free consultation. We also offer flexible financing options to help you get the patio you have always wanted.
How Do I Account for Drainage When Leveling Ground?
A common mistake homeowners make is thinking a patio should be perfectly flat. This is not the case, as a flat patio will just have water pooling on the surface every time it rains. A crucial part of knowing how to level ground for pavers is accounting for drainage. A good paver patio must have a slight slope or "grade" to it, which allows rainwater to run off the surface and away from your house. This prevents water from sitting on the pavers, which can lead to a host of problems, including mold, mildew, and shifting pavers.
The general rule of thumb is to create a slope of about 1/4 inch for every foot of patio. This might sound like a small amount, but it is enough to get the water moving without being noticeable to the eye. The slope should always be directed away from your house or any other structure. You do not want water draining towards your home's foundation, as this can cause a lot of damage over time. The process of ground prep for paver installation requires a lot of precision to get this right. You need to be very careful with your measurements to ensure the grade is consistent across the entire patio.
Here is a simple way to create the right grade:
Determine Your Starting Point: The highest point of your patio should be right against your house. This is where you will start your measurements.
Set Your Stakes: You should set a series of stakes along the edges of your patio. The stakes should be placed at the beginning and the end of each slope.
Use a String Line and Level: You should run a string line from the highest point of the patio to the lowest point. Using a line level on the string, you should make sure you have the right slope. For every foot of patio, you should have a drop of about 1/4 of an inch.
Excavate to the Right Depth: You will need to excavate the ground to a specific depth to make room for the base materials. You will need to make sure that the bottom of your excavation also has the right grade.
This is a very technical part of the job, and it can be difficult to get it right. Our team at Modern Yardz has a lot of experience with this kind of precision work. We use professional-grade tools and techniques to ensure your patio has the perfect grade for drainage. A perfect patio starts with a perfect foundation. We also offer other great hardscaping services, like beautiful concrete patios in San Diego.
What Base Material Should I Use for Proper Support?
The base material you use is just as important as knowing how to level ground for pavers. The base is what gives your patio its strength and allows it to last for a long time. You can't just lay pavers on top of dirt. That would be a huge mistake, as the pavers would shift and sink very quickly. The base of a paver installation is made up of a few different layers, and each one has a very specific job to do.
The base is typically made up of two main layers: a compacted gravel base and a sand layer. Here is a more detailed look at the materials you will need for a proper ground prep for paver installation:
Compacted Soil: Before you lay any base materials, you need to make sure the underlying soil is compacted and has the correct grade. This is your first line of defense against shifting pavers. You should use a plate compactor to make sure the soil is as hard as it can be.
The Gravel Base: The gravel base is the main load-bearing layer of your patio. This layer is usually made of a crushed stone, like a Class II road base. You should lay the gravel in layers of about 2 to 4 inches and compact each layer with a plate compactor. The total thickness of your gravel base should be about 4 to 8 inches, depending on the type of pavers and the expected traffic. A thicker base is needed for a paver driveway. This is a very crucial part of the process, and it takes a lot of time and effort to get it right.
The Sand Layer: The final layer of your base is a thin layer of bedding sand. You should use a coarse, washed concrete sand for this layer. The sand is not for support, but for creating a perfectly level surface for the pavers to rest on. You should lay a layer of sand that is about 1 inch thick and then use a screed board to level it out perfectly. This is the last step of the ground prep before you can start laying the pavers.
Knowing how to flatten soil for pavers and install the base materials correctly is what separates a professional job from a DIY one. The entire process requires a lot of hard work and precision. At Modern Yardz, we use only the highest-quality materials and professional-grade techniques to ensure your patio has a rock-solid foundation. Our team is expert at all these steps, from the initial excavation to the final sand leveling. We also offer flexible financing options to help you get the patio of your dreams. If you are ready to get started, you can see all of our great work in our build portfolio.
How Can I Check That the Surface Is Even Before Laying Pavers?
After you have spent all that time and effort on ground prep for paver installation, you want to make sure the surface is perfect before you lay any pavers. Laying pavers is a permanent step, and any imperfections in the base will show up in the finished product. Knowing how to check that the surface is even is a crucial part of the process. You want to make sure your pavers do not wobble or sit at an angle. A final, meticulous check of the sand layer is a very important part of how to level ground for pavers.
Here is a simple and effective way to check that the surface is even:
Use a Long Straightedge: The best way to check for a perfectly level surface is to use a long, straight piece of lumber or metal. This is the same tool you would use to screed the sand.
Check in All Directions: You should place the straightedge on the sand and sweep it across the surface. You should do this in all directions, from side to side and from corner to corner. You are looking for any high spots or low spots. A low spot can be fixed by adding a little more sand and re-screeding the area. A high spot can be fixed by removing a little sand and re-screeding.
Check the Grade: You should also use a bubble level on top of the straightedge to make sure you still have the correct grade for drainage. You want to make sure your slope is consistent across the entire patio. This is the final check for how to flatten soil for pavers.
This final check is a very important part of the job, and it requires a lot of care and attention to detail. This is where a professional team really shines. Our team at Modern Yardz has a multi-step quality control process to ensure that the base for your pavers is perfect. We take our time and do the job right so that your finished patio is flawless. We are committed to a perfect installation from the first step to the last. We can help you with the entire design and installation process. If you are ready to get started on your dream yard, and you want a professional team to handle all the details for you, contact us for a free consultation. We would love to show you all the beautiful projects in our design portfolio.
Frequently Asked Questions. Here are some common questions. Find the answers you're looking for below.
What are the essential steps for how to level ground for pavers before starting ground prep for paver installation?
Modern Yardz advises beginning with clearing the area of debris, then grading the soil to ensure proper drainage. Ground prep for paver installation involves compacting the soil and creating a level base, which is critical when learning how to flatten soil for pavers to prevent future shifting.
How do I know when I’ve properly leveled the ground for pavers during ground prep for paver installation?
Modern Yardz recommends using a long level or string lines to check for uniform flatness. Accurate leveling is key in how to level ground for pavers to ensure stability and longevity.
What tools are best for how to flatten soil for pavers effectively during ground prep for paver installation?
Modern Yardz suggests using a shovel for initial grading, a rake for smoothing, and a plate compactor to compact the soil firmly during ground prep for paver installation.
Can I skip soil flattening when learning how to level ground for pavers?
Modern Yardz strongly advises against skipping this step because uneven or loose soil can cause pavers to shift, compromising the entire ground prep for paver installation.
How deep should I dig when preparing the ground to level for pavers during ground prep for paver installation?
Modern Yardz recommends excavating 6 to 8 inches to remove topsoil and create space for base materials, which is essential for proper ground prep for paver installation and how to flatten soil for pavers.
What materials should I use after leveling the ground to stabilize the base before laying pavers during ground prep for paver installation?
What materials should I use after leveling the ground to stabilize the base before laying pavers during ground prep for paver installation?
How important is drainage when learning how to level ground for pavers during ground prep for paver installation?
Modern Yardz emphasizes that proper drainage prevents water pooling under pavers, which can cause settling. Incorporating a slight slope during ground prep for paver installation helps maintain structural integrity.
What common mistakes should I avoid when flattening soil for pavers during ground prep for paver installation?
Modern Yardz cautions against inadequate compaction, failing to remove organic matter, and uneven grading, all of which can undermine how to flatten soil for pavers effectively during ground prep for paver installation
How do weather conditions affect the process of how to level ground for pavers during ground prep for paver installation
Modern Yardz recommends performing ground prep for paver installation during dry weather to avoid soil settling or muddy conditions that interfere with proper soil flattening.
Can I use heavy machinery for how to flatten soil for pavers in small DIY ground prep for paver installation projects?
Modern Yardz suggests smaller projects may only need manual tools, but a rented plate compactor can greatly improve soil flattening results and efficiency during ground prep for paver installation.
How do I handle uneven terrain when learning how to level ground for pavers?
Use additional excavation and fill with gravel or sand to create a uniform base before compaction.
What is the role of landscape fabric during ground prep for paver installation?
Landscape fabric can be used to prevent weed growth and stabilize the soil beneath pavers.
How do I maintain a level surface after installing pavers?
Regularly check for settling and refill joints with sand to maintain stability.
Is it necessary to waterproof the ground before leveling for pavers?
Waterproofing is generally not required but ensuring good drainage is essential.
How can I test the stability of leveled ground before laying pavers?
Walk over the prepared base and look for any soft spots; a properly compacted base will feel firm and stable.


.webp)
.webp)