A classic brick patio. It’s the backdrop for so many quintessential San Diego moments—weekend barbecues, quiet morning coffees, evening conversations under the stars. It feels timeless, permanent. And it can be. But we’ve seen the other side of it, too. The patios that heave and sink after one rainy season, the ones with sprawling weeds forcing their way through every joint. The difference between a beautiful, multi-generational feature and a weekend-warrior headache comes down to one thing: the process.
Here at Modern Yardz, we’ve designed and built countless outdoor living spaces across San Diego County, from cozy courtyards in Chula Vista to sprawling entertaining areas in Oceanside. We’ve learned—often through fixing the mistakes of others—what it truly takes to construct a brick patio that not only looks impeccable on day one but stands the test of time. It’s not just about laying bricks in a pretty pattern. It’s a formidable construction project that demands respect for the groundwork. So, let's pull back the curtain and walk through how to lay a brick patio the way our professional crews do it.
Before You Dig: The Planning Phase is Non-Negotiable
Honestly, the success or failure of your patio is decided long before you ever pick up a shovel. This is the stage where foresight pays massive dividends. Rushing here is a catastrophic mistake. We can't stress this enough.
First, think about the purpose. Is this a small, intimate space for a bistro set, or is it the foundation for a complete outdoor kitchen and dining area? The function dictates the size and location. Consider foot traffic patterns from your house. Where is the sun at different times of the day? You probably don't want your dining area in the blazing afternoon sun with no shade options. Our design services always start with these lifestyle questions, because a patio that isn't a joy to use is just a collection of bricks.
Next, you have to think about water. This is the silent killer of patios. You need to plan for a slight, almost imperceptible slope—we recommend a quarter-inch drop for every foot of run—directing water away from your home's foundation. Always away. A level patio is a pool. A patio sloped toward your house is an invitation for moisture damage that can be devastatingly expensive to fix. Mark your intended slope with stakes and string lines to visualize it before any dirt is moved. It’s a simple step that saves worlds of trouble.
And let’s talk logistics. Before you dig, call 811. It’s a free service that marks underground utility lines. Hitting a gas line or electrical conduit is a day-ruining, potentially life-threatening event. Don’t guess. Just don’t. You'll also want to check with your local San Diego municipality about permit requirements. Smaller patios on-grade often don't require one, but rules vary, especially if you’re building retaining walls or tying into other structures. It’s always better to know for sure.
Finally, calculate your materials. Measure the length and width of your planned patio to get the square footage. Add about 5-10% extra for cuts, mistakes, and breakage. This applies to your bricks, your base material, and your sand. Nothing stops a project dead in its tracks faster than running out of materials midway through. If this initial stage already feels like a lot, that's perfectly normal. It's a complex process, and if you'd rather have an expert team handle it from the start, this is a great time to BOOK MY FREE CONSULTATION.
The Groundwork: Excavation and Base Preparation
If the planning phase is the brain of the project, the base is its skeleton. It’s the unseen, unsung hero of a durable patio. Our team means this sincerely—90% of patio failures are due to a poorly prepared base. This is where you earn the longevity of your patio.
Your first task is excavation. You need to dig out the entire patio area to a specific depth. How deep? It depends on your soil and the materials you're using, but a good rule of thumb is to calculate the height of your brick (typically 2.25 inches), plus 1 inch for the sand bed, plus 4-6 inches for the compacted gravel base. So, you’re looking at digging down about 7-9 inches from your desired finished patio height. For San Diego's often-clay-heavy soil, we lean toward a deeper base—a solid 6 inches—to ensure stability.
Once excavated, the bottom of your trench—the subgrade—needs to be graded to match the slope you planned for earlier and then compacted. Thoroughly. We use a heavy-duty plate compactor for this, making several passes over the entire area until the soil is firm and unyielding. You can rent these from most equipment supply stores. Trying to do this with a hand tamper on anything but the smallest of areas is a grueling, often moving-target objective. A properly compacted subgrade prevents the entire patio system from settling over time.
Now, for the base material itself. We lay down a geotextile fabric first. Think of it as an insurance policy. This fabric separates your gravel base from the soil below, preventing them from mixing over time and compromising the structural integrity of the base. It also helps with drainage and weed suppression. It’s an inexpensive step that adds immense value.
On top of the fabric, you'll add your gravel base (often called crusher run or Class II base rock) in layers, or “lifts.” Don’t just dump all 6 inches in at once. It won’t compact properly. We recommend adding it in 2-3 inch lifts, lightly moistening each layer with a hose, and then compacting it thoroughly with the plate compactor before adding the next. You’re looking for a final base that is rock-solid and precisely sloped. This is the foundation. Mess this up, and nothing else you do will matter. It’s comprehensive, meticulous work.
Choosing Your Materials Wisely
Not all bricks are created equal, and the same goes for your other materials. The choices you make here affect not just the look but the performance of your patio. Our About page talks about our commitment to quality, and that starts with sourcing the right components for the job.
For pavers, you'll generally choose between clay bricks and concrete pavers. Clay bricks offer that classic, rich color that deepens over time, but they can be more brittle and absorbent. Concrete pavers come in a staggering variety of shapes, sizes, and colors and are incredibly durable and consistent. For patios, make sure you’re buying bricks rated for paving (often designated as “severe weathering” or SW), not facade bricks, which will crack and flake under foot traffic and moisture.
Your base and sand are just as important. Here’s a quick breakdown of the common choices.
| Material |
Primary Use |
Pros |
Cons |
| Class II Base |
Sub-base |
Excellent compaction, stable, great drainage. |
Heavy, requires machine compaction for best results. |
| Decomposed Granite |
Sub-base/Leveling |
Packs tightly, provides a firm surface. |
Can have drainage issues if not installed correctly. |
| Coarse Sand |
Leveling Bed |
Easy to screed level, allows for drainage. |
Can wash out over time if not properly contained. |
| Polymeric Sand |
Joint Filler |
Hardens to lock bricks, resists weeds/insects. |
More expensive, requires specific application process. |
We almost exclusively recommend a Class II aggregate base and a 1-inch bed of coarse concrete sand for leveling. It’s a time-tested system that provides the best combination of stability and drainage. The final component is your edge restraint. This is a critical, non-negotiable element. Without it, the bricks on the perimeter will slowly creep outward, creating unsightly gaps and leading to failure. You can use plastic or metal edging designed for pavers, or you can set a border of bricks in a concrete footing for a more integrated, robust edge.
The Screeding Process: Creating a Perfect Canvas
With your base compacted and your edge restraints installed, it’s time to create the sand bed that your bricks will sit in. The goal is a perfectly smooth, uniformly thick 1-inch layer of sand. The technique for this is called screeding.
You’ll need two parallel pipes or rails (1-inch outer diameter electrical conduit works perfectly) laid directly on top of your compacted base. Set them so the tops of the pipes are at the correct height for the bottom of your bricks. Then, you pour your coarse sand between the rails and pull a straight 2x4 board across the top of them, dragging it toward you in a slight side-to-side motion. This removes the excess sand and leaves a perfectly flat, smooth surface.
Work in sections you can reach without stepping on the freshly screeded sand. Once a section is done, you carefully remove the pipes and fill in the small trenches left behind with a little extra sand, smoothing it over with a trowel. It’s a process that requires a delicate touch. This sand bed is not compacted. It's meant to be a loose cushion that allows you to set each brick perfectly.
This is where homeowners often get into trouble, creating slight dips and rises that become major annoyances later. Our crews have a feel for this that comes from years of experience, knowing exactly how the sand will behave. It’s more art than science at this point. Patience is your best friend here.
Now, The Fun Part: Laying the Bricks
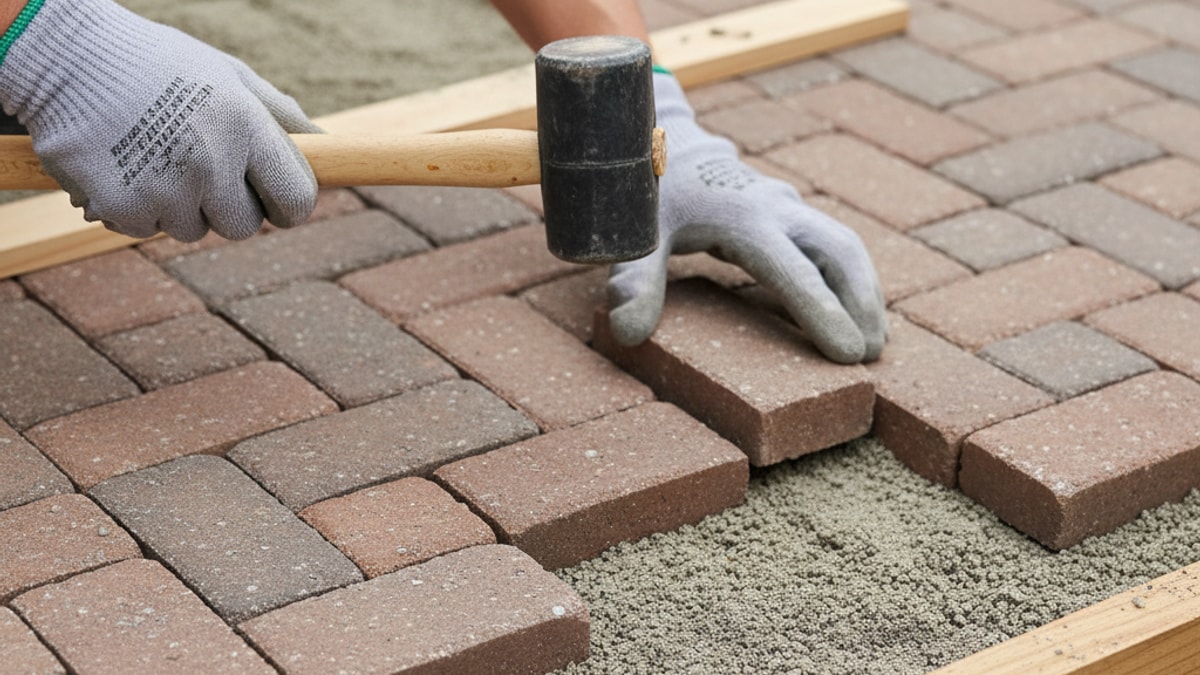
Finally! After all that prep, you get to actually lay some bricks. This is the most rewarding part of the process, where your patio starts to take shape. Start in a corner—preferably against the house—and work your way outward. Place the bricks gently onto the sand bed; don't slide them or press them down hard yet. This will disturb the sand. Just set them in place, using string lines stretched between your edges as a guide to keep your lines perfectly straight.
Your chosen pattern will dictate the process. A simple running bond or basket weave is more forgiving for beginners. A herringbone pattern looks spectacular but requires a significant number of angled cuts, which adds complexity. Use a rubber mallet to gently tap the bricks into place, getting them level with the adjacent ones. A long level laid across multiple bricks at a time will be your guide.
Inevitably, you’ll need to cut bricks, especially around the edges or any curves. A masonry saw (or a grinder with a diamond blade) is the right tool for this. Measure twice, cut once. And always, always wear safety glasses and a dust mask. Brick dust is no joke. Cutting is dusty, noisy work, but it’s what gives a project that sharp, professional look. If you see a patio with big, sloppy mortar joints at the edges, it’s a sign that someone skipped the hard part.
Locking It All In: Sand, Compaction, and Sealing
Once all the bricks are laid and the cuts are made, your patio is still just a collection of individual units sitting on sand. The final steps are what transform it into a single, interconnected, and durable surface.
First, sweep polymeric sand into the joints. This is a special type of sand mixed with a polymer that hardens when activated with water. It’s far superior to regular joint sand because it locks the bricks together, creates a formidable barrier against weeds, and won't wash out in the rain. Sweep it diagonally across the joints until they are completely full. Use a leaf blower on a low setting to blow off all the excess sand from the surface of the bricks. This is critical—any sand left on the surface will harden into a hazy film that’s very difficult to remove.
With the joints filled and the surface clean, it's time for the final compaction. Run your plate compactor over the entire patio. This vibrates the sand deep into the joints and settles the bricks firmly into the sand bed, creating a smooth, even surface. Don't skip this. It's what creates the interlocking strength.
After compaction, you'll likely need to top off the joints with a little more polymeric sand. Sweep it in, blow the surface clean again, and then you’re ready to activate it. Using a hose with a gentle shower nozzle, lightly mist the patio. You want to wet it just enough to activate the polymers without washing the sand out of the joints. Follow the specific instructions on the sandbag, as different brands have slightly different requirements for watering.
Let the patio cure for at least 24-48 hours before walking on it or putting furniture back. The final step, which we recommend doing after a few months to allow any efflorescence (white, salty deposits) to emerge and be cleaned, is to apply a good quality sealer. A sealer will protect the bricks from stains, enhance their color, and make them easier to clean. It’s the final layer of protection for your investment.
Learning how to lay a brick patio is a journey. It’s a project that is deceptively complex, with the most important work happening where no one can see it. It demands patience and a respect for the process. If you’re feeling inspired, we encourage you to explore more ideas on our Blog. But if you’re thinking that your time is better spent enjoying your backyard rather than building it, our team is here to help. We live and breathe this work, and we’d be honored to bring your vision to life. The satisfaction of a well-executed project is immense, whether you do it yourself or entrust it to professionals who stake their reputation on every single brick.


.webp)
.webp)