Here in San Diego, our outdoor spaces aren't just an afterthought; they're a core part of our lifestyle. It’s where we unwind, entertain, and soak in that near-perfect weather. But the unrelenting sun or an unexpected shower can quickly send everyone running inside. That's where a covered patio becomes less of a luxury and more of a necessity—it’s the key to unlocking true year-round outdoor living.
But figuring out how to build a covered patio that is both beautiful and structurally sound can feel like a formidable task. It’s more than just putting up some posts and a roof. It’s an architectural extension of your home. Our team at Modern Yardz has spent years designing and constructing these essential outdoor rooms all over San Diego County, from the coastal breezes of Oceanside to the sunny hills of Chula Vista. We’ve learned—often by fixing the mistakes of others—what it takes to do it right. This isn't just a guide; it's the culmination of our collective experience, designed to walk you through the process as if we were right there with you.
First Things First: The Critical Planning Phase
Before you even think about buying lumber or digging a hole, you need a plan. A rock-solid plan. We've seen countless projects stumble because of inadequate foresight, and honestly, this initial stage is where the success or failure of your covered patio is often decided. It’s not just about what it will look like, but how it will function as a part of your daily life. What's the ultimate goal here? Are you dreaming of a sprawling outdoor dining area for hosting epic dinner parties? A cozy, shaded lounge for reading on a lazy Sunday? Or maybe a functional poolside cabana to escape the midday sun?
Your answer to that question dictates everything that comes next—the size, the materials, the features. Our design process always starts with this conversation. We ask clients to imagine their ideal day in their new space. This isn't just fluff; it's a critical, non-negotiable element of good design. You also need to take a hard, unflinching look at your property. Where does the sun hit in the afternoon? Are there prevailing winds? What about the slope of the ground? In San Diego, we have everything from perfectly flat lots to dramatic canyonside properties, and each presents its own unique set of challenges and opportunities. A site assessment isn't just about measurements; it’s about understanding the environment your new structure will live in.
And then there’s the budget. Let’s be honest—this is crucial. It’s easy to get carried away with grand ideas, but a realistic budget is your best friend. Costs can be broken down into three main categories: materials, labor (whether it's your own sweat equity or a professional crew), and the often-forgotten administrative costs like permits and engineering plans. We always recommend creating a detailed budget with a 10-15% contingency fund. Unexpected things always happen. Always. Having that buffer prevents a small hiccup from turning into a project-derailing catastrophe.
Don't Skip This: Navigating San Diego's Building Codes
This is the part of the process that makes most people's eyes glaze over. We get it. Permits, regulations, and building codes aren't exciting. But ignoring them is one of the fastest ways to turn your dream project into a nightmare. We can't stress this enough: understanding your local requirements is not optional. The City of San Diego, as well as the county's various municipalities, have specific rules for structures like patio covers.
Generally, any covered structure over a certain size (it varies, but think around 120 square feet) or attached to your primary residence will absolutely require a permit. This process involves submitting detailed plans for review to ensure your structure is safe and meets all zoning requirements, such as property line setbacks and height restrictions. Why does this matter so much? Two reasons. First, safety. The codes are there to ensure your patio cover won't collapse in a windstorm or due to a seismic event. Second, your property value. An unpermitted structure can create massive headaches when you eventually decide to sell your home. It can scare off buyers and even lead to orders to tear it down.
Our team handles this entire process for our clients. We know the ins and outs of the local planning departments, and our experience helps streamline what can otherwise be a frustrating and time-consuming ordeal. Building a relationship with local officials, as we have over the years on our various Services projects, makes a significant, sometimes dramatic, difference. If you're tackling this yourself, our advice is to visit your local building department's website or office before you do anything else. Get the facts directly from the source. It will save you a world of pain later.
Choosing Your Materials: The Great Debate
Now for the more exciting part—deciding what your covered patio will actually be made of. The material you choose has a colossal impact on the final look, the required maintenance, and the overall cost. There are three main contenders in the San Diego market, and each has its own distinct personality and set of trade-offs. Our experience shows there's no single "best" option; there's only the best option for you.
| Material |
Key Advantages |
Key Disadvantages |
Best For... |
| Wood (Redwood, Cedar) |
Unmatched natural beauty, highly customizable (stains, paints), feels warm and traditional. |
Requires regular maintenance (sealing, staining), susceptible to termites and rot if not cared for. |
Homeowners seeking a classic, high-end look who don't mind a bit of annual upkeep. Perfect for craftsman or rustic style homes. |
| Aluminum |
Extremely low maintenance, resistant to rust, rot, and termites, strong and lightweight. Modern finishes available. |
Can dent on impact, may have a more "manufactured" look, can get hot in direct sun. |
The "set it and forget it" homeowner. Ideal for modern or contemporary homes and for properties near the coast due to its corrosion resistance. |
| Vinyl / Composite |
Virtually zero maintenance, won't rot, peel, or fade. Cleans easily with soap and water. |
Can look less premium than wood or aluminum, limited color palette, potential for warping in extreme heat over many years. |
Budget-conscious projects and homeowners who prioritize minimal maintenance above all else. |
We've found that wood, particularly Redwood or Douglas Fir, remains a favorite for its timeless appeal. The ability to stain it to match a home's existing trim is a huge plus for creating a seamless look. However, for homes right on the coast, we often recommend high-quality, powder-coated aluminum. The salty air is relentless, and aluminum's inherent resistance to corrosion is a massive long-term benefit. It's about weighing aesthetics against practicality—a decision we help homeowners make every day. You can see examples of different materials in our project galleries on our Home page.
The Foundation: Your Project's Bedrock
The most beautiful, well-designed patio cover is worthless if it's sitting on a shoddy foundation. This is the part of the build that gets buried in concrete and dirt, never to be seen again, but it is—without exaggeration—the most critical structural component of the entire project. This is where you absolutely cannot cut corners.
It all starts with the footings. These are the concrete piers that anchor your support posts to the ground. The size and depth of your footings are determined by a few factors: the size and weight of the structure they're supporting, and the type of soil you have. San Diego's soil can range from sandy loam to heavy clay, and each has different load-bearing capabilities. This is often where an engineer's calculations are required for the permitting process. They'll specify exactly how deep and wide each footing needs to be.
Digging these holes is hard work. It's grueling. But it has to be done right. Once dug, a concrete form (often a cardboard tube called a Sonotube) is placed in the hole, and a metal post anchor is set into the wet concrete. And—this is key—that anchor must be perfectly positioned and perfectly level. Our team uses laser levels and string lines to ensure every post location is precise to a fraction of an inch. A small mistake here gets magnified exponentially as you build upwards. A post that’s a half-inch off at the bottom could be several inches off at the roofline. That's a catastrophic error. It’s comprehensive, meticulous work, but it’s the only way to guarantee a structure that’s safe, secure, and built to last a lifetime.
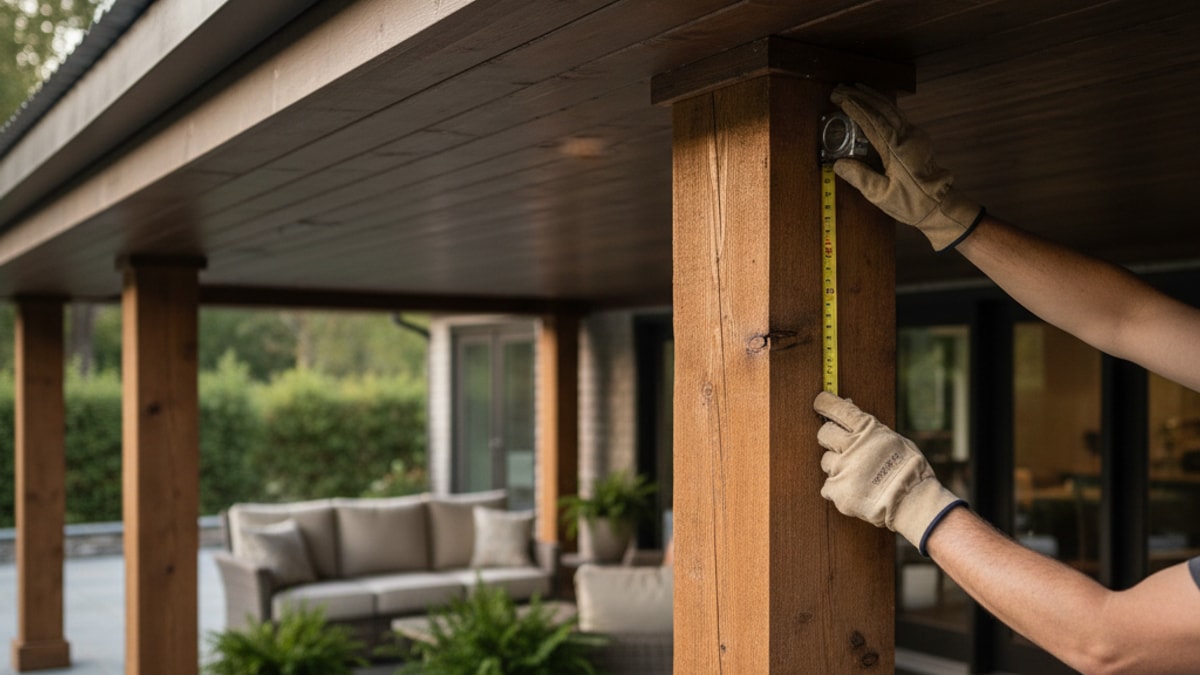
Framing the Structure: The Skeleton Takes Shape
With your posts securely anchored to their footings, it's time to build the skeleton of your covered patio. This is the framing stage, where the beams, headers, and rafters all come together. If the foundation is the bedrock, the frame is what gives the structure its strength and shape.
First up are the support beams. These are the heavy-duty timbers that span the distance between your posts. They carry the entire weight of the roof structure, so they need to be properly sized. A beam that's too small for its span will sag over time, creating a visually unappealing—and potentially dangerous—dip in your roofline. The connection between the post and the beam is also critical. We use heavy-gauge galvanized or stainless steel hardware specifically designed for these load-bearing connections. In our coastal climate, using the right metal is non-negotiable to prevent rust and corrosion from compromising the joint.
If you're attaching the patio cover to your house (a very common design), you'll install a ledger board. This board is bolted directly to the house's framing and serves as the mounting point for one side of your roof. Proper flashing is absolutely essential here to create a waterproof seal and prevent water from getting behind the ledger and rotting out the wall of your home. We've seen horrifying damage from improperly installed ledgers. It’s a detail that demands perfection.
Finally, you have the rafters. These are the smaller boards that run from the ledger board to the main support beam, creating the slope or pitch of your roof. They are the ribs of your structure. The spacing of the rafters depends on the type of roofing you'll be using and the loads it needs to support. It's a system where every piece works together—the posts support the beams, and the beams support the rafters. When it's all connected properly, you have an incredibly strong and rigid frame, ready for its covering.
The Roof Over Your Head: More Than Just Shelter
The roof does more than just keep you dry; it defines the character of your covered patio. The choice you make here will determine how much light gets through, the overall aesthetic, and the level of protection you get from the elements. There's a surprising amount of nuance here.
Your main options are a solid roof, an open-lattice roof (like a pergola), or a translucent roof.
A solid roof offers the most complete protection from both sun and rain. You can finish it with the same asphalt shingles as your house for a perfectly integrated look, or you could opt for a sleek standing-seam metal roof for a more modern vibe. Insulated roof panels are another fantastic option we often recommend. They not only block the sun but also significantly reduce the heat that radiates through, keeping the space below much cooler on a hot day. This is a game-changer for San Diego summers.
An open-lattice or pergola-style roof provides partial shade. It creates a beautiful interplay of light and shadow that shifts throughout the day. It's not going to keep you dry in a rainstorm, but it's perfect for filtering the harsh sun while maintaining a bright, airy feel. It's also an ideal structure for growing beautiful vining plants like bougainvillea or jasmine, adding a living element to your patio.
Then there's the hybrid approach: translucent roofing panels, typically made of polycarbonate. These are becoming increasingly popular, and for good reason. They block nearly 100% of harmful UV rays and provide full protection from the rain, but they allow soft, diffused natural light to pass through. This means you get to enjoy your patio even on a rainy day without feeling like you're in a dark cave. It's a brilliant compromise that offers the best of both worlds. Our team has installed all types, and the right choice really comes down to how you plan to use the space and the specific microclimate of your yard.
It's All in the Details: The Finishing Touches
A structurally sound frame and a solid roof make a patio cover. But the finishing touches are what make it an outdoor room. This is where you can infuse your personal style and add the functionality that will make you want to spend all your time out there. This is where a project truly comes to life.
Think about electrical. Running conduit for a ceiling fan is a must in our climate. The gentle breeze it creates can make the space comfortable even on the warmest days. What about lighting? We love incorporating recessed can lights on a dimmer switch for ambient evening light, and perhaps some sconces on the posts for a touch of elegance. And don't forget outlets! You'll want a place to plug in a speaker, a laptop, or maybe even a blender. Thinking about this during the framing stage makes it infinitely easier and cleaner than trying to add it later.
Then there’s the floor. The patio surface itself is a huge part of the overall design. We install everything from classic concrete pavers to sleek, modern porcelain tiles. The flooring should complement both your house and the patio cover itself. You can find more inspiration on our Blog. And why stop there? A covered patio is the perfect anchor for an outdoor kitchen, a cozy fire feature, or built-in seating walls. It becomes the hub of a complete outdoor living environment. This is the holistic approach we take in our designs—we don't just see a patio cover; we see the heart of a new backyard.
Ready to explore what's possible for your own home? Let's talk. You can BOOK MY FREE CONSULTATION with our design team, and we can start dreaming up your perfect outdoor space together.
DIY vs. Hiring a Professional: An Honest Look
So, after reading all this, the big question remains: can you build a covered patio yourself? The answer is... maybe. If you have significant construction experience, a full set of professional-grade tools, a strong back, and a lot of free time, it's certainly possible. The allure of saving money on labor is powerful, and we respect the DIY spirit.
However, it's important to be brutally honest about the risks. This is not a weekend project like building a garden box. A small miscalculation in your footings, an improperly attached ledger board, or an undersized beam can lead to catastrophic failure. The permitting process alone can be a maze of bureaucratic red tape for a homeowner. We've been called in to rescue more than a few DIY projects that have gone sideways, and it's often more expensive to fix the mistakes than it would have been to hire a professional from the start. That's the reality—it all comes down to risk.
Hiring a professional team like Modern Yardz is an investment in peace of mind. You're not just paying for labor; you're paying for expertise, efficiency, and accountability. You're paying for our knowledge of local codes, our relationships with suppliers, and our understanding of what works (and what doesn't) in the San Diego climate. We manage every single step, from the initial design concept to the final cleanup. You can learn more about our philosophy and team on our About page. We believe your time is better spent enjoying your backyard, not stressing over construction logistics.
Ultimately, building a covered patio is one of the best investments you can make in your home. It extends your living space, enhances your quality of life, and adds significant value to your property. Whether you decide to tackle it yourself or bring in a team of experts, the key is to approach it with careful planning and a commitment to quality. If you have questions or want to discuss your project, don't hesitate to Contact us. We're here to help San Diego homeowners create the outdoor spaces they've always dreamed of.
Your backyard has so much potential. A well-designed, professionally built covered patio can be the centerpiece that transforms it from just a yard into a true extension of your home—a place for celebration, relaxation, and making memories that will last a lifetime. It’s more than just a structure; it’s an upgrade to your entire way of life.


.webp)
.webp)