A concrete patio can be the unflinching heart of a San Diego backyard. It’s the stage for weekend barbecues, the quiet spot for a morning coffee, the foundation for an entire outdoor living space. We've seen it time and time again—a well-designed concrete surface completely transforms how a family interacts with their yard. It’s a significant, sometimes dramatic shift. But let’s be honest, the path from a patch of grass to a pristine, durable patio is paved with potential pitfalls. It’s more than just mixing some bags and spreading it around.
Our team at Modern Yardz has spent years designing and installing custom concrete features across San Diego County, from the coastal breezes of Oceanside to the sunny yards of Chula Vista. We’ve corrected the DIY projects gone wrong and perfected the techniques that ensure a patio doesn't just look good on day one, but endures for decades. This isn't just a simple how-to. This is our collected experience, the nuances and non-negotiable steps we follow on our own projects. We’re pulling back the curtain to show you how to build a concrete patio the right way, because we believe a solid foundation—in projects and in knowledge—is everything.
First Things First: Planning Your Perfect Patio
Before a single shovel hits the dirt, the most critical work happens on paper and in your head. Rushing this stage is the number one mistake we see. A catastrophic failure in a concrete project often traces back to a five-minute decision made in the very beginning. So, let's slow down and get this right.
First, think about function. How will you use this space? Is it for a large dining table that needs a sprawling, level surface? Or is it a more intimate setting for a couple of chairs around a future fire feature? The intended use dictates the size, shape, and even the location. We recommend using a garden hose or spray paint to outline the potential shape directly on the ground. Live with it for a few days. Walk around it. Does it feel right? Does it cramp another part of your yard? This simple visualization can save you a world of regret.
Now, let's talk about the silent killer of outdoor hardscapes: drainage. Water is relentless, and if you don't tell it where to go, it will make its own destructive path. Your patio must have a gentle, almost imperceptible slope away from your home's foundation. The standard we work with is a slope of 1/4 inch per foot. This means for a 12-foot patio, the far edge should be 3 inches lower than the edge against the house. It's not enough to notice when you're sitting at a table, but it's more than enough to ensure rainwater sheets off and away from your home, preventing a world of moisture-related issues. We can't stress this enough—improper slope is a foundational error that’s nearly impossible to fix later.
Finally, check with your local San Diego building department and your HOA, if you have one. Depending on the size and complexity of your patio (especially if it includes covers or retaining walls), you might need a permit. It’s a bureaucratic step, for sure, but it’s a critical, non-negotiable element of doing the job correctly and protecting your property's value. This planning phase is exactly where professional Services can make a formidable difference, turning a vague idea into a workable, compliant blueprint.
The Right Tools and Materials for the Job
Walking into a hardware store can be overwhelming. Let’s cut through the noise. Having the right equipment doesn't just make the job easier; it makes a professional result possible. You can rent some of the bigger-ticket items, but don't skimp. Fighting with bad tools is a miserable experience.
Here’s a breakdown of what our teams consider essential:
- For Excavation & Prep: A flat-head shovel, a pointed-end shovel, a wheelbarrow, a measuring tape, a level (a 4-foot one is best), a tamper (manual or a rented plate compactor), and plenty of stakes and string.
- For Forming: 2x4 lumber for the forms, a circular saw, a drill with screws (screws hold better than nails and are easier to adjust), and a hand sledge for driving stakes.
- For Mixing & Pouring: A concrete mixer (for anything larger than a tiny slab, this is a back-saver), a concrete hoe, and 5-gallon buckets. If you're doing a large patio, ordering ready-mix concrete is almost always the better option. It’s delivered ready to go, and the consistency is perfect.
- For Finishing: A screed board (a very straight 2x4), a magnesium float (or a bull float for larger areas), an edger tool, a groover (for control joints), and a steel trowel for a smooth finish or a stiff-bristled broom for a non-slip texture.
- Safety Gear (Non-Negotiable): Safety glasses, heavy-duty gloves, long sleeves and pants, and waterproof boots. Wet concrete is highly alkaline and can cause serious chemical burns. Treat it with respect.
When it comes to the concrete itself, you're typically looking at a bagged mix (like Quikrete) or a ready-mix delivery. For any patio of a reasonable size—say, over 50 square feet—we strongly recommend ready-mix. The cost is often comparable once you factor in the sheer volume of bags you'd need, and the quality control is far superior. It saves a monumental amount of physical labor. You’re not just mixing one bag; you’re mixing dozens, back-to-back, while the clock is ticking.
| Concrete Source |
Best For |
Pros |
Cons |
| Bagged Mix |
Small slabs, footings, post setting (under 50 sq ft) |
Available anytime, good for small batches, full control over timing |
Labor-intensive, consistency can vary, can be more expensive for large jobs |
| Ready-Mix |
Patios, driveways, large projects (over 50 sq ft) |
Perfect consistency, saves immense time and labor, cost-effective at scale |
Must be ready when the truck arrives, minimum order quantities may apply |
Laying the Foundation: Excavation and Formwork
This is where the real work begins. The strength and longevity of your concrete patio are determined not by the concrete itself, but by the base you build beneath it. Get this wrong, and you’ll be looking at cracks and heaving within a few years.
First, excavate the area. You need to dig down deep enough to accommodate a 4-inch layer of compacted gravel sub-base plus the 4-inch thickness of the concrete slab itself. That’s a total depth of 8 inches from your final desired patio height. Use your stakes and string lines to keep your excavation area square and your depth consistent. As you dig, ensure you're starting to build in that crucial 1/4-inch-per-foot slope for drainage.
Once excavated, it’s time for the sub-base. We use a crushed gravel aggregate. Spread it evenly across the entire area to a depth of about 4-5 inches. Now comes the most important part of this step: compaction. You must compact the gravel until it's a solid, interlocked base. A hand tamper works for very small areas, but for a patio, we absolutely recommend renting a plate compactor. Our experience shows that a poorly compacted base is the leading cause of slab failure. You want to make multiple passes over the entire surface until it's level, firm, and doesn't shift under your weight. It should feel solid. Rock solid.
With the base prepared, you'll build the formwork. This wooden frame will hold the wet concrete in place and define the final shape of your patio. Using 2x4s, build a box around the perimeter, screwing the corners together tightly. Use wooden stakes hammered into the ground every 2-3 feet on the outside of the frame to brace it. The forms must be strong. A cubic yard of concrete weighs about 4,000 pounds, and it will push against those forms with immense force. Any bowing or blowouts will be a disaster. Use your level to ensure the tops of the forms are perfectly set to the final height and slope of your patio. They are your guide for everything that comes next.
And another consideration—reinforcement. For most patios in a stable soil area like San Diego, a wire mesh or rebar grid is essential. It won't stop concrete from cracking (all concrete eventually gets hairline cracks), but it will hold the slab together tightly if it does, preventing sections from heaving or separating. The reinforcement should be positioned so it sits in the middle of the slab's thickness, not lying on the bottom. Use small blocks or 'chairs' to prop it up off the gravel base.
The Moment of Truth: The Pour
This is the day all the prep work pays off. It’s intense, it’s messy, and it’s extremely time-sensitive. Once that concrete starts flowing, you are on the clock. You have a limited window of workability before it begins to set, so you need a plan and, ideally, a few extra sets of hands.
If you're using ready-mix, coordinate with the driver to chute the concrete as close to the pour area as possible. If you're mixing bags, have one person dedicated to running the mixer while others transport and spread the concrete. Dump the wet concrete into the forms, starting at a far corner and working your way out. Use a shovel or a concrete rake to spread it evenly, making sure it fills every corner. It's crucial to slightly overfill the forms.
Now, you screed. This is the process of leveling the concrete. Take a long, perfectly straight 2x4 (your screed board) and, with a partner, rest it on top of the forms. Use a back-and-forth sawing motion as you pull the board across the surface, dragging the excess concrete with you. This scrapes the concrete down to the level of the forms, creating a flat, even surface. Fill any low spots that appear and screed the area again. Your goal is a perfectly flat plane that follows the slope you built into the forms.
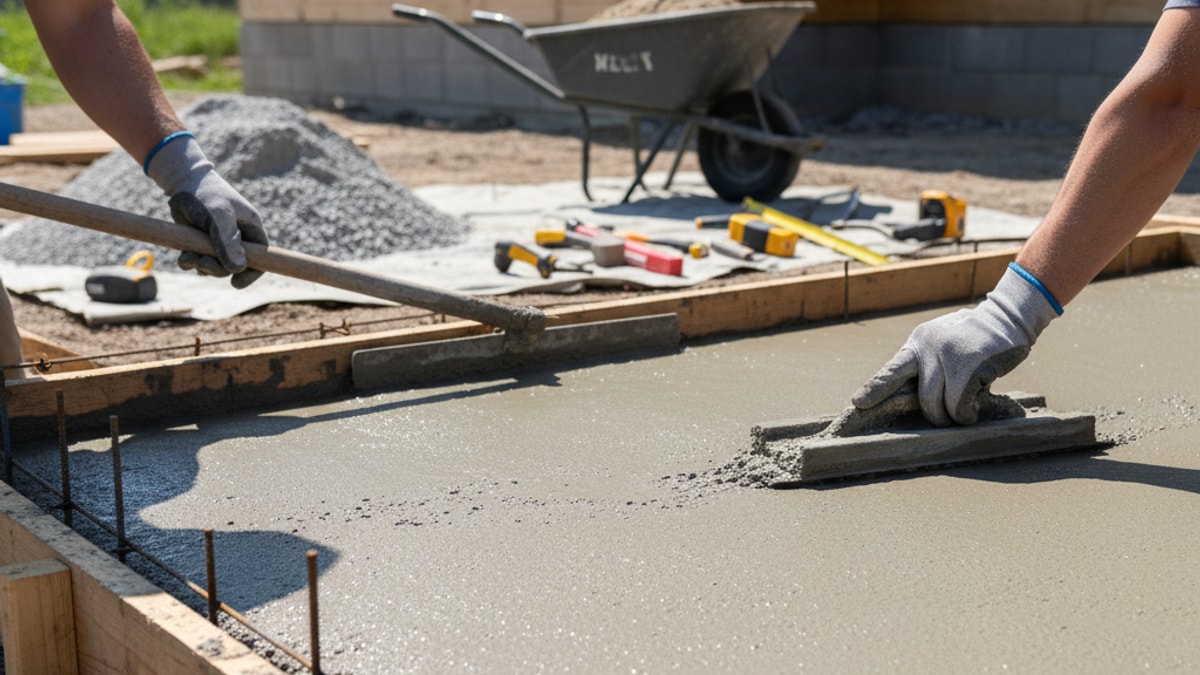
Immediately after screeding, while the concrete is still wet, you'll use a bull float. This is a long-handled tool with a wide magnesium head that you push and pull across the surface. This step does two things: it further flattens the surface, smoothing out the lines left by screeding, and it helps push the heavy aggregate down while drawing the finer cement 'cream' to the surface, which is essential for a smooth finish. Don't overwork it. A few passes are all you need.
The Finishing Touches: Adding Texture and Control
After floating, you have to wait. This part requires patience and a feel for the material. You need to wait for the “bleed water”—the sheen of water that rises to the surface—to evaporate completely. The surface will look dull. Working the concrete while bleed water is present will trap that water and severely weaken the surface, leading to flaking and scaling later. The timing depends entirely on the weather—it could be 20 minutes on a hot, dry Santa Ana day or a few hours on a cool, overcast 'May Gray' morning.
Once the bleed water is gone and the concrete has stiffened enough to hold its shape, it’s time for the final finish. Use an edging tool along the inside perimeter of the forms to create a clean, rounded edge. This isn't just for looks; it helps prevent chipping along the edges.
Next, you need to add control joints. Concrete shrinks as it cures, and this shrinkage creates stress that causes cracking. Control joints are shallow grooves that essentially give the concrete a planned, straight line to crack along, keeping random, ugly cracks from sprawling across your beautiful new patio. For a standard 4-inch slab, the joints should be at least 1-inch deep. You can use a special tool called a groover to create them while the concrete is still workable, or you can come back the next day and cut them with a concrete saw. We recommend placing them in a grid pattern no more than 10 feet apart in any direction.
Finally, apply the surface texture. The most common and practical finish for an outdoor patio is a broom finish. After all the other finishing steps are done, you gently drag a stiff-bristled broom across the surface in one direction. This creates a fine, non-slip texture that's perfect for outdoor spaces. For a smoother, more modern look, you can use a steel trowel, but be warned—a steel-troweled finish can be incredibly slippery when wet. This is where the artistry of our Home projects comes in, with options like stamped concrete or exposed aggregate finishes that require specialized tools and expertise.
The Final—and Most Important—Step: Curing
You're not done yet. Far from it. The first month in a concrete slab's life is the most critical. Curing is the process of maintaining proper moisture and temperature for the concrete to achieve its designed strength. Improper curing can reduce the final strength of the concrete by up to 50%.
Don't let the slab dry out too quickly. For the first 7 days, you need to keep the surface continuously damp. The easiest way to do this is to gently mist it with a hose several times a day, especially during the heat of the day. You can also cover it with plastic sheeting or curing blankets to trap the moisture. This slow, steady chemical reaction is what gives concrete its incredible durability. After about 24-48 hours, it should be hard enough to walk on gently, but avoid placing any heavy furniture on it for at least a week. It won’t reach its full design strength for about 28 days.
After the curing period, we highly recommend applying a good quality concrete sealer. This protects the surface from stains, moisture, and UV damage, keeping your patio looking new for years. Reapplying sealer every 2-3 years is a simple piece of maintenance that pays huge dividends. You can find more tips like this on our Blog.
Knowing When to Call for Backup
Building a concrete patio is a formidable undertaking. It's brutally hard physical labor, and the margin for error is razor-thin. A mistake with concrete is, quite literally, set in stone. If you're dealing with a complex shape, a steep slope, or just don't have the time and physical capacity for a project of this scale, it’s okay to call in the professionals. Honestly, it's often the smarter financial decision in the long run.
Our team at Modern Yardz is built on decades of this kind of work. We understand the specific soil conditions and microclimates of San Diego. We have the professional-grade equipment and the experienced crew to execute a pour flawlessly and efficiently. You can learn more about our philosophy and experience on our About page. A professional installation means peace of mind, a guarantee of quality, and a final product that enhances your home and lifestyle.
If you've read this far and are feeling a little overwhelmed, that's completely normal. This is a big job. If you'd rather spend your weekends enjoying your backyard instead of building it, we're here to help. You can reach out to our design team to discuss your project. We’d be happy to listen to your vision and provide a professional perspective. Why not BOOK MY FREE CONSULTATION and let us handle the heavy lifting? You can get in touch through our Contact page.
A patio is so much more than a slab of rock. It’s the place where your kids will run through the sprinkler, where you'll host milestone birthdays, and where you'll unwind after a long week. Whether you decide to tackle it yourself or bring in an expert team, building it on a foundation of knowledge and quality is the only way to ensure it lasts a lifetime.


.webp)
.webp)