A driveway is so much more than just a place to park your cars. It’s the handshake of your home—the first impression, the grand entrance. For years, homeowners were stuck with two main choices: boring, crack-prone concrete or messy, high-maintenance asphalt. But in 2026, the game has changed. Pavers have completely redefined what a driveway can be, offering a blend of jaw-dropping aesthetics and formidable durability that other materials just can't match. It's a significant, sometimes dramatic shift in curb appeal.
But let's be honest. The idea of installing one yourself can feel daunting. You've probably seen a neighbor's lumpy, weed-infested attempt and thought, 'no thanks.' We get it. Our team at Modern Yardz has spent years perfecting the process, and we’ve seen what separates a driveway that lasts three years from one that lasts thirty. The difference is always in the details. This isn't just a weekend project; it's an investment in your home's value and functionality. So, we're pulling back the curtain to show you the professional approach to how to make a driveway with pavers. This is our definitive breakdown, built from years of on-the-ground experience.
Why Choose Pavers for Your Driveway in 2026?
Before we get into the nitty-gritty of how to make a driveway with pavers, let's talk about the 'why.' Why are so many homeowners making the switch? It boils down to a few critical, non-negotiable advantages. First and foremost is visual appeal. Pavers offer a sprawling universe of colors, shapes, textures, and patterns. You can create a look that's uniquely yours, from a classic herringbone to a modern running bond. It’s a level of customization that a flat slab of concrete simply can't offer. This is where a great Landscape Design SAN Diego plan can integrate your driveway seamlessly with the rest of your property.
Durability is the next massive win. Unlike a single slab of concrete that will inevitably crack under pressure and shifting soil, a paver driveway is a flexible system of interlocking units. Each paver can move slightly, accommodating ground movement and the weight of vehicles without catastrophic failure. And if a paver does somehow get damaged or stained with oil? You don't have to rip out the entire driveway. You just pop out the offending paver and replace it. Simple. This repairability alone saves homeowners a fortune over the lifespan of the driveway. We've found that a properly installed paver driveway can easily last 30-50 years, which is a fantastic return on investment. The process of how to make a driveway with pavers correctly is what unlocks this longevity.
Before You Dig: Planning is Everything
You wouldn't build a house without a blueprint, and the same logic applies here. A successful project begins long before the first shovel hits the dirt. The planning phase is where you prevent the most common and costly mistakes. We can't stress this enough: measure twice, dig once. Start by mapping out the exact dimensions of your driveway. Use stakes and string, or even landscape marking paint, to get a clear visual. Consider the flow. How will vehicles enter and exit? Is there enough room for doors to open? Answering these questions now prevents major headaches later. Understanding the full scope of how to make a driveway with pavers starts with this crucial step.
Next, you have to think about what's underground. Before any excavation, you must call 811 to have public utility lines (gas, electric, water) marked. It's a free service, and it's the law. Hitting a utility line is not just dangerous; it's an incredibly expensive mistake. You also need to check with your local municipality about any required permits for this kind of work. Some areas have regulations regarding setbacks or water runoff that you need to be aware of. Finally, calculate your materials. You'll need to figure out the square footage for your pavers, the cubic feet for your base gravel, and the amount of bedding sand and jointing sand required. Always order about 10% extra of everything to account for cuts, mistakes, and waste. It's far better to have a little left over than to run out mid-project. A clear plan is foundational to knowing how to make a driveway with pavers.
The Essential Toolkit: Gathering Your Gear
Having the right tools for the job is non-negotiable. Trying to make do with the wrong equipment will lead to frustration and a subpar result. This isn't the time to cut corners. Here's a rundown of what our team considers essential for a professional-grade installation. The journey of how to make a driveway with pavers is made significantly easier with the right equipment.
| Tool/Material |
Purpose |
Pro Tip |
| Shovel & Wheelbarrow |
For excavation and moving materials like gravel and sand. |
A flat-head shovel is best for creating a level excavation base. |
| Plate Compactor |
Absolutely critical for compacting the gravel base and setting the pavers. |
Rent a heavy-duty reversible plate compactor. A small one won't provide adequate compaction. |
| Level & String Lines |
To ensure proper slope and a flat, even surface. |
Use a line level on your strings to maintain consistent grade across the entire project area. |
| Tape Measure |
For accurate measurements of the area, depth, and paver placement. |
A 25-foot or 50-foot tape is ideal for driveway-sized projects. |
| Screed Rails & Board |
To create a perfectly level 1-inch layer of bedding sand. |
Use 1-inch outer diameter metal pipes as your rails for precision. |
| Paver Saw / Angle Grinder |
For cutting pavers to fit along edges and curves. |
A wet saw minimizes dust and provides cleaner cuts. Always wear safety glasses and a mask. |
| Rubber Mallet |
To gently tap pavers into place and adjust their height. |
Use a white or non-marking mallet to avoid scuffing the paver surface. |
| Push Broom |
For sweeping jointing sand into the paver joints. |
A stiff-bristled broom works best to force the sand deep into the joints. |
| Safety Gear |
Safety glasses, gloves, dust mask, and steel-toed boots. |
Hearing protection is also a must when operating the plate compactor or paver saw. |
This list might seem extensive, but each item plays a vital role. Proper execution of how to make a driveway with pavers relies on having this professional gear at your disposal.
Step 1: The Excavation Phase - Digging Deep
This is where the real work begins. The strength and longevity of your paver driveway are determined not by the pavers on top, but by the foundation beneath them. And that foundation starts with proper excavation. For a standard residential driveway that will support cars and SUVs, you need to excavate a minimum of 7 to 9 inches deep. This allows for 4-6 inches of compacted base material, 1 inch of bedding sand, and the height of the paver itself (usually around 2 3/8 inches). If you expect heavier vehicles like an RV or a work truck, you need to go deeper—up to 12 inches for a more robust base. This depth is a core principle in how to make a driveway with pavers that won't sink or shift.
Equally important is establishing the correct slope for drainage. Your driveway must slope away from your house and garage, typically at a grade of at least 1/4 inch per foot. This prevents water from pooling against your foundation, which can cause catastrophic damage over time. Use your stakes and string lines to set this grade before you start digging. As you excavate, use your tape measure frequently to check your depth, ensuring it's consistent across the entire area, factoring in the slope. The soil you remove needs to go somewhere, so plan for that—whether it's a rented dumpster or another area of your yard that needs fill. Getting this step right is paramount to successfully learning how to make a driveway with pavers.
Step 2: Building an Unshakeable Foundation
We've seen it time and again: a beautiful paver installation fails within a few years because the base was an afterthought. The gravel base is the single most important component of your driveway system. Its job is to distribute the load of vehicles and provide a stable, frost-proof foundation. It is the absolute heart of how to make a driveway with pavers.
We recommend using a dense-grade aggregate, often called road base or ¾-minus gravel. This material contains a mix of stone sizes and fine particles that lock together tightly when compacted. You'll add the base material in 2- to 3-inch layers (or 'lifts'). After spreading each lift, you must run the plate compactor over it multiple times in different directions until it's completely solid. You'll know it's properly compacted when you can walk on it without leaving footprints. Repeat this process until you've reached your desired base depth (4-6 inches for most driveways). This relentless compaction is what prevents settling and rutting down the road. It’s tedious, but skipping it is a recipe for disaster. This is the professional secret for how to make a driveway with pavers that truly lasts.
Once the base is fully compacted and graded, it's time for the bedding sand. This is not the same as playground sand. You need a coarse, washed concrete sand. Spread a 1-inch layer over the entire base. Now, use your screed rails and a straight board to pull the sand smooth, creating a perfectly flat and level surface for the pavers to sit on. This screeded sand layer is what you'll actually lay the pavers on. Do not walk on it or compact it! Its purpose is to provide a setting bed, not structural support. The base does the heavy lifting. This nuanced step is essential in the process of how to make a driveway with pavers.
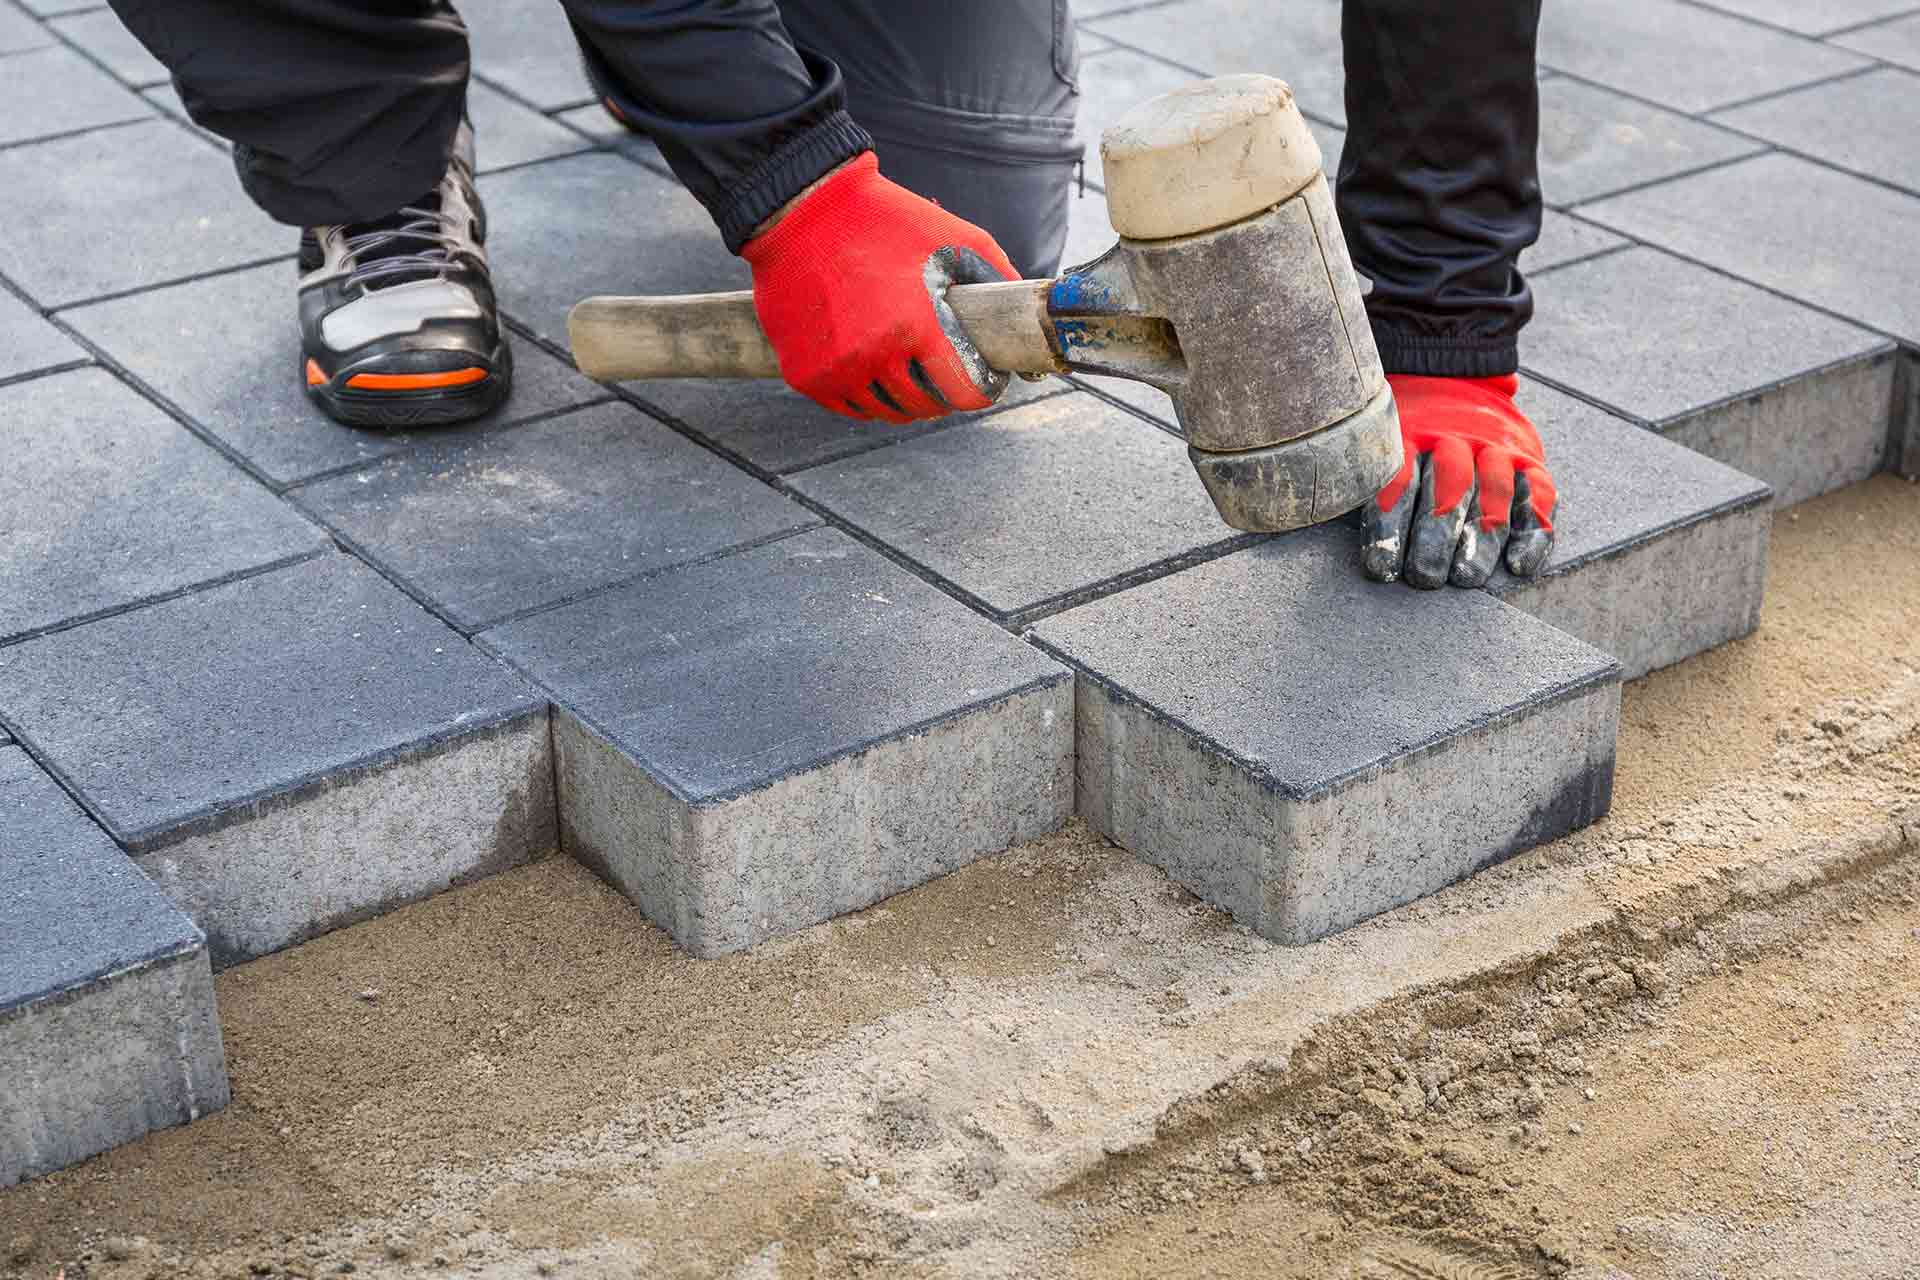
Step 3: Laying the Pavers - The Art of the Pattern
Now for the fun part! This is where your driveway starts to take shape. Choose a corner to start from and begin laying your pavers directly on the screeded sand. Place them gently; don't slide or push them, as this will disturb the sand bed. Work your way outward, setting the pavers hand-tight against each other. Most pavers have small spacer bars on their sides that create an automatic joint line, so you don't need to guess the spacing.
Your choice of pattern is important for both aesthetics and strength. For driveways, a herringbone pattern (at 45 or 90 degrees) is the strongest because it distributes weight across multiple interlocking pavers. A running bond pattern is also popular and strong enough for most residential use. Whichever pattern you choose, use string lines to keep your lines straight and true as you progress. Every few rows, step back and check your work from a distance. It's much easier to adjust a few pavers now than to realize your lines are crooked after you've laid half the driveway. As you lay the pavers, walk on the ones you've already placed, not on the bare sand. This part of how to make a driveway with pavers is a bit like putting together a giant, heavy puzzle.
Step 4: Cutting and Edge Restraints - Locking It All In
Unless your driveway is a perfect rectangle, you're going to have to make cuts. This is where the paver saw or angle grinder comes in. Measure the gap you need to fill, mark the paver, and make your cut. Always wear your safety gear during this step, as it creates a lot of dust and noise. The quality of your cuts will make a huge difference in the finished look of the project, so take your time and aim for precision. Knowing how to make a driveway with pavers includes mastering these finishing touches.
Once all your pavers are laid and cut, you must install edge restraints. This is another absolutely critical step that DIYers often neglect. Edge restraints are what hold the entire system together and prevent the pavers from shifting or spreading apart over time. You can use pre-fabricated plastic or metal edging designed for this purpose, or you can pour a concrete toe. The restraints are installed along the entire perimeter of the driveway and secured with long metal spikes driven into the compacted base. This structural boundary is essential. Sometimes, this edging can be incorporated into a larger hardscape element, like our custom Seat Retaining Walls, which can beautifully frame a driveway entrance.
Step 5: Jointing Sand and Compaction - The Final Lock
Your pavers are in, and the edges are secure. Now it's time to lock everything together. This is achieved with jointing sand. We strongly recommend using polymeric sand for driveways. Unlike regular sand, polymeric sand contains polymers that harden when activated with water. This creates a firm yet flexible joint that locks the pavers together, prevents weed growth, and resists erosion from rain and washing. It's a game-changer and a key part of the modern method for how to make a driveway with pavers.
First, make sure the surface of the pavers is completely dry. Sweep the polymeric sand over the entire driveway, working it into the joints with your push broom until they are completely full. Then, use your plate compactor (with a protective pad to prevent scuffing the pavers) to vibrate the sand down into the joints and settle the pavers into the bedding sand. This step is what creates the crucial interlock between the pavers. You may need to add more sand and repeat the process until the joints are filled to the top. Finally, use a leaf blower to gently blow all excess sand off the paver surfaces before you add any water.
Step 6: Sealing Your Paver Driveway for Longevity
After a final cleaning and allowing the polymeric sand to cure according to the manufacturer's instructions (usually 24-48 hours), the last step is sealing. While not strictly mandatory, our team highly recommends it. A good quality paver sealer will protect your investment from stains (like oil and rust), prevent fading from UV rays, and make cleaning easier. It can also enhance the color of the pavers, giving them a rich, 'wet' look if you choose a gloss finish, or keep them natural with a matte sealer. Applying the sealer is typically done with a roller or a sprayer. This final touch is the professional way to complete the process of how to make a driveway with pavers, ensuring it looks incredible for years to come. You'll want to re-seal the driveway every 3-5 years to maintain this protection.
Common Mistakes to Avoid
Our experience has shown us a few common, heartbreaking mistakes that can undermine an entire project. Here's what to watch out for when learning how to make a driveway with pavers:
- Inadequate Base Preparation: We've said it before, but it bears repeating. A weak, insufficiently compacted base is the #1 cause of paver driveway failure. Don't skimp on depth or compaction time.
- Forgetting About Slope: A flat driveway is a swimming pool waiting to happen. Ensure a proper slope away from your home from the very beginning.
- Skipping Edge Restraints: Without them, your pavers will slowly creep apart, creating unsightly gaps and a weak border. It's a guaranteed failure point.
- Using the Wrong Sand: Using playground sand for the joints or the wrong type for the bedding layer can lead to weeds, insect problems, and shifting pavers.
- Activating Polymeric Sand Too Soon: Getting the paver surface wet before all the excess sand is blown off can create a permanent, hazy film on your beautiful new pavers.
When to DIY vs. When to Call the Pros
So, can you really learn how to make a driveway with pavers yourself? The answer is... maybe. It's a physically demanding, technically precise project that requires specialized tools and a lot of patience. If you're an experienced DIYer with a strong back and an eye for detail, it's certainly achievable. You'll save on labor costs, and there's a huge sense of satisfaction in completing a project of this scale.
However, it's important to be realistic. This is a formidable undertaking. The excavation, the hauling of tons of material, and the relentless compaction can be grueling. Mistakes are not just costly; they're incredibly difficult to fix once the pavers are down. For many homeowners, the time, physical toll, and risk just aren't worth it. Our team at Modern Yardz specializes in creating flawless hardscapes, and our Pavers SAN Diego service ensures a perfect installation from the foundation up, backed by our expertise and professional equipment. We can integrate it with other features like elegant Landscape Lighting SAN Diego to truly elevate your home's entrance.
If you're weighing your options or just want an expert opinion on your project, don't hesitate to reach out. We're passionate about creating beautiful, functional outdoor spaces. Feel free to BOOK MY FREE CONSULTATION with our design team. We can walk you through the possibilities and provide a clear plan for bringing your vision to life, whether it’s just the driveway or a complete property transformation.
A paver driveway is more than an upgrade; it's a transformation. It’s a statement of quality and style that pays dividends in both daily enjoyment and long-term home value. Whether you decide to take on the challenge yourself or partner with a team of professionals, understanding the right way to do it is the key to success. Armed with this knowledge, you’re ready to create an entrance that’s not just built to park on, but built to last.


.webp)
.webp)