Creating functional, beautiful outdoor spaces often involves tackling challenging topography, an endeavor that frequently calls for the strategic placement of retaining walls. It's more than just stacking stones; it's about engineering beauty and stability into your landscape. In 2026, with evolving material science and design aesthetics, understanding precisely how to build retaining wall blocks has never been more critical for homeowners looking to elevate their property.
Here at Modern Yardz, we've spent years transforming outdoor areas, from initial Landscape Design SAN Diego concepts to the meticulous construction of every element. Our experience has shown us that a well-built retaining wall isn't just a utilitarian structure; it's a foundational piece that defines your yard's character, adds usable space, and prevents erosion. It's a significant investment, truly, and we want you to approach it with absolute confidence, whether you're considering a DIY project or partnering with professionals like our team.
Why Retaining Walls Are More Than Just Dirt Holders
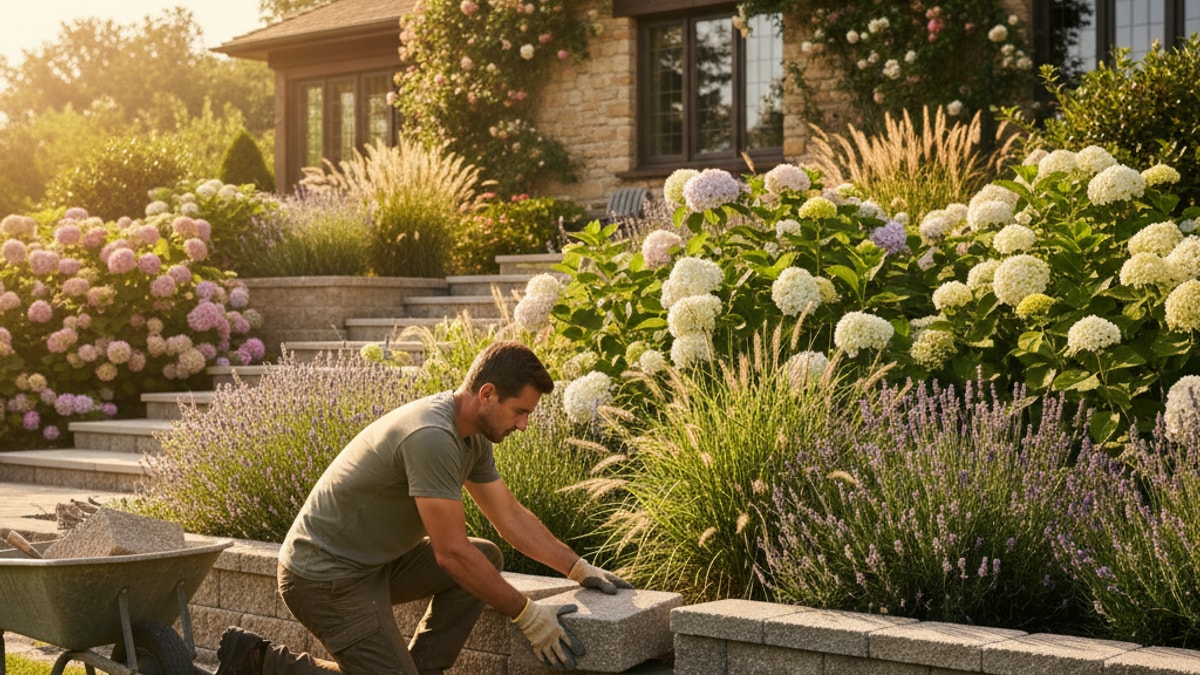
Think about it: a retaining wall is a silent, hardworking hero in your yard. It holds back soil, prevents erosion on sloped properties, and creates level areas for patios, gardens, or even Outdoor Kitchens SAN Diego. But beyond the practical, there's an undeniable aesthetic value. A thoughtfully designed wall can introduce visual interest, define different zones within your outdoor space, and even serve as integrated seating (think Seat Retaining Walls that double as social hubs). We've seen projects where a single, well-placed wall completely transforms a previously unusable slope into a stunning, multi-tiered oasis. It's truly remarkable.
Our team has observed a significant uptick in demand for robust, visually appealing retaining walls in recent years, especially as homeowners prioritize outdoor living more than ever. People are looking for enduring solutions that stand the test of time, and knowing how to build retaining wall blocks correctly is the cornerstone of that durability. Without proper construction, you're looking at potential structural failures, an unsightly mess, and a costly redo. That's the reality. It all comes down to impeccable planning and execution.
Understanding the Anatomy of a Great Retaining Wall
Before you even think about putting shovel to soil, it's crucial to grasp the fundamental components and considerations of these structures. Not all retaining walls are created equal, and the type of block you choose, alongside the wall's height and purpose, will dictate much of your approach to how to build retaining wall blocks.
We typically categorize retaining walls by their primary function and construction method. Gravity walls, for instance, rely solely on their mass and setback to hold back soil. Segmental retaining wall (SRW) blocks are a popular choice for this, offering a dry-stack, interlocking system that's relatively straightforward for many applications. Cantilevered walls, on the other hand, use a thin, reinforced concrete stem and a footing, often requiring professional engineering due to the forces involved. For most residential projects, especially those focused on DIY or manageable heights, you'll be dealing with gravity walls constructed from concrete segmental blocks.
Key design considerations always include drainage (a non-negotiable element, we can't stress this enough), soil type (which dictates pressure and potential for instability), and the overall grade of your slope. Our professional observations show that neglecting any of these can lead to catastrophic failure down the line. We mean this sincerely: a retaining wall runs on proper engineering and genuine attention to detail.
Planning Your Project: The Unflinching First Steps
This is where many DIYers either excel or stumble dramatically. Proper planning isn't just a suggestion; it's the critical, non-negotiable element for success when learning how to build retaining wall blocks. Forget this stage, and you're essentially building on quicksand.
First, assess your site. What's the slope? Where does water naturally drain? What's the soil like? Our team always conducts a thorough site analysis to understand the existing conditions. Next, check local building codes and permit requirements. This is absolutely paramount in 2026. Walls over a certain height (often 3-4 feet, but it varies) almost always require permits and possibly engineering plans. Don't skip this; the fines and forced demolition aren't worth the risk.
Then, design the wall. Sketch it out. Consider its length, height, and any curves. Remember, the general rule of thumb for dry-stacked SRW walls is that for every 1 foot of height, you'll need at least 6 inches of embedded base below grade. This is crucial for stability. Also, plan for utilities. You don't want to accidentally sever a water line or power cable. That's a nightmare scenario we help clients avoid with our meticulous pre-construction surveys.
Finally, gather your tools and materials. This isn't a job for inadequate equipment. You'll need more than just the blocks themselves. Think about geotextile fabric, crushed gravel for the base and backfill, perforated drain pipe, and capstones. We'll detail these further in a moment.
Laying the Groundwork: Preparing the Base for Retaining Wall Blocks
This stage is the absolute bedrock of your entire project. If the base isn't perfect, your wall won't be either. Period. We've seen it time and again: a rushed base leads to a leaning, failing wall. The first step in how to build retaining wall blocks correctly is excavation. You'll need to dig a trench that's wide enough for your block plus a few inches on either side for drainage material, and deep enough to accommodate your base material and the first course of blocks below grade.
Our professional observations suggest digging a trench approximately 24 inches wide for a standard 12-inch deep block, and deep enough so that at least one-third of your wall's total height is below grade. For instance, a 3-foot tall wall needs at least 1 foot buried. Add 6 inches for your compacted gravel base, and you're looking at an 18-inch deep trench. It's comprehensive, sometimes grueling work, but absolutely essential.
Once excavated, compact the subgrade soil thoroughly. We use a plate compactor for this; a hand tamper simply won't cut it for anything substantial. Then, add a 6-inch layer of crushed gravel (typically 3/4-inch angular stone, not round river rock, as angular stone locks together better). Level this gravel meticulously. We mean meticulously. Use a long level, a string line, and a rubber mallet. Every inch must be perfectly flat and level, both front-to-back and side-to-side. This ensures your first course of blocks will be perfectly true, which dictates the success of every subsequent course. We can't stress this enough: precision here prevents colossal headaches later.
The Art of Stacking: How to Build Retaining Wall Blocks Effectively
With your perfectly prepared base, you're now ready for the exciting part: laying the blocks. This is where your vision truly starts to take shape. Here's what we've learned through countless installations:
1. The First Course is Foundation: Place your first course of blocks directly on the leveled, compacted gravel base. Begin at the lowest point of your wall. Ensure each block is perfectly level, both individually and in relation to its neighbors. Use a string line stretched taut along the back of the blocks to maintain a straight line. If you're building a curved wall, mark your curve with spray paint or a garden hose first. This initial layer is paramount to how to build retaining wall blocks that won't shift over time.
2. Drainage, Drainage, Drainage: As you lay your first course, consider your drainage system. We recommend laying a perforated drain pipe (socked or wrapped in geotextile fabric) behind the first course of blocks, sloping slightly towards an outlet point. This pipe will collect water that seeps through the backfill, directing it away from the wall's base and preventing hydrostatic pressure from building up, which is a common cause of wall failure.
3. Backfill and Compaction: After laying the first course and placing the drain pipe, backfill behind the blocks with at least 12 inches of crushed gravel. This permeable material allows water to drain freely to your pipe. Compact this gravel in 6-inch lifts. Again, a plate compactor is your friend here. Do not use regular soil directly behind the wall; it holds water and will exert immense pressure.
4. Subsequent Courses: Stack the next course of blocks, offsetting the joints from the course below (like brickwork). Many segmental retaining wall blocks have a lip or pin system that naturally creates a slight setback, which is vital for stability. This setback leans the wall slightly into the slope, increasing its resistance to pressure. As you stack each course, constantly check for level and alignment. Our team often uses a long level to check several blocks at once.
5. Geogrid Reinforcement: For walls over 3-4 feet tall, or in areas with significant soil pressure, geogrid reinforcement is essential. This synthetic mesh is laid horizontally between courses of blocks and extends back into the soil, creating friction and tying the wall into the earth behind it. The specifications for geogrid vary by wall height and soil conditions, so consult an engineer or your block manufacturer's guidelines. We've found that proper geogrid installation is a game-changer for taller walls.
6. Capstones: Once you reach your desired height, the final touch is the capstone. These are typically larger, flatter blocks designed to sit on top, providing a finished look and protecting the wall from weather. Secure them with a strong, flexible construction adhesive. This gives your wall a polished, professional appearance, completing the process of how to build retaining wall blocks effectively and beautifully.
Essential Tools and Materials for Your Retaining Wall Project
Understanding the right equipment and supplies is just as important as knowing the steps. Here's a quick comparison of what you'll need:
| Item |
Description |
Why It's Critical |
| Retaining Wall Blocks |
Concrete segmental units, varying in size, color, and texture. |
The primary structural component. Choose based on aesthetics, height, and manufacturer's specs. |
| Crushed Gravel |
Angular stone (e.g., 3/4-inch clean stone or 'road base'). |
Forms the stable, permeable base and drainage layer behind the wall, preventing hydrostatic pressure. |
| Plate Compactor |
Heavy-duty machine for compacting soil and gravel. |
Essential for achieving the necessary compaction for a stable, long-lasting wall. Hand tampers are insufficient. |
| Shovels & Picks |
For excavation and moving materials. |
Basic tools for site preparation. |
| Long Level & String Line |
4-foot or 6-foot level, and a string line with stakes. |
Absolutely crucial for ensuring every block is level and aligned, both individually and across the course. |
| Rubber Mallet |
For gently adjusting blocks into place without damaging them. |
Helps in achieving precise leveling of individual blocks. |
| Perforated Drain Pipe |
4-inch diameter, typically rigid or flexible PVC, often wrapped in filter fabric. |
Collects and redirects water, preventing pressure buildup behind the wall. |
| Geotextile Fabric |
Non-woven fabric used to separate soil from gravel and wrap drain pipe. |
Prevents soil migration into the drainage layer and pipe, maintaining permeability. |
| Construction Adhesive |
High-strength, flexible adhesive for securing capstones. |
Permanently attaches capstones, providing a finished look and structural integrity to the top layer. |
| Safety Gear |
Gloves, safety glasses, steel-toed boots. |
Protects you from injury during heavy labor and operating machinery. |
Common Pitfalls and How We Avoid Them
Even with the best intentions, mistakes happen. Our team has, over the years, encountered every conceivable issue when it comes to retaining walls, and we've refined our processes to mitigate these common pitfalls. Let's be honest, this is crucial. One of the biggest errors we see is inadequate base preparation. Homeowners often underestimate the sheer weight of the wall and the soil it holds back, cutting corners on excavation depth or compaction. The result? A wall that settles unevenly, cracks, or even bulges outwards. When you're learning how to build retaining wall blocks, remember: the hidden work below ground is just as vital as the visible structure.
Another significant issue is poor drainage. Without a proper drain pipe and gravel backfill, water will inevitably accumulate behind the wall. This hydrostatic pressure can be immense, easily pushing even robust walls outward. We've seen walls literally explode under this pressure. Our solution? Meticulous drainage planning, as we discussed, ensuring water has a clear, unobstructed path away from the wall's foundation. This approach (which we've refined over years) delivers real results.
Incorrect block choice for the application is another pitfall. Not all blocks are designed for all wall heights or soil conditions. Consulting with a professional or understanding the block manufacturer's specifications is key. You wouldn't use a lightweight garden block for a 5-foot structural wall, right? Similarly, neglecting geogrid reinforcement on taller walls is a recipe for disaster. It's a critical component for distributing soil pressure and preventing wall failure.
Finally, skipping permit applications is a gamble that rarely pays off. In 2026, building departments are increasingly vigilant. An unpermitted wall might stand for years, but try selling your home, and you might find yourself facing a costly remediation order. We always advise our clients to follow proper channels, ensuring peace of mind and structural integrity. Our commitment to proper construction extends across all our services, from Pavers SAN Diego to Pools AND Spas.
Elevating Your Outdoor Space with Modern Yardz Expertise
Learning how to build retaining wall blocks can be a rewarding DIY project for smaller applications, but for larger, more complex, or structurally critical walls, partnering with experienced professionals makes all the difference. Our team at Modern Yardz specializes in turning ambitious outdoor visions into tangible realities. We manage every step, from the initial conceptualization in our Landscape Design SAN Diego service, through the meticulous construction, including expert installation of Seat Retaining Walls and integrating them with Fire Features or Landscape Lighting SAN Diego.
We understand the unique challenges of creating enduring, beautiful outdoor spaces. Our collective expertise ensures that your retaining wall isn't just structurally sound but also seamlessly integrated into your overall landscape design, complementing other features like Artificial Turf SAN Diego or Patio Covers Pergolas SAN Diego. We handle all the intricate details, from permit navigation to material sourcing, delivering a finished product that exceeds expectations. This comprehensive approach differentiates us, ensuring every project, even those involving complex Concrete SAN Diego work, is executed with precision and care.
Our goal is to build spaces where memories are made, structures that enhance your daily life and add lasting value to your property. We're here to help homeowners create outdoor spaces that are as functional as they are beautiful. When you're ready to tackle a significant landscaping project and truly understand how to build retaining wall blocks that last, we're here to guide you, or better yet, build it for you.
Frequently Asked Questions About Retaining Walls


.webp)
.webp)