How to Build a Retaining Wall? (Step-by-Step Process)
Research from the American Concrete Institute shows that approximately 60% of retaining wall failures stem from inadequate drainage design, not structural deficiencies in the wall material itself. The pressure exerted by saturated backfill can exceed 100 pounds per square foot — enough to push most improperly drained walls out of plumb within a single wet season.
We've designed and installed hundreds of retaining walls across varying soil types and slope conditions. The difference between a wall that lasts 30 years and one that fails in three comes down to preparation work that happens before you ever stack the first block.
How do you build a retaining wall correctly?
To build a retaining wall, excavate a level trench below the frost line, install compacted gravel base material at least 6 inches deep, set the first course below grade, backfill with drainage aggregate, and install perforated drain pipe behind the wall. Proper embedment depth and drainage are non-negotiable for structural integrity.
Understanding Load-Bearing Capacity and Wall Height
Before you select materials or break ground, you need to understand the relationship between wall height and structural requirements. Walls under 3 feet tall are typically considered non-engineered gravity walls — their mass alone resists soil pressure. Above 4 feet, most local building codes require engineered designs with geogrid reinforcement or tie-backs anchored into the slope.
The load-bearing capacity of your soil determines embedment depth. Clay soils with poor drainage create lateral pressure significantly higher than well-draining sandy soils. A wall holding back saturated clay might need embedment equal to one-eighth of the exposed wall height, plus 6 inches. For a 4-foot wall, that means burying the first 12 inches of block below finished grade.
Slope angle matters more than most homeowners realize. A gentle 3:1 slope exerts far less pressure than a steep 1:1 cut. If you're terracing a steep yard, multiple shorter walls with level benches between them distribute load better than a single tall wall. This approach also avoids engineered wall requirements in many jurisdictions.
Site Assessment and Excavation Preparation
Start by calling 811 at least three business days before digging. Utility strikes aren't just dangerous — they can add thousands in repair costs and delay your project timeline by weeks. Mark all flagged utilities with spray paint and stay at least 18 inches away from any marked line.
Next, establish your wall footprint with stakes and mason's line. Use a line level or laser level to verify the string is perfectly horizontal — this becomes your reference plane for the entire project. Most walls should have a slight backward lean (called batter) of about 1 inch per foot of height for stability. Your string line represents the front face of the finished wall.
Excavate your trench to the required depth, typically 6 to 12 inches below grade depending on wall height and frost depth. The trench should extend 12 inches behind the back face of your wall to accommodate drainage aggregate. Compact the trench bottom with a plate compactor — loose soil will settle unevenly and cause differential movement in your wall.
Base Preparation and Material Specification
The base layer is the foundation of structural integrity. Use ¾-inch crushed angular gravel, not round pea gravel. Angular particles lock together when compacted; round particles roll and shift. Spread the gravel in 2-inch lifts and compact each lift separately with a vibratory plate compactor. Your target is a minimum 95% compaction — you should barely see footprints when walking on properly compacted base.
Level is critical on the first lift, but a slight slope front-to-back aids drainage. Use a 4-foot level and check every 3 feet along the trench length. High spots will cause the first course to rock; low spots concentrate weight and accelerate settling. Take your time here — rushing base prep is the single biggest mistake we see on failed DIY walls.
For walls exceeding 3 feet, consider upgrading to a concrete footing. A poured footing 12 inches wide and 6 inches thick, reinforced with two runs of #4 rebar, provides a rigid base that won't settle differentially. This adds material cost but eliminates the most common long-term failure mode.
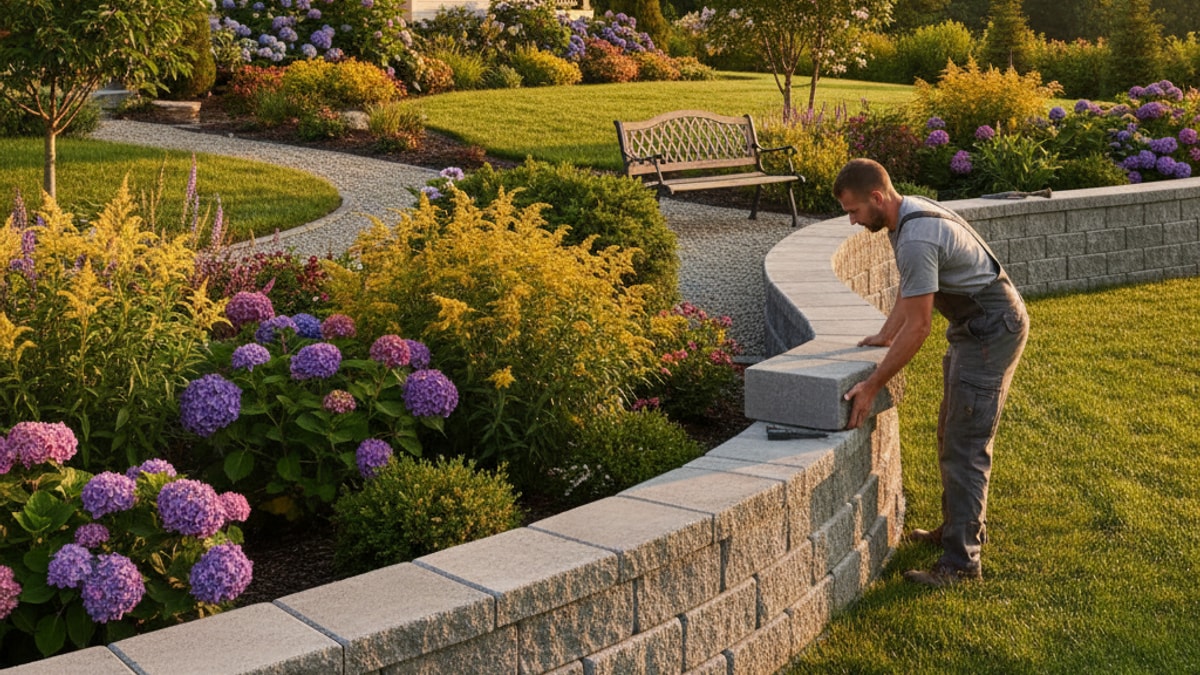
Installation Method for the First Course
The first course determines everything that follows. Set it perfectly level front-to-back and side-to-side, and check with a 4-foot level every single block. A block that's 1/8 inch high now becomes 1 inch high by the sixth course due to compounding error.
Most segmental retaining wall blocks have a built-in setback lip that creates automatic batter when stacked. Align this lip carefully — it controls your wall angle. Bury the first course so that only 1 to 2 inches remain exposed above finished grade in front of the wall. This embedment resists forward sliding from soil pressure.
Use construction adhesive rated for masonry on cap blocks only, never between structural courses. Structural courses need to move slightly during freeze-thaw cycles. Gluing them traps moisture and causes spalling. The interlocking design provides adequate shear resistance without adhesive.
Drainage Solution Behind the Wall
Here's the honest answer: no drainage system means eventual failure. Water weighs 62.4 pounds per cubic foot. When soil behind your wall saturates, hydrostatic pressure can double or triple the design load. Even a well-built wall will fail under those conditions.
Backfill the cavity behind your wall with ¾-inch washed drainage rock, not native soil. This aggregate allows water to drain freely down to a perforated drain pipe installed at the base of the wall. The pipe should have a minimum 2% slope and daylight to open air or connect to a storm drain — never terminate it into a dead end.
Install filter fabric between the drainage rock and native soil to prevent fine particles from migrating into the aggregate and clogging voids. Overlap fabric seams by 12 inches and run the fabric up the back of the wall, then fold it over the top of the backfill before covering with topsoil. This creates a burrito-wrap that keeps silt out of your drainage layer.
Comparison of Retaining Wall Material Options
Choosing the right material affects project timeline, workmanship warranty potential, and long-term performance. Here's how the most common options compare for typical residential applications.
| Material Type |
Cost Per Square Foot |
Maximum DIY Height |
Lifespan Expectation |
Drainage Requirement |
Professional Assessment |
| Concrete Block (SRW) |
$15–$30 |
4 feet |
30–50 years |
Backfill aggregate + pipe |
Best balance of cost, ease, and longevity for most homeowners |
| Poured Concrete |
$40–$75 |
No limit |
50–75 years |
Weep holes + drain pipe |
Requires forming expertise; overkill for walls under 4 feet |
| Natural Stone |
$50–$100 |
3 feet |
40–60 years |
Backfill aggregate + pipe |
Beautiful but labor-intensive; difficult to achieve consistent batter |
| Pressure-Treated Timber |
$10–$20 |
3 feet |
10–20 years |
Backfill aggregate + pipe |
Degrades quickly in wet climates; lumber costs volatile in 2026 |
| Boulder/Rock |
$30–$60 |
5 feet |
75+ years |
Minimal (voids self-drain) |
Requires excavator and skilled operator; excellent for natural aesthetic |
For most residential projects under 4 feet, segmental retaining wall blocks offer the best combination of ease, cost, and performance. They're engineered specifically for retaining applications, unlike concrete block or natural stone which require more skill to stabilize.
Key Takeaways
- Embedment depth should equal one-eighth of exposed wall height plus 6 inches minimum for walls over 3 feet tall.
- A 4-foot retaining wall exerts approximately 480 pounds per linear foot of lateral force on saturated clay soil without proper drainage.
- Always backfill with ¾-inch angular drainage aggregate, never native soil — round gravel and clay both trap water and increase hydrostatic pressure.
- Local building codes typically require engineered designs and permits for walls exceeding 4 feet in height or supporting surcharge loads.
- Proper base compaction at 95% density prevents differential settlement, the leading cause of mid-span cracking in block walls.
Step-by-Step: How to Build a Retaining Wall
Now that you understand the structural principles, here's the actual construction sequence. Follow these steps in order — skipping ahead or improvising will compromise structural integrity.
Step 1: Mark and Excavate
Stake your wall line and excavate a trench 12 inches wider than your block depth. Dig to frost line depth or 6 inches below grade minimum, whichever is deeper. Compact the trench bottom with a plate compactor until you can't see footprints.
Step 2: Install Base Material
Spread ¾-inch crushed angular gravel in 2-inch lifts. Compact each lift separately to 95% density. Use a 4-foot level to check for level front-to-back and side-to-side. Final base thickness should be 6 inches minimum after compaction.
Step 3: Set the First Course
Place blocks on the compacted base with front faces aligned to your string line. Check every block with a 4-foot level both directions. Bury this course so only 1–2 inches show above finished grade. Adjust base material under individual blocks as needed — never shim with wood or thin stone.
Step 4: Add Drainage Pipe and Rock
Place perforated drain pipe at the base of the wall, holes facing down, with a minimum 2% slope toward daylight. Begin backfilling behind the wall with drainage aggregate as you stack courses. Keep aggregate 6 inches from the back of each block to prevent voids.
Step 5: Stack Subsequent Courses
Align each block's setback lip with the rear edge of the block below. Stagger vertical joints by at least 6 inches — running joints create weak planes. Check level every course. Backfill and compact behind the wall every two courses to prevent the wall from bowing outward during construction.
Step 6: Install Geogrid (If Required)
For walls over 3 feet or supporting surcharge loads, install geogrid reinforcement every other course. Roll the grid perpendicular to the wall, extending into the slope a distance equal to 60% of wall height. Backfill over the grid with 6 inches of soil, compact, then continue stacking.
Step 7: Cap the Wall
Cap blocks provide a finished top surface and lock the final course in place. Use masonry adhesive specifically rated for outdoor use. Apply a continuous bead to the top of the last course, then set caps firmly. Wipe excess adhesive immediately.
Step 8: Finish Backfill and Grade
Complete backfilling behind the wall with native soil once drainage aggregate reaches within 6 inches of the top. Slope final grade away from the wall at 2% minimum to shed surface water. Compact all backfill to prevent settling.
What If: Retaining Wall Scenarios
What If the Ground Is Already Sloped and Uneven?
Step your wall in sections rather than following the existing slope. Each level section should be perfectly horizontal, with vertical drops between sections. Minimum step height is one full block; maximum is three blocks before starting a new level section. This maintains proper batter and prevents the wall from appearing to lean when viewed from the side.
What If I Encounter Large Rocks or Roots During Excavation?
Remove them completely rather than building around them. Rocks create voids that allow settling; roots decompose and leave voids. If you hit bedrock, you've found excellent bearing material — clean the surface and set your first course directly on rock with a thin leveling layer of coarse sand. If roots are from a tree you're keeping, consult an arborist before cutting anything over 2 inches in diameter.
What If Water Pools Behind the Wall After Heavy Rain?
Your drainage system has failed. Most likely the drain pipe outlet is clogged, crushed, or positioned above the water level. Dig test holes behind the wall to verify water is entering the drainage aggregate. If aggregate is dry but water pools on the surface, your problem is surface drainage — regrade the area behind the wall to direct runoff away. If aggregate is saturated, your pipe isn't functioning — you'll need to excavate and reinstall it properly.
What If the Wall Is Bowing Outward at the Middle?
This indicates inadequate backfill compaction during construction. As loose backfill settles, it pulls the top of the wall backward while saturated soil at mid-height pushes outward. If the bow is less than 1 inch, monitor it — it may stabilize. Beyond 1 inch, the wall is failing and requires reconstruction. Next time, compact backfill every two courses during construction, not after the wall is complete.
What If Local Code Requires a Building Permit?
Submit a site plan showing wall location, height, and distance from property lines. Many jurisdictions require walls over 4 feet to be engineer-stamped. Budget $800–$1,500 for engineering if required. The permit process typically adds two to four weeks to your project timeline but protects you from liability and ensures HOA compliance where applicable.
When Professional Help Is Worth the Cost
Let's be direct about this: retaining walls are one of the few landscaping projects where DIY mistakes cost more than hiring professionals from the start. A failed wall means excavating and rebuilding from scratch — you'll pay twice, once for materials you'll discard and again for the replacement, plus potential property damage from soil movement.
Our Seat Retaining Walls service handles permitting, engineering coordination, and installation with a workmanship warranty that covers structural performance. For walls over 4 feet, supporting structures like pools or patios, or retaining soil on steep slopes above 2:1, professional installation isn't optional — it's a liability shield.
The ROI on home improvement for professionally installed retaining walls averages 70–80% of project cost when selling, according to 2026 remodeling impact data. DIY walls, unless flawlessly executed, often raise inspection concerns that reduce property value. An inspector who sees a leaning wall assumes foundation problems throughout the property.
Common Mistakes That Compromise Structural Integrity
The biggest error is assuming that stacking blocks is enough. Weight alone doesn't retain soil at heights over 2 feet — you need embedment, drainage, and proper backfill. A wall sitting on grade with no base preparation will slide forward within one season.
Second: using the wrong backfill material. Clay soil expands when wet, exerting massive pressure. If you backfill with excavated clay, you're engineering failure into your wall. Always use free-draining aggregate directly behind the wall, even if it costs $40 per ton delivered.
Third: ignoring setback lip alignment. Each course must set back uniformly to create consistent batter. If one block sits too far forward, it creates a hinge point where the wall will crack. Check alignment with a string line on every course, not just eyeball it.
Fourth: attempting curved walls without understanding geometry. Curves require tapered blocks or cutting standard blocks at angles. Gaps between blocks on the inside radius must stay under ¼ inch or you lose structural interlock. Curves look elegant but add 40% to labor time and 20% to material waste.
Maintenance Schedule for Long-Term Performance
Retaining walls aren't set-and-forget. Inspect annually for signs of movement: cracks, rotation, or bulging. Use a level against the wall face — more than 1 inch of deviation from original plumb indicates active failure. Catching movement early allows repair before full reconstruction becomes necessary.
Clean drain pipe outlets twice per year, spring and fall. Leaves, silt, and roots clog perforated pipe surprisingly fast. If water can't exit, your drainage system becomes a bathtub behind your wall. Flush outlets with a garden hose to verify flow.
Monitor vegetation near the wall. Tree roots can lift blocks and compromise stability. Shrubs are fine; trees should be planted at least 10 feet away. If ivy or other climbing vines establish on the wall face, remove them annually — their roots penetrate block joints and accelerate deterioration.
Repair damaged blocks immediately. A single cracked block allows water infiltration that spreads freeze-thaw damage to adjacent blocks. Replace broken units before winter — ice expansion will make a small problem catastrophic.
Integrating Retaining Walls Into Landscape Design
A well-designed retaining wall does more than hold soil — it creates usable outdoor space. Terracing a slope with multiple walls yields level areas for patios, lawns, or planting beds. These flat zones dramatically increase your yard's functional square footage.
Consider combining wall projects with other improvements. A retaining wall that creates a level pad becomes the foundation for an outdoor kitchen or fire pit. At Modern Yardz, we often integrate Landscape Lighting SAN Diego into wall caps during construction — LED strip lights or post lights on walls create ambiance while improving safety on stepped terrain.
Curb appeal matters for resale value. A clean, straight wall with consistent coursing and a finished cap looks intentional. A wandering wall with mismatched blocks screams DIY mistake. If you're investing labor and materials, invest the extra time to make it look professional — the before-and-after difference is what buyers notice.
Walls taller than 4 feet benefit from planted terraces or shrubs at their base to soften the visual mass. A bare concrete face feels industrial; plantings make the wall look like it belongs in the landscape. Choose shallow-rooted species like ornamental grasses or low shrubs — avoid anything that will grow large roots near the wall.
How Modern Yardz Approaches Retaining Wall Projects
Every retaining wall we design begins with a site assessment that evaluates soil type, drainage patterns, and slope stability. We don't quote from photos — soil conditions vary dramatically even within the same neighborhood, and a price based on assumptions costs everyone time and money when conditions don't match expectations.
Our process starts with test pits to verify soil bearing capacity and water table depth. Clay soils get different base specs than sandy soils. We measure slope angles with an inclinometer, not eyeballing — a 1:1 slope requires geogrid reinforcement; a 3:1 slope may not. These details determine material specification and project timeline accuracy.
We're licensed and insured specifically for hardscape construction, which matters when structural work is involved. If a wall fails and damages property, homeowner's insurance typically won't cover DIY construction defects. Our workmanship warranty covers structural performance for the life of the installation when materials are maintained per our recommendations.
Related Services
Retaining walls often connect with other hardscape elements to create cohesive outdoor spaces. Our Pavers SAN Diego service frequently terraces into retaining walls to create multi-level patios with distinct zones for dining and lounging. We also integrate Fire Features into seated walls, combining function with gathering space that extends outdoor season usability.
For properties with challenging slopes, combining retaining walls with Concrete SAN Diego foundations creates stable pads for pools, spas, or outbuildings. Each element requires coordination during design to ensure grades, drainage, and access work together rather than conflict.
The structural work is half the transformation. The finished grading, planting, and lighting turn raw construction into outdoor living space. That's where Landscape Design SAN Diego integrates everything into a cohesive vision that matches how you actually use your yard.
If you're planning a wall that creates space for specific uses — a level lawn for kids, a patio for entertaining, or terraced planting beds — start with design before you start digging. The wall location, height, and finish details should serve your bigger vision, not get built in isolation and then force compromises on everything that follows. Check out our portfolio at Modern Yardz to see how we approach integrated outdoor projects.
If your property needs a retaining wall, the planning you do now determines whether it lasts three years or thirty. Proper embedment, drainage, and base preparation aren't optional steps you can skip to save time — they're the difference between a structural asset and a structural liability. Get the foundation right, and the rest is just stacking blocks.


.webp)
.webp)