A paver driveway isn't just a place to park your car. It's a statement. It's the first impression your home makes, a sprawling welcome mat that sets the tone for everything else. And in 2026, we’re seeing a significant, sometimes dramatic shift away from plain concrete toward these more elegant, durable solutions. But the difference between a stunning driveway that lasts for decades and a lumpy, weed-infested mess comes down to one thing: the process. It's all in the execution.
Our team at Modern Yardz has designed and installed countless paver driveways, and we've learned a thing or two. We've seen the DIY projects that went sideways and been called in to fix the work of less experienced crews. The truth is, understanding how to lay pavers for a driveway is less about the pavers themselves and more about what lies beneath. It’s a formidable construction project masquerading as a landscaping task. So, let's pull back the curtain and show you how the professionals get it done right, from the ground up.
First Things First: Planning Your Paver Masterpiece
You wouldn't build a house without a blueprint, right? The same unflinching logic applies here. Before a single shovel hits the dirt, you need a rock-solid plan. This is the stage where you save yourself from catastrophic headaches later on. Seriously. We can't stress this enough. A well-thought-out plan is the critical, non-negotiable element of knowing how to lay pavers for a driveway successfully.
First, assess the site. What are you dealing with? Is the ground sloped? Are there drainage issues? You absolutely must plan for water to run away from your home's foundation. A 1/4-inch drop per foot of run is a standard guideline, but your specific property might demand a more nuanced approach. Our team often uses laser levels to map out the topography with impeccable precision. This isn't just about avoiding puddles; it's about protecting the structural integrity of your home and the driveway itself. Another consideration is underground utilities. Before you dig, you must call 811 to have any buried lines marked. Hitting a gas or water line is a disaster you don't want.
Next comes the design phase. This is where the vision for your home's exterior truly comes to life. What style are you aiming for? Modern, rustic, traditional? The paver you choose will dictate the feel. Large format pavers lend a clean, contemporary look, while cobblestone styles create a classic, old-world charm. Color, texture, and pattern are all part of this equation. Herringbone, running bond, and basketweave are popular choices, each offering a different aesthetic and level of installation complexity. This is where our expertise in Landscape Design SAN Diego becomes invaluable; we help homeowners navigate these choices to create a cohesive look that complements their home's architecture. The process of how to lay pavers for a driveway is as much an art as it is a science.
Gearing Up: The Tools of the Trade
Having the right equipment is non-negotiable. Trying to tackle this project with just a shovel and a wheelbarrow is a recipe for exhaustion and a subpar result. The proper tools not only make the job easier but also ensure a professional-quality finish. It's a key part of how to lay pavers for a driveway that often gets overlooked by ambitious DIYers. Our trucks are loaded with specialized gear, but for a homeowner tackling the job, some are essential rentals.
Let’s be honest, the plate compactor is the MVP of this entire operation. You'll need it for the sub-base, the base, and the final setting of the pavers. Do not skip this. Rent one. You’ll also need a demolition saw (or a powerful angle grinder with a diamond blade) for cutting pavers to fit edges and curves. It's dusty, noisy work, but it’s the only way to get those clean, precise lines. Of course, you’ll need the basics: shovels, rakes, a wheelbarrow, a good level (a 4-footer at minimum), string lines, stakes, a rubber mallet, and plenty of safety gear like glasses, gloves, and hearing protection. The difference between a struggling amateur and a smooth-running pro often comes down to having the right tool at the right time. When you're learning how to lay pavers for a driveway, this is a crucial lesson.
| Tool Category |
Essential Equipment |
Recommended (But Optional) |
Professional-Grade |
| Excavation |
Shovel, Mattock, Wheelbarrow |
Mini Excavator (rental) |
Skid Steer |
| Base Prep |
Hand Tamper, Level, Rake |
Plate Compactor (rental is a must) |
Laser Level, Reversible Plate Compactor |
| Paver Laying |
String Line, Rubber Mallet, Stakes |
Paver Puller, Knee Pads |
Screed Rails, Paver Cart |
| Cutting |
Hammer & Chisel (for splits) |
Demolition Saw (rental) |
Wet Table Saw for Pavers |
| Finishing |
Stiff Bristle Broom |
Plate Compactor with Pad |
Power Washer, Sealer Sprayer |
The Real Work Begins: Excavation and Base Preparation
This is where the muscle comes in. It’s the least glamorous part of the project, but it is, without a doubt, the most important. The longevity of your driveway depends entirely on the foundation you build beneath it. A poorly prepared base will lead to sinking, shifting, and uneven pavers within a year or two. We've seen it happen. This is the core principle of how to lay pavers for a driveway properly.
First, you need to excavate. For a driveway that will support vehicles, you need to dig deep—typically 7 to 10 inches below your final desired paver height. This depth accounts for the paver itself, a layer of sand, and a thick, compacted base of gravel. The exact depth depends on your soil type (clay soils require a deeper base) and local climate (freeze-thaw cycles demand more robust foundations). As you dig, ensure you're maintaining that crucial slope for drainage we talked about earlier. Use your string lines and level to constantly check your grade. Knowing how to lay pavers for a driveway means becoming obsessed with your measurements at this stage.
Once excavated, the first layer down is a geotextile fabric. This is a professional touch that many DIY guides skip. This fabric separates your gravel base from the native soil below, preventing them from mixing over time and compromising the foundation. It’s a simple step that adds immense stability and longevity. Next comes the sub-base material, usually a 3/4-inch crushed stone aggregate. You'll add this in 2-3 inch layers (or 'lifts'), watering it lightly and compacting each layer thoroughly with the plate compactor. You should make multiple passes in different directions until the base is unyielding. This process is repeated until you’ve built up a solid 4-6 inches of compacted sub-base. It's grueling work, but it's what separates a 20-year driveway from a 2-year headache. Truly understanding how to lay pavers for a driveway means understanding the physics of load distribution, which all starts here.
The Art of the Perfect Screed
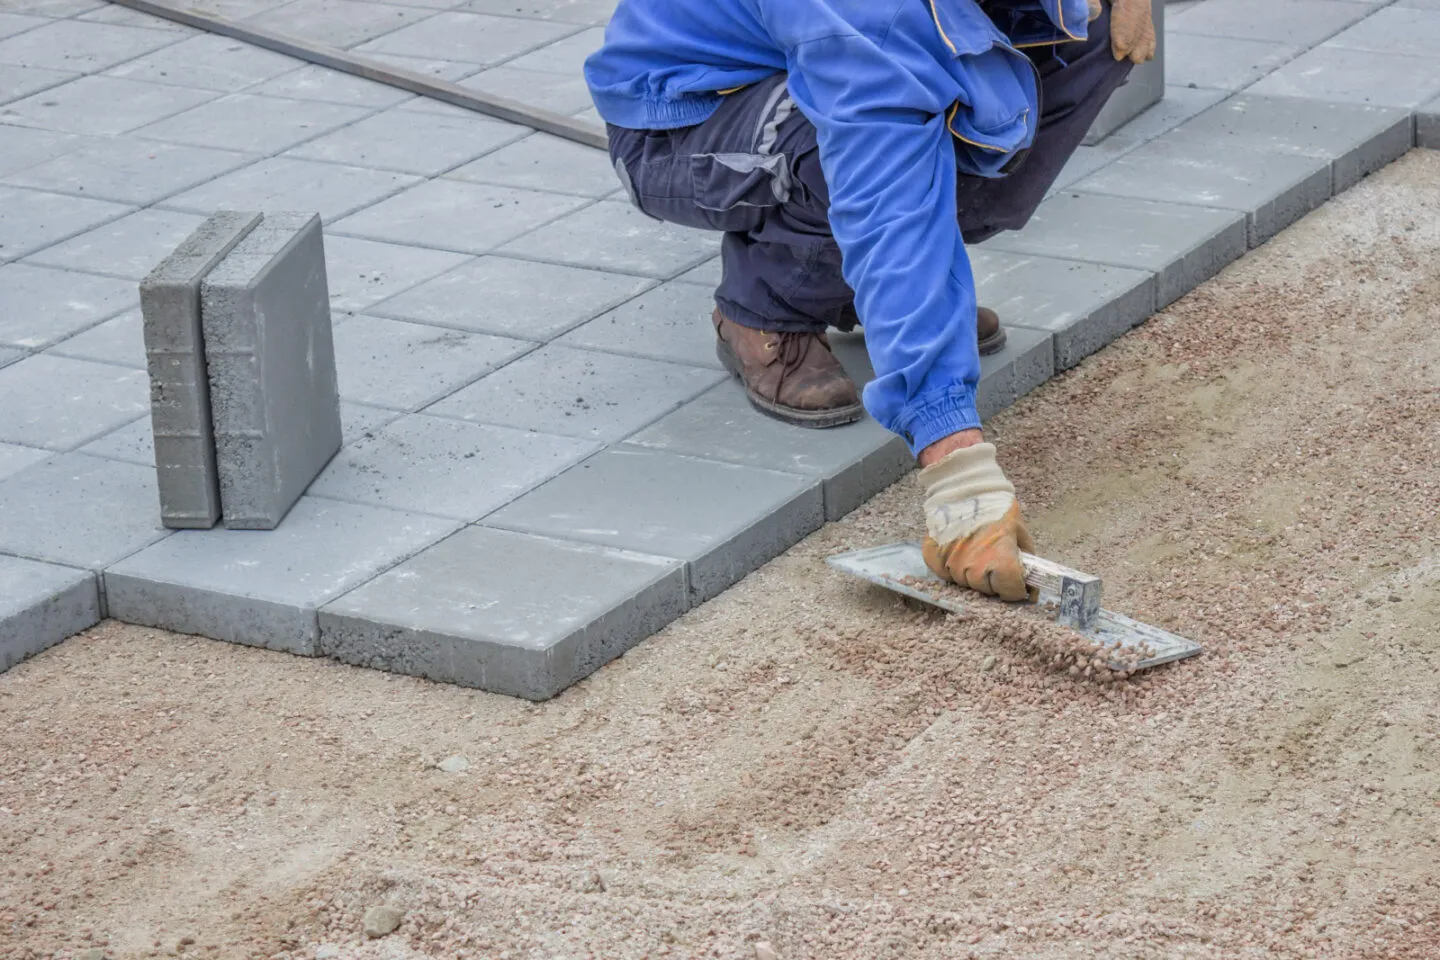
After your sub-base is compacted to what feels like the density of a meteor, it’s time for the bedding sand. This is not just any sand. We recommend coarse, washed concrete sand—never playground sand, which is too fine and holds water. This layer provides a bed for the pavers to sit in, allowing for minor adjustments and locking them in place. The key here is to get a perfectly uniform, 1-inch thick layer.
This is where a technique called 'screeding' comes in. You'll lay down two parallel pipes or rails (1-inch outside diameter) on your compacted base. Then, you pour the sand between them and pull a straight 2x4 across the top of the rails, dragging it toward you. This scrapes off the excess sand, leaving a perfectly smooth, level surface. Work in sections, removing the rails and carefully filling in the voids with sand as you go. One critical rule: once you've screeded an area, do not walk on it or disturb it in any way. You'll be laying the pavers from the area you just completed, reaching forward onto the screeded sand. This meticulous attention to detail is a hallmark of a professional approach to how to lay pavers for a driveway.
Our service for Pavers SAN Diego emphasizes this stage because we know it's where perfection is made. A flawed base telegraphs all its imperfections directly to the finished surface.
Finally: Laying the Pavers and Making the Cuts
Now for the satisfying part! You can finally start laying pavers. Start from a hard edge, like the foundation of your house or garage, and work your way outwards. Place the pavers gently onto the sand bed—don't slide them or press them down hard. The goal is to set them straight down. Use the click-and-drop method: touch the edge of the new paver to the one already in place, and then lower it down. This ensures tight joints. Use your string lines to keep your rows perfectly straight. It's easy to drift off course, and even a small deviation can become a glaring eyesore over a large area.
Check your work constantly. Every few feet, use your level to ensure the surface is flat and maintaining the correct slope. You can make minor height adjustments by adding a pinch of sand underneath a low paver or tapping a high one down with a rubber mallet. This is the finessing part of how to lay pavers for a driveway.
Inevitably, you will need to cut pavers to fit along the edges or around curves. This is where your rented demolition saw comes in. Measure twice, cut once. Always wear your safety gear, as cutting creates a tremendous amount of dust and noise. For curves, you might need to make several angled cuts to create a smooth arc. The quality of these cuts is what distinguishes a professional job from an amateur one. A perfect installation also requires edge restraints. These are typically plastic or metal strips that are staked into the gravel base along the perimeter of the driveway. They are absolutely essential for preventing the pavers from spreading and shifting apart over time under the load of vehicles. They get installed before you lay the pavers on the outside edges.
The Finishing Touches That Lock It All In
Your driveway might look finished once all the pavers are down, but the final steps are what lock everything together into a single, strong, interlocking surface. This is the last phase in understanding how to lay pavers for a driveway, and it’s just as important as the first.
First, you need to sweep jointing sand into all the gaps between the pavers. For driveways, we exclusively recommend polymeric sand. This type of sand contains a polymer that, when activated with water, hardens to form a durable, flexible joint. It helps lock the pavers together, prevents weed growth, and resists erosion from rain and washing. Sweep the sand across the surface until every joint is filled. Then, use your plate compactor (with a protective pad or piece of plywood to prevent scuffing the pavers) to vibrate the pavers. This settles them into the sand bed and helps work the jointing sand down deep into the gaps. You may need to add more sand and repeat the process. Don't skimp here; full joints are crucial. This is a critical step in how to lay pavers for a driveway that will withstand traffic.
Once the joints are full and the excess sand is completely blown or swept off the paver surfaces, it’s time to activate the polymeric sand. Lightly mist the driveway with a hose on a shower setting. You want to wet the sand, not blast it out of the joints. Follow the manufacturer's specific instructions, as they can vary. Typically, it involves a few light waterings spaced apart. The driveway will then need to cure for 24-48 hours before you can drive on it. The final, optional step is applying a sealer. A good quality sealer can protect the pavers from stains (like oil drips), prevent fading from UV rays, and make them easier to clean. Many sealers also enhance the color, giving the pavers a rich, 'wet' look. For a high-traffic area like a driveway, we generally recommend sealing every 3-5 years. It’s the final piece of the puzzle for how to lay pavers for a driveway that looks incredible for years to come.
Common Pitfalls Our Team Sees (And How to Avoid Them)
Over the years, we've been called in to assess and repair paver installations that have failed prematurely. The issues almost always trace back to a few common, avoidable mistakes. If you're learning how to lay pavers for a driveway, memorizing these pitfalls will save you a world of trouble.
Inadequate Base Depth: This is the number one killer of paver driveways. Skimping on excavation and using only a few inches of gravel is a guarantee of future failure. Cars are heavy. The base needs to be deep and robust enough to distribute that load without shifting. For our projects, a 6-8 inch compacted base is standard.
Forgetting About Drainage: Water is the enemy. A driveway that pools water or directs it toward your house is a functional failure, no matter how good it looks. Proper slope is not optional; it’s a foundational requirement. The entire process of how to lay pavers for a driveway should be guided by where you want water to go.
No Edge Restraints: We see this surprisingly often. Without edge restraints, the pavers on the perimeter have nowhere to go but out. The outward pressure from car tires will slowly push them apart, creating widening gaps and a crumbling edge. It's a slow-motion collapse.
Improper Compaction: Just dumping gravel in a hole isn't enough. Each layer must be mechanically compacted until it's solid. We've seen people try to use a hand tamper for an entire driveway base. The result is always uneven settling. A plate compactor is essential for a reason. This meticulous work is what defines a professional understanding of how to lay pavers for a driveway.
This project is a massive undertaking, and while rewarding, it's not for everyone. The sheer volume of material to be moved—tons of soil, gravel, and sand—can be shocking. If reading through these steps feels overwhelming, it might be the right time to bring in professionals. Our team can handle everything from the initial Landscape Design SAN Diego to the final sweep. Why not BOOK MY FREE CONSULTATION to discuss your project? We can help you understand the scope and provide a clear path forward.
Knowing how to lay pavers for a driveway is about more than just following steps; it’s about understanding the principles of building a stable, interlocking system that can withstand weather, weight, and time. It’s a project that, when done right, provides immense satisfaction and adds tangible value and beauty to your home. It’s a first impression that truly lasts.


.webp)
.webp)