A sloped yard presents a unique, sometimes formidable challenge. It can feel like a puzzle with pieces that just don't fit—unusable space, erosion problems, and a landscape that feels more chaotic than calm. But our team sees something else entirely. We see potential. A slope is a blank canvas for creating stunning, multi-level outdoor living areas, and one of the most classic and effective tools for this transformation is a well-built wood retaining wall. It's more than just a barrier; it’s an architectural feature that adds depth, character, and immense functionality to your property.
But let's be honest. The internet is flooded with tutorials on how to build a wood retaining wall, and many of them miss the critical details that separate a weekend project from a long-term structural asset. We've been called in to replace far too many walls that failed within a few years due to poor planning or shoddy construction. That's why we're putting our decades of collective experience on the page. We want to show you the right way, the professional way, to approach this project, ensuring the structure you build is not only beautiful but unflinchingly strong for years to come.
Is a Wood Retaining Wall Really the Best Choice?
Before you even touch a shovel, the first question to ask is whether wood is the right material for your specific needs. It's a fantastic choice for many reasons. Wood offers a natural, warm aesthetic that blends seamlessly with gardens and greenery, a look that can be harder to achieve with concrete blocks. It's also generally more cost-effective upfront, which is a major draw for many homeowners. But it's not without its trade-offs.
Our experience shows that the primary consideration is lifespan. Even the best pressure-treated lumber has a finite life, typically 20 to 30 years, depending on climate and soil conditions. It requires a certain level of maintenance to maximize that lifespan. For projects demanding permanence or integrating complex features like built-in seating, our Seat Retaining Walls service often explores masonry or composite options. However, for a classic, functional wall under four feet tall, wood is an excellent and popular choice. A key part of our Landscape Design SAN Diego process is walking clients through these material choices, ensuring the final decision aligns perfectly with their long-term vision and budget. Understanding this context is the first step in learning how to build a wood retaining wall.
Before You Dig: The Critical Planning Phase
This is where most DIY projects go wrong. Enthusiasm takes over, and the crucial, meticulous planning stage gets rushed. We can't stress this enough: impeccable planning is the blueprint for success. A catastrophic failure five years down the road can almost always be traced back to a mistake made before a single post was set. It's the unglamorous part of the job, but it’s the most important. Anyone serious about how to build a wood retaining wall must start here.
First, check your local building codes. Seriously. Walls over a certain height (often three or four feet, including the buried portion) typically require a permit and an engineer's stamp. Don't guess. A quick call to your local planning department will save you from a world of headaches, potential fines, and the heartbreaking task of tearing down your hard work. This is a non-negotiable step.
Next, you absolutely must call 811 to have underground utility lines marked. This is a free service, and it's the law. Hitting a buried gas line or electrical cable can be disastrous, even fatal. Give them a few days' notice before you plan to excavate. Finally, map out your wall's location with stakes and string. Live with it for a day or two. See how it affects foot traffic and sightlines. Does it create the space you envisioned? Making adjustments now is easy. Later, it's a grueling, back-breaking ordeal. The core of how to build a wood retaining wall that functions perfectly is thinking through its placement and impact on the entire yard.
Choosing the Right Materials: A 2026 Breakdown
Material selection is another area where cutting corners leads to premature failure. The right components are an investment in longevity. When our clients ask how to build a wood retaining wall, we tell them to focus their budget on three key areas: the wood itself, the fasteners, and the drainage material.
The wood must be rated for ground contact. This isn't just any pressure-treated lumber from the big-box store. You're looking for wood with a specific preservative retention level, typically designated as UC4A (ground contact, general use) or, even better, UC4B (ground contact, heavy-duty). The tag on the end of the board will tell you everything you need to know. Using wood rated only for decking or fencing is a guaranteed recipe for rot and decay within a decade.
For fasteners, don't even think about using standard deck screws or electro-galvanized nails. The chemicals used in modern pressure-treated wood are highly corrosive. You need hot-dipped galvanized or, ideally, stainless steel screws and bolts. They cost more, yes, but they won't disintegrate and cause your wall to fall apart. For backfill, you'll need a healthy supply of 3/4-inch angular gravel—not pea gravel, which can act like ball bearings under pressure. You’ll also need non-woven geotextile fabric (also called filter fabric) to keep soil from clogging your crucial drainage system. This isn't optional; it's a core component of how to build a wood retaining wall that lasts.
| Component |
Budget Option (Shorter Lifespan) |
Professional Recommendation (Maximum Lifespan) |
Why It Matters |
| Wood |
UC4A Pressure-Treated Pine |
UC4B Pressure-Treated Douglas Fir or Redwood |
UC4B has a higher concentration of preservatives, making it far more resistant to rot and insect damage in constant contact with wet soil. |
| Fasteners |
Hot-Dipped Galvanized Screws/Spikes |
316 Stainless Steel Lag Bolts & Screws |
Stainless steel offers superior corrosion resistance against the harsh chemicals in treated wood and moist soil, preventing fastener failure. |
| Drainage Pipe |
Flexible Corrugated Pipe (No Sock) |
4" Rigid Perforated PVC Pipe with Sock |
Rigid PVC is less likely to crush under the weight of backfill. The fabric 'sock' prevents silt from clogging the pipe's perforations over time. |
| Backfill |
Bank-Run Gravel (Mixed Sizes) |
3/4" Angular Crushed Gravel |
Angular gravel locks together to create a stable, porous drainage column that resists compaction and allows water to flow freely, relieving pressure. |
| Waterproofing |
None / Tar Coating |
Peel-and-Stick Bituminous Membrane |
Applying a waterproof membrane directly to the back of the wall provides a formidable, last-line-of-defense barrier against moisture intrusion into the wood. |
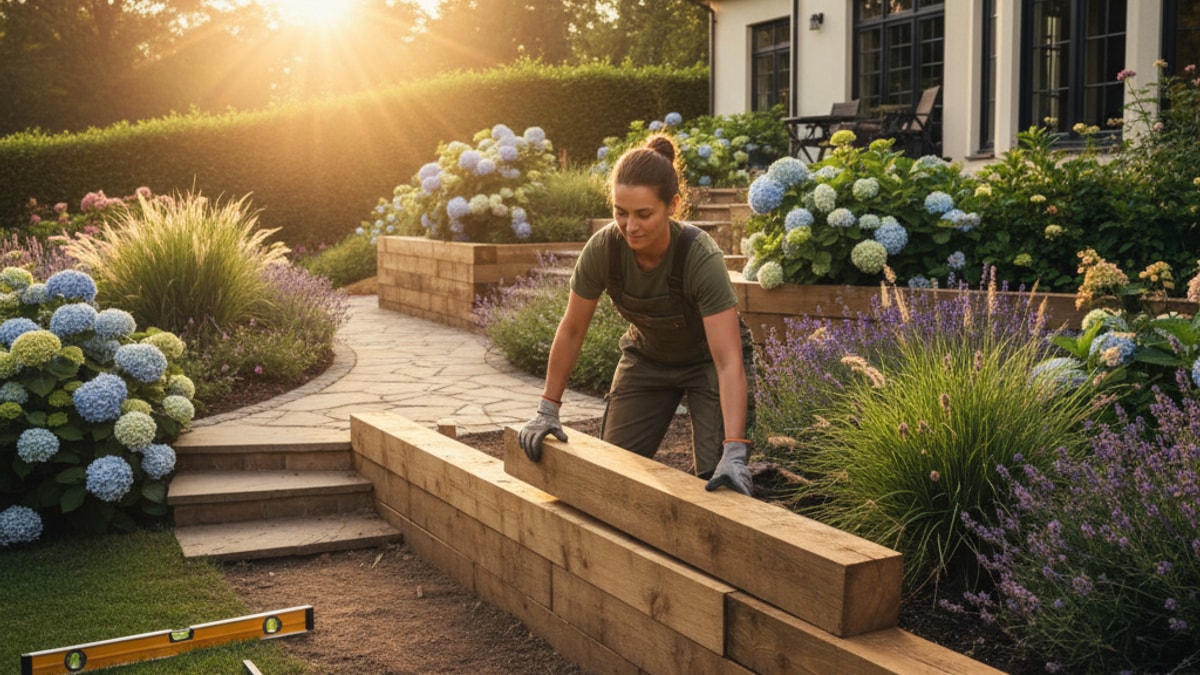
Step-by-Step: How to Build a Wood Retaining Wall
Alright, with the planning done and materials on site, it’s time for the physical work to begin. We're going to break this down into the same core phases our crews follow. Precision at every stage is key. A small mistake in the first course will amplify with every subsequent layer.
1. Meticulous Excavation
First, dig the trench for your foundation. It should be wide enough to work in comfortably and deep enough to bury at least half of your first course of timber, plus 4-6 inches for a gravel base. For a 6x6 timber, that means a trench about 10 inches deep. It's absolutely critical that the bottom of this trench is perfectly level. Use a long level or a builder's line level. A sloped foundation means a sloped wall. This part of how to build a wood retaining wall is pure labor, so pace yourself.
2. The Unshakable Foundation
Now, fill the bottom of the trench with 4-6 inches of your angular gravel. Tamp it down firmly with a hand tamper or a piece of 4x4 until it's compacted and, once again, perfectly level. This gravel base does two things: it provides a stable footing for the wall and allows water to drain away from the base, preventing the wood from sitting in a perpetual puddle. This is a non-negotiable step in the process of how to build a wood retaining wall correctly.
3. Setting the First Course
This is the moment of truth. Lay your first course of timbers directly on the compacted gravel base. Check for level in every direction—front to back and end to end. Use a sledgehammer and a block of scrap wood to gently tap the timbers into perfect position. We can't overstate this: if your first course isn't perfect, your entire wall will be flawed. Drill through the timbers and drive 2-foot sections of rebar down through them and into the ground below for extra stability. This anchors everything.
4. Installing Posts and Deadmen Anchors
For any wall over two feet high, you need reinforcement. This comes in the form of 'deadmen'—T-shaped anchors made from timbers that tie back into the hillside. For every 6-8 feet of wall length, you'll install another course of timbers, but this time you'll attach a perpendicular timber that extends at least 3-4 feet back into the slope you're retaining. A cross-piece is then attached to the end of that, forming the 'T'. As you backfill, the weight of the soil on top of the deadman acts as a powerful anchor, preventing the wall from bowing or tipping forward. This is the structural engineering behind how to build a wood retaining wall that can withstand immense pressure.
5. Building Up and Tying In
Now you can start stacking your subsequent courses. Stagger the joints like you would with brickwork for maximum strength. Each course should be secured to the one below it with long, heavy-duty structural screws or galvanized spikes. We recommend a slight batter—a backward lean into the hill—of about 1 inch for every 12 inches of height. This subtle lean uses gravity to its advantage, making the wall significantly stronger.
6. The Secret Weapon: Drainage, Drainage, Drainage
Hydrostatic pressure—the force of water-saturated soil—is the single greatest enemy of a retaining wall. It can and will push over a poorly designed structure. This is why drainage isn't an afterthought; it's a primary system. As you build, backfill directly behind the wall with at least 12 inches of your angular gravel, course by course. Before adding the gravel, drape your geotextile fabric against the hillside, leaving enough to fold over the top of the gravel later. This fabric acts as a filter, letting water pass through but stopping the soil. Near the bottom of the wall, lay a 4-inch perforated pipe (holes facing down) to collect water and channel it away to a safe location at the side of the wall. This comprehensive drainage system is the most overlooked but most important part of how to build a wood retaining wall.
7. Finishing Touches
Once you've reached your desired height, fold the excess filter fabric over the top of the gravel backfill and then cover it with a few inches of topsoil. For a professional finish, add a cap timber to the top of the wall. This not only looks great but also helps protect the end grain of the vertical posts. You might also consider integrating features like subtle Landscape Lighting SAN Diego to highlight the new structure at night, turning a functional wall into a beautiful focal point. Ready to upgrade your backyard? Thinking about these details is what separates a good project from a great one.
Common Mistakes We See (And How to Avoid Them)
Over the years, our team has been called to repair or replace countless retaining walls built by homeowners or less-experienced contractors. The failures almost always stem from the same handful of critical errors. Understanding these pitfalls is just as important as knowing the right steps for how to build a wood retaining wall.
The number one culprit is, without a doubt, inadequate drainage. People skip the gravel backfill, use the wrong kind of pipe, or forget the filter fabric entirely. The result is a wall that becomes a dam. Saturated soil expands and exerts immense pressure, causing the wall to bow, lean, and eventually fail. It's a catastrophic and expensive mess to fix.
Another common mistake is insufficient foundation depth. The rule of thumb is to bury at least 10% of the wall's total height, but more is always better. A shallow foundation provides no leverage against the soil's pressure. We also see people using the wrong materials—untreated or incorrectly treated wood, interior-grade screws, or rounded pea gravel. These shortcuts save a little money upfront but guarantee a much shorter lifespan for the wall. Learning how to build a wood retaining wall is also about learning what not to do.
Finally, people often underestimate the sheer force they are trying to contain. Soil is incredibly heavy, and when it's wet, it's even heavier. Don't skimp on reinforcement like deadmen anchors. Building a wall that is too high without consulting an engineer is a dangerous gamble. Our professional approach to Seat Retaining Walls always starts with a thorough structural assessment to ensure safety and longevity, which is a process we recommend for any ambitious DIY project as well.
Beyond the Wall: Creating a Cohesive Outdoor Space
A retaining wall shouldn't exist in isolation. It's a powerful design element that can redefine your entire outdoor living area. Think of it as the foundation for a more dynamic and usable yard. You can create beautiful, terraced garden beds filled with vibrant plants. It can form the border of a stunning patio, perhaps finished with elegant Pavers SAN Diego or sleek Concrete SAN Diego for a modern look. You could even incorporate steps into the wall itself, creating a graceful transition between different levels of your yard.
This is where a holistic vision comes into play. How does the wall interact with your other outdoor features? Does it frame the view from your Outdoor Kitchens SAN Diego? Does it create a cozy, enclosed space around one of our custom Fire Features? Thinking about these connections is the difference between simply installing a structure and truly designing a space. The process of how to build a wood retaining wall is just one part of a larger, more exciting journey of landscape transformation.
This project is a significant undertaking, but it's one of the most rewarding improvements you can make to your property. It solves a real problem while adding immense beauty and value. By following these steps, focusing on high-quality materials, and refusing to cut corners—especially on drainage—you can build a structure that you'll be proud of for decades. It's a testament to good planning and hard work.
And if you decide the project is more than you want to tackle alone, that's what we're here for. Our team lives for this stuff. We can take your vision and handle everything from the initial engineering to the final planting. Let’s Design the Outdoor Space You’ve Been Dreaming Of.


.webp)
.webp)