A sloped yard can be a formidable challenge. It creates drainage issues, limits usable space, and can feel like a constant battle against gravity. A well-built retaining wall doesn't just solve these problems; it transforms them into opportunities. It can carve out a beautiful patio, create terraced gardens, or simply add stunning, functional structure to your landscape. But there’s a massive difference between a wall that stands for a season and one that stands for decades. The secret isn't just in the blocks themselves, but in the meticulous process behind them.
Here at Modern Yardz, we’ve spent years designing and building landscapes, and we've seen firsthand what separates a successful retaining wall from a catastrophic failure. It’s an unflinching commitment to the fundamentals. This isn't just about stacking stones. It's about engineering a system that can withstand immense pressure from soil and water, year after year. So, we're pulling back the curtain to share our professional process. This is our comprehensive 2026 guide on how to install retaining wall blocks the right way—the way that lasts.
Before You Even Dig: Planning is Everything
Let’s be honest, the temptation to just grab a shovel and start digging is strong. We get it. But our team has found that the projects that go smoothly are the ones where 90% of the problem-solving happens before a single speck of dirt is moved. Rushing this stage is the fastest way to a leaning, bulging, or completely failed wall. Proper planning is the critical, non-negotiable element of knowing how to install retaining wall blocks for longevity.
First, you need to understand your site. What's the soil like? Is it sandy, clay, or loam? Clay soils expand and contract dramatically with moisture, exerting tremendous pressure. You'll need to account for that. What's happening uphill from your proposed wall? A large slope or a neighbor's downspout could direct a massive amount of water right where you don't want it. A simple walk-around during a rainstorm can tell you more than a week of dry-weather observation. For anything beyond a simple, short garden wall, this is where a professional Landscape Design SAN Diego plan becomes invaluable. It’s about seeing the entire system, not just the wall itself.
Next up: permits. This is a big one. Many local municipalities have strict rules about retaining walls, especially once they exceed a certain height (often three to four feet, including the buried portion). Building without a permit can result in hefty fines and a tear-down order. It's a nightmare scenario we've helped clients navigate after the fact. Always check with your local building authority before you begin. It's a simple phone call that can save you a world of trouble. The core of learning how to install retaining wall blocks is doing it legally.
Finally, choose your materials wisely. The world of retaining wall blocks has exploded in 2026. You have options ranging from traditional quarried stone to modern, interlocking concrete systems. Your choice will impact the look, the cost, and the installation process. Interlocking concrete blocks are often the most DIY-friendly, with built-in lips or pin systems that help maintain the correct setback, or 'batter'. They are a fantastic choice for anyone learning how to install retaining wall blocks. Calculate your needs carefully: you'll need blocks for the wall face, capstones for the top, gravel for the base and drainage column, drainage pipe, and landscape fabric. Our rule of thumb? Order 5-10% extra of everything. You'll thank yourself later when you don't have to make a last-minute run for three more blocks to finish the job.
The Foundation: Your Wall's Unseen Hero
We can't stress this enough: the success or failure of your retaining wall is determined before the first block is ever laid. It all happens in the trench. A poor foundation will undermine everything you build on top of it, guaranteed. This stage is where meticulous work pays off, and it’s the most important step in understanding how to install retaining wall blocks.
The first step is excavation. You need to dig a trench that is deep enough and wide enough to accommodate your leveling pad. A good rule of thumb is to dig the trench about twice as wide as your block (from front to back) and deep enough to bury at least half of the first course, plus 6-8 inches for your gravel base. For a standard 8-inch tall block, that means a trench depth of at least 10-12 inches. Use stakes and a string line to keep your trench perfectly straight. A line level or a laser level is your best friend here. Absolute precision is key.
Once the trench is excavated, it's time to compact the soil at the bottom. Seriously. Rent a hand tamper or a plate compactor and go over the entire trench floor until it's firm and unyielding. This prevents the soil from settling later under the immense weight of the wall. Our experience shows that skipping this step is a primary cause of wall failure. After compacting the native soil, you'll add your base material. This should be a compactible gravel, often called road base or paver base. Don't use sand or pea gravel; they can shift and wash out over time. Add the gravel in 2-3 inch layers (or 'lifts'), compacting each layer thoroughly before adding the next. This process of learning how to install retaining wall blocks correctly starts from the ground up. You need to build this base until you have a solid, perfectly level pad that is at least 6 inches deep. We mean perfectly level. Use a 4-foot level to check it from front-to-back and side-to-side. A flawless base makes the rest of the job ten times easier. A flawed base makes it nearly impossible.
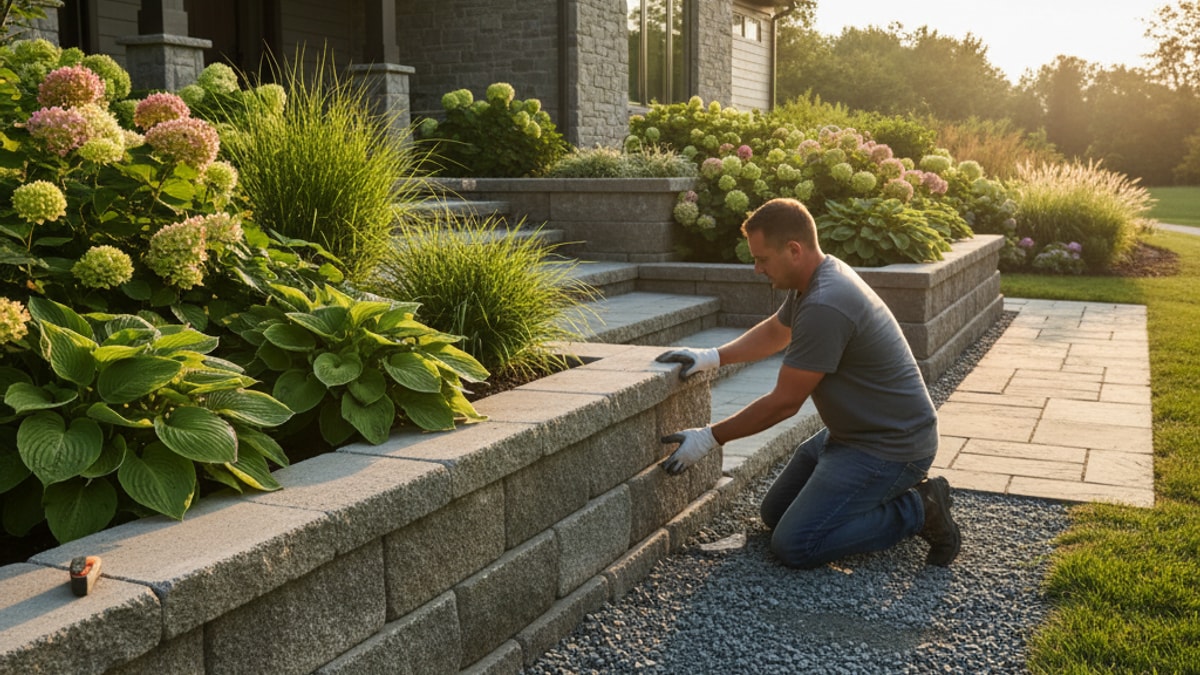
Laying the First Course: Precision is Paramount
Now, this is where it gets interesting. With your impeccable foundation in place, you can finally start laying blocks. The first course is, without a doubt, the most important row you will lay. Every single block in this row must be perfectly level, both with itself and with its neighbors. Every course above it will inherit any imperfections from this first one. There is no fixing it later. This is the moment that defines how to install retaining wall blocks for a professional finish.
Place your first block at one end of the trench on the compacted gravel base. Use a torpedo level to check it from front-to-back and side-to-side. Gently tap it with a rubber mallet to make micro-adjustments until that bubble is dead center. Then, place the next block right beside it, ensuring the sides are touching snugly. Level this second block, and then use your longer 4-foot level across both blocks to ensure they are perfectly level with each other. Repeat this process. Block by block. Level, adjust, level again. It's slow, tedious work. It's also the only way to do it right.
As you lay this first course, you'll want to sweep away any gravel that gets on top of the blocks. You need a clean surface for the next row. Once the entire first course is laid and you've confirmed it's level along its entire length, you're ready for the next critical step. Backfill in front of and behind this first course with your gravel base material. This locks the blocks in place and prevents them from shifting as you begin to build upwards. You want to see at least half of this first block buried below the final grade level. This provides a solid anchor and prevents the wall from kicking out at the base over time. This foundational lock-in is a crucial part of the process of how to install retaining wall blocks.
Building Up: Stacking, Backfilling, and Drainage
With the first course set in stone (pun intended), the rest of the wall starts to come together much faster. But speed doesn't mean you can sacrifice attention to detail. The next steps—stacking, backfilling, and drainage—are a system that works together to ensure your wall can handle the immense forces working against it.
Start your second course with a half-block to create a staggered, running bond pattern. This is just like laying bricks. It distributes the load and makes the entire structure significantly stronger. Most modern block systems are designed to be cut with a circular saw and a masonry blade. Always wear safety glasses and a dust mask when cutting concrete blocks. As you lay each new course, you'll follow the setback designed into the block system. This 'batter' creates a slight backward lean into the hillside, which is crucial for stability. For taller walls, we recommend using a high-strength concrete adhesive between each course for added security. Apply it in a serpentine bead a few inches back from the front face of the blocks.
This is the point where you must install your drainage system. A wall without proper drainage is doomed. Hydrostatic pressure—the force of water-saturated soil—can push over even the most well-built wall. To prevent this, you need to create a path of least resistance for water to escape. Immediately behind your wall, you should backfill with at least 12 inches of clean, angular drainage gravel (like 3/4" crushed rock). At the bottom of this gravel column, right at the base of the wall, lay a 4-inch perforated drain pipe. The pipe should have holes facing down and be wrapped in a fabric 'sock' to prevent sediment from clogging it. This pipe should run the length of the wall and 'daylight' at one or both ends, allowing water to drain away freely to a lower point in the yard. This is a non-negotiable step in how to install retaining wall blocks.
As you build each course, you'll backfill behind it with the drainage gravel. Behind the gravel column, place a sheet of heavy-duty landscape fabric. This fabric acts as a separator, preventing the native soil from mixing with your clean drainage gravel and clogging the system. Once the fabric is in place, you can backfill with the native soil you excavated earlier, compacting it in 6-inch lifts as you go. This entire system—pipe, gravel, fabric, and backfill—works in unison. This is the professional approach for how to install retaining wall blocks that last a lifetime.
| Block Material |
DIY-Friendliness |
Cost (Material Only) |
Lifespan |
Aesthetic |
| Interlocking Concrete |
High |
$$ - $$$ |
50-100 Years |
Uniform, Modern, Varied Colors |
| Natural Stone (Dry Stack) |
Low to Medium |
$$$ - $$$$$ |
100+ Years |
Rustic, Natural, Unique |
| Timber (Treated Wood) |
High |
$ - $$ |
15-20 Years |
Natural, Warm, Prone to Rot |
| Poured Concrete |
Very Low (Pro Only) |
$$$$ |
100+ Years |
Utilitarian, Strong, Industrial |
The Finishing Touches: Caps, Cuts, and Cleanup
You've done the hard work. The foundation is solid, the drainage is perfect, and the wall is built. Now it's time for the details that elevate the project from functional to beautiful. The final steps in how to install retaining wall blocks are what people will actually see and appreciate every day.
The most common finishing touch is the capstone. These are flat, solid blocks designed to create a clean, finished top surface for your wall. They are almost always secured with concrete adhesive. Take your time here to get the alignment and overhang just right. A perfectly installed cap course is the signature of a professional job. It provides a polished look that can turn a simple retaining wall into an intentional design element, like the ones we build for our Seat Retaining Walls projects, which provide both structure and built-in seating for a patio.
Landscaping around the wall is also key. The final grade on top of and at the base of the wall should be sloped gently away from the structure to encourage surface water to run off, rather than saturate the soil behind it. You can finish the top with a layer of topsoil and plant some shallow-rooted groundcover or perennials to help prevent erosion. At the base, you can integrate the wall seamlessly with other hardscape elements. A beautiful Pavers SAN Diego patio can be laid right up to the base of the wall, creating a cohesive and expansive outdoor living area. The possibilities are endless, and this is where you can truly get creative. Ready to Upgrade Your Backyard? This is where vision comes to life.
Common Mistakes We See (And How to Avoid Them)
Over the years, our team has been called in to repair or replace countless failing retaining walls. And almost every time, the failure can be traced back to one of a few common, avoidable mistakes. Understanding these pitfalls is just as important as knowing the right steps when learning how to install retaining wall blocks.
- The Pathetic Base: The single biggest mistake is skimping on the foundation. A shallow trench, uncompacted soil, or an uneven gravel pad is a recipe for disaster. The wall will settle unevenly, causing cracks, bulges, and eventual collapse. Take your time on the base. It’s the most important part of the entire project.
- Forgetting About Water: Number two, without a doubt, is ignoring drainage. We see walls built with no gravel backfill, no drain pipe, and no landscape fabric. The builder essentially creates a concrete dam, and it's only a matter of time before the immense force of trapped water pushes it over. Drainage isn't optional; it's essential. This is a fundamental lesson in how to install retaining wall blocks.
- No Setback (Batter): A perfectly vertical retaining wall is actually a very weak wall. The slight backward lean into the hill, or batter, is what gives the wall its strength to resist the forward pressure of the soil. Most interlocking block systems have this built-in, but you still have to follow the design. Ignoring it is a critical error.
- Improper Backfilling: Just piling dirt behind the wall won't cut it. Soil needs to be backfilled in thin layers (lifts) and compacted as you go. Loose, uncompacted backfill will settle over time, creating a sinkhole behind your wall and reducing its supportive strength. The process of how to install retaining wall blocks must include meticulous backfilling.
Building a retaining wall is a significant undertaking. It requires careful planning, hard physical labor, and an uncompromising attention to detail. For smaller, decorative garden walls, it can be a rewarding DIY project. But for larger, more structural walls that are holding back a significant amount of earth, the risks of getting it wrong are just too high. A failure isn't just an eyesore; it can be a dangerous and incredibly expensive problem to fix. If you're looking at your sloped yard and dreaming of what could be, Let’s Design the Outdoor Space You’ve Been Dreaming Of. Our team has the expertise and equipment to do it right the first time, ensuring your investment is beautiful, functional, and safe for decades to come.
Knowing how to install retaining wall blocks is a fantastic skill, but knowing when to call a professional is a sign of wisdom. We hope this guide has given you the knowledge to tackle your project with confidence, or the clarity to decide when it's time to bring in an expert. A great retaining wall is more than just a pile of blocks; it’s the foundation for a whole new way to enjoy your outdoor space.


.webp)
.webp)