A driveway is so much more than a place to park your car. It’s your home’s first impression, the welcome mat to your property, and a critical functional element that you’ll use every single day. Getting it right isn't just about aesthetics; it’s about longevity, safety, and value. And in 2026, the standards for a durable, well-built driveway are higher than ever. It's a surprisingly complex project, one that often looks deceptively simple from the outside. That's why we're here to pull back the curtain.
Our team at Modern Yardz has spent years perfecting the art and science behind landscape construction, and we’ve seen it all—the triumphs of impeccable planning and the catastrophic failures born from cut corners. We’ve learned that understanding how to construct a driveway properly is the only way to avoid a cracked, sinking, or pooling mess in just a few years. This isn't just a guide; it's a distillation of our collective experience, designed to give you the unflinching truth about what this project really entails. Let's dig in.
Before You Even Break Ground: The Planning Phase
Honestly, the success or failure of your project is decided long before the first shovel hits the dirt. The planning phase is the non-negotiable bedrock of the entire process. Skipping this is like building a house without a blueprint. A really, really bad idea. The first question in how to construct a driveway isn't about materials—it's about design and logistics.
First, you need a comprehensive vision. What's the goal? Are you replacing an old, tired slab, or creating a new path? How will it integrate with your home's architecture and the rest of your landscape? This is where a professional eye for design becomes invaluable. A service like our Landscape Design SAN Diego offering isn't just about picking pretty plants; it's about creating a cohesive, functional outdoor space where every element, including the driveway, works in harmony. We consider traffic flow, turning radius for vehicles, and how the driveway can enhance—not detract from—your home's curb appeal. The nuances of how to construct a driveway begin with these high-level decisions.
Next comes the nitty-gritty. You absolutely must check for local building codes and permit requirements. While this guide is universal, your local municipality has specific rules about setbacks, materials, and drainage. It’s a tedious step, we know, but it prevents formidable headaches and fines down the road. You also need to call 811 or your local utility locating service. This is critical. Hitting a buried gas line, water main, or electrical cable is a disastrous, expensive, and incredibly dangerous mistake. Don't even think about digging until you know what’s underneath. We’ve seen DIY projects go sideways fast because of this oversight. The process of how to construct a driveway must prioritize safety above all.
Finally, let's talk about the silent killer of driveways: water. Poor drainage is the root cause of probably 90% of driveway failures we're called in to fix. Water pooling on the surface can lead to staining and ice patches, while water penetrating the base will cause heaving, sinking, and cracking. Your driveway must be sloped correctly—typically a minimum of 2% grade, or a quarter-inch drop per foot—to guide water away from your home's foundation and into a safe runoff area. Sometimes, this requires installing channel drains or French drains. Planning for water management is a non-starter in understanding how to construct a driveway that will actually last.
Choosing Your Weapon: Driveway Materials in 2026
Alright, the plan is set. Now for the fun part: choosing the material that will define the look and feel of your home's entrance. In 2026, you have more options than ever, each with a distinct personality and set of demands. Your choice here will fundamentally change the answer to how to construct a driveway.
Let's be honest, this is a crucial decision that balances budget, aesthetics, and long-term maintenance tolerance. We've laid out the most popular choices below to help you compare. Our team works extensively with both pavers and concrete, and our experience shows that the installation quality is just as important as the material itself.
| Material |
Average Cost (per sq. ft.) |
Lifespan |
Maintenance Level |
Key Pros & Cons |
| Concrete |
$8 - $18 |
30-40 years |
Low to Moderate |
Pros: Durable, versatile (stamped, colored), relatively low maintenance. Cons: Can crack over time, repairs can be difficult to blend, susceptible to salt/chemical damage. |
| Pavers |
$15 - $30+ |
50+ years |
Low |
Pros: Extremely durable, huge design flexibility, repairs are easy (just replace a paver), allows for permeability. Cons: Higher upfront cost, potential for weeds in joints if not properly installed. |
| Asphalt |
$5 - $10 |
15-25 years |
Moderate to High |
Pros: Lower initial cost, flexible and less prone to cracking than concrete, good in cold climates. Cons: Requires regular sealing (every 3-5 years), can get soft in extreme heat, shorter lifespan. |
| Gravel |
$2 - $5 |
Varies (ongoing) |
High |
Pros: Very low upfront cost, excellent drainage, easy for DIY. Cons: Requires constant raking and replenishment, dusty, can be difficult to plow snow from. |
For homeowners seeking a modern, clean look, our Concrete SAN Diego solutions offer incredible versatility. We can go beyond a simple grey slab with broom finishes, exposed aggregate, or intricate stamped patterns that mimic stone or brick. Knowing how to construct a driveway with concrete means understanding the right mix, reinforcement, and curing process to prevent premature cracking.
On the other hand, for those who want timeless elegance and unmatched durability, Pavers SAN Diego are, in our professional opinion, the superior long-term investment. The design possibilities are virtually endless, and their segmental nature means they can flex with ground movement, making them incredibly resistant to cracking. The method of how to construct a driveway with pavers is more intricate, involving multiple layers of aggregate and sand, but the result is an impeccable, long-lasting surface. The ability to simply lift and replace a stained or damaged paver is a game-changer for long-term ownership.
The Foundation of Everything: Excavation and Base Prep
We can't stress this enough: the part of your driveway you don't see is more important than the part you do. A beautiful surface is meaningless without a rock-solid foundation. This stage is where the real work happens, and where the durability of your driveway is truly forged. Any expert will tell you that the secret to how to construct a driveway that lasts for decades lies in the base preparation.
It starts with excavation. You need to dig out the entire driveway area to a specified depth. This isn't just about scraping off the grass. You're removing topsoil, clay, and any organic material that will decompose and shift over time. The depth depends on your climate and soil type, but a typical excavation is between 8 and 12 inches. It's a significant amount of earth to move, usually requiring heavy machinery like a skid-steer loader.
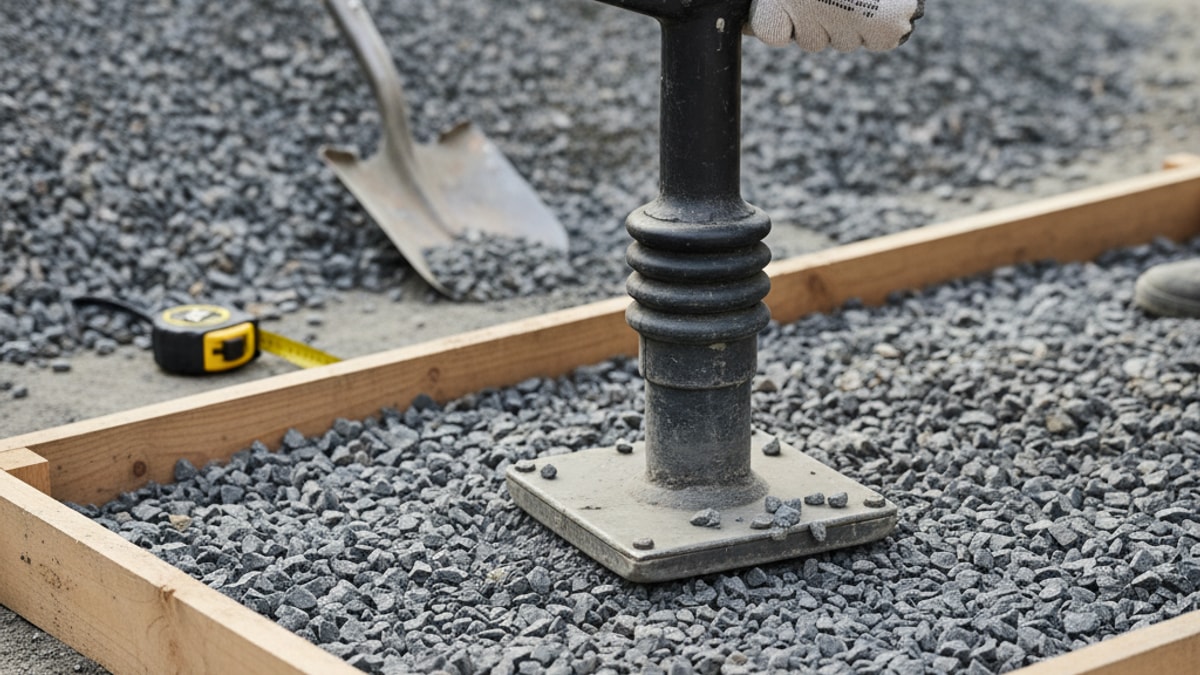
Once excavated, the soil at the bottom (the subgrade) must be graded for drainage and then compacted relentlessly. We use a heavy plate compactor to ensure the subgrade is firm and stable. A weak subgrade will doom the entire project. This is a step where DIY attempts often fall short, as renting the proper compaction equipment and knowing how to use it effectively is crucial. This is a physically demanding part of how to construct a driveway.
Next comes the sub-base, which is typically a layer of crushed aggregate (like 3/4-inch crushed stone). This layer is spread evenly over the compacted subgrade to a depth of at least 6-8 inches. The sub-base serves several critical functions: it provides structural support, distributes the load of vehicles, and facilitates drainage. We often install a layer of geotextile fabric between the subgrade and the sub-base. This tough fabric prevents the stone from sinking into the soil over time, preserving the integrity of the base. It's a small extra cost that adds years to the driveway's life. The sub-base is then graded and, you guessed it, compacted again. Each layer must be compacted in lifts (smaller layers) to achieve maximum density. This is the uncompromising reality of how to construct a driveway properly. There are no shortcuts here.
The Main Event: Laying Your Surface
With a perfect foundation in place, it's finally time to install the surface you'll see and use every day. The technique varies dramatically depending on your material choice, and precision is key. This is the most visible stage of how to construct a driveway, where craftsmanship truly shines.
For a Concrete Driveway:
The process begins by setting up forms—typically wooden boards—around the perimeter of the driveway. These forms act as a mold, holding the wet concrete in place and defining the final shape. We then install a grid of steel rebar or wire mesh inside the forms. This reinforcement is absolutely essential for providing tensile strength and minimizing cracking. A concrete driveway poured without reinforcement is just a slab waiting to fail.
Then comes the pour. A concrete truck will deliver the pre-mixed concrete, which is poured into the forms. The crew has to work quickly and efficiently to spread the concrete evenly before it begins to set. Using a large board called a screed, they level the surface of the concrete. After screeding, the surface is smoothed further with floats and trowels. Finally, a finish is applied. The most common is a broom finish, which creates a non-slip texture. This detailed process is how to construct a driveway that is both safe and durable.
For a Paver Driveway:
After the compacted sub-base is prepared, the next layer is a 1-inch bed of coarse sand. This sand layer is screeded perfectly smooth and level, as it's what the pavers will sit on directly. We can't overstate the need for precision here; any imperfections in the sand bed will be visible on the final surface.
Now, the pavers are laid by hand, one by one, directly onto the sand bed in the desired pattern (like herringbone or basketweave). We work from one edge, tapping the pavers into place with a rubber mallet. It's a meticulous, labor-intensive process. Once all the main pavers are in place, cuts are made for the edges using a wet saw. A concrete edge restraint is then installed around the entire perimeter to lock the pavers in place and prevent them from shifting. This is a critical, non-negotiable step in how to construct a driveway with pavers. Finally, fine jointing sand is swept over the surface and a plate compactor is run over the pavers to vibrate the sand down into the joints, locking everything together into a strong, flexible pavement.
Finishing Touches and Long-Term Care
Your driveway isn't finished the moment the last paver is laid or the last bit of concrete is smoothed. The final steps and ongoing care are what will preserve your investment for years to come. Thinking about how to construct a driveway must include thinking about its entire lifecycle.
For concrete, the curing process is paramount. Concrete doesn't 'dry'; it hardens through a chemical reaction called hydration. This process takes about 28 days to reach full strength. You'll need to stay off of it completely for at least 7 days. We also recommend applying a high-quality sealer about a month after the pour. This sealer protects the surface from water, oil, and salt, preventing stains and spalling. It should be reapplied every few years.
For pavers, after the initial jointing sand is compacted, you may need to top it off again after a few weeks as it settles. Using polymeric sand is a great option for 2026; it contains a binder that hardens when wet, which helps lock the joints tightly and prevent weed growth and insect infestations. Like concrete, sealing pavers is also a great idea to protect their color and make cleaning easier. This final step is key to how to construct a driveway that remains pristine.
Don't forget to integrate your driveway into the rest of your landscape. Adding beautiful plantings along the edges can soften the look. And incorporating professional Landscape Lighting SAN Diego isn't just for aesthetics; it's a huge safety feature, illuminating the path to your home at night. This holistic approach is what separates a simple slab from a truly integrated part of your home's design.
DIY vs. Hiring a Pro: A Sincere Breakdown
After reading all this, you might be thinking, "Can I do this myself?" The honest answer is: maybe, but it's a formidable challenge. Learning how to construct a driveway from an article is one thing; executing it is another entirely. It's one of the most physically demanding and technically challenging projects a homeowner can undertake.
Consider the sheer logistics. You'll need to rent heavy equipment like a skid-steer and a plate compactor. You'll have to manage the disposal of tons of excavated soil and the delivery of tons of aggregate. The work is back-breaking, requiring immense physical stamina. More importantly, the margin for error is razor-thin. An improperly prepared base, an incorrect slope for drainage, or a poorly finished surface can lead to a complete failure that costs more to fix than it would have to hire a professional in the first place.
This is where a team like ours at Modern Yardz comes in. When you hire a professional, you're not just paying for labor. You're paying for expertise, efficiency, and peace of mind. We have the right equipment, the experienced crew, and the deep knowledge of how to construct a driveway that will withstand the test of time. We handle the permits, the material sourcing, and the complex logistics. We guarantee our work, so your investment is protected. If you're weighing your options and want to understand what a professional installation would look like for your home, why not BOOK MY FREE CONSULTATION to discuss your project with our team? It's a no-obligation way to get expert advice tailored to your property.
Building a new driveway is a significant investment, but it's one that pays dividends in curb appeal, functionality, and property value for decades. Whether you choose the sleek modernity of concrete or the timeless character of pavers, the key is to ensure it's built on a foundation of quality. It’s the handshake of your home—make sure it’s a firm one.


.webp)
.webp)