A well-executed driveway isn't just a utilitarian path; it's a critical, non-negotiable element of your property's curb appeal and overall functionality. For homeowners aiming to significantly elevate their outdoor aesthetic and invest in long-term durability, knowing how to lay paving stones for a driveway correctly is paramount. We're talking about a surface that endures relentless daily traffic, variable weather patterns, and the constant test of time. It's a formidable challenge, but one that, with the right approach and expertise, yields truly spectacular results.
Here at Modern Yardz, we've spent years refining the art and science of outdoor transformations, from intricate Landscape Design SAN Diego to robust Pavers SAN Diego installations. Our collective experience shows that while the DIY spirit is commendable, understanding the nuanced, often dramatic shifts in best practices – especially as we move further into 2026 – makes all the difference. This isn't just about putting stones down; it's about building a lasting foundation. Let's delve into the definitive guide on how to lay paving stones for a driveway, ensuring your project is a resounding success.
The Crucial First Steps: Planning & Design
Before any dirt is moved, before any material is ordered, a meticulously detailed plan is absolutely essential. Honestly, though, this is where many projects falter. You wouldn't build a house without blueprints, would you? A driveway deserves the same unflinching attention to detail. We recommend starting with a clear vision: what's the desired aesthetic? What's the practical function? How will it integrate with existing Outdoor Kitchens SAN Diego or your Pools AND Spas area? These considerations shape everything that follows.
We've found that early consultation, perhaps even a Standard Design Package or Premium Design Package from our team, can save countless hours and dollars down the line. It's truly an investment in peace of mind. Consider the driveway's shape, size, slope, and traffic load. Will it be purely for passenger vehicles, or will heavier trucks occasionally use it? This directly impacts the required base depth and material specifications. Drainage is another critical, non-negotiable element. Poor drainage can lead to significant, sometimes catastrophic, structural failure over time. We're talking about erosion, shifting pavers, and an overall compromised surface. Our team always assesses the site's natural water flow and plans for proper runoff, often incorporating subsurface drainage solutions that many DIYers overlook when figuring out how to lay paving stones for a driveway.
Permitting is another vital, often moving-target objective. Regulations vary, and what was permissible last year might have changed by 2026. Always check with local authorities. It's a step you absolutely cannot skip; non-compliance can lead to hefty fines or even project demolition. Here's what we've learned: success depends on thorough upfront planning.
Essential Tools & Materials for a Paved Driveway
Equipping yourself with the right tools and materials is paramount when you're preparing to lay paving stones for a driveway. Skimping here isn't just a cost-cutting measure; it's a recipe for frustration and a substandard finish. We can't stress this enough: quality tools make the job easier, safer, and the results speak for themselves. You'll need:
- Excavation Equipment: Shovels, picks, or even a mini-excavator for larger projects. Trust us, your back will thank you.
- Grading Tools: Rakes, screed boards (long, straight 2x4s or aluminum screed bars), and a long level.
- Compaction Equipment: A plate compactor. A hand tamper simply won't achieve the necessary density for a durable driveway. We mean this sincerely: rent one.
- Measuring & Layout Tools: Tape measure, string line, stakes, chalk line, builder's level or transit, and a marking paint.
- Cutting Tools: A wet saw with a diamond blade for precise paver cuts. Angle grinders are okay for small, irregular cuts, but a wet saw is king for driveways.
- Safety Gear: Gloves, safety glasses, ear protection, steel-toed boots.
- Wheelbarrow and Shovels: For moving materials.
- Brooms and a Plate Compactor with a Rubber Mat: For sweeping sand and final compaction.
For materials, you'll need:
- Geotextile Fabric: A critical separation layer.
- Base Material: Crushed aggregate (typically 3/4-inch minus, compactable gravel).
- Bedding Layer: Coarse concrete sand or washed concrete sand (not play sand or masonry sand).
- Pavers: Select your style, color, and thickness (driveway pavers are generally thicker, 60mm minimum).
- Edge Restraints: Plastic or concrete edging with spikes.
- Jointing Sand: Polymeric sand is highly recommended for its weed-inhibiting and ant-deterring properties. It's an upgrade worth every penny.
- Optional Sealant: To protect and enhance your pavers.
Our team always sources the highest quality materials, understanding that the foundation of any outdoor project, especially when you're learning how to lay paving stones for a driveway, truly dictates its longevity and appearance. We've seen firsthand how using inferior products leads to premature wear and dissatisfied clients.
Site Preparation: The Unsung Hero of Driveway Longevity
This is where the rubber meets the road, quite literally. Proper site preparation is the single most important factor determining the success and longevity of your paved driveway. It's comprehensive. Ignoring any step here is like building a skyscraper on quicksand. You’re setting yourself up for failure, and that’s not something we want for any of our clients or readers.
1. Layout and Excavation: Mark out your driveway's perimeter using stakes and string lines. Ensure accurate dimensions and slopes. We're aiming for a minimum slope of 1/8 inch per foot for proper drainage. Then, excavate the area. The depth depends on your base material thickness, bedding layer, and paver thickness. For a typical residential driveway, we often recommend an excavation depth of 10-12 inches to accommodate a robust base. This includes space for your aggregate base, a 1-inch bedding layer, and the pavers themselves. Don't underestimate this step when you're learning how to lay paving stones for a driveway; it's physically demanding, but it's the bedrock of everything else.
2. Subgrade Compaction: Once excavated, compact the subgrade (the natural soil) thoroughly. Use your plate compactor, making multiple passes in different directions. The goal is a firm, stable, and uniformly dense surface. Any soft spots need to be dug out and filled with compacted aggregate. This is critical because uneven compaction will lead to future settlement and paver dips.
3. Geotextile Fabric Installation: Lay down a heavy-duty geotextile fabric directly over the compacted subgrade. This isn't just some fancy extra; it's a critical separation layer. It prevents the base aggregate from migrating into the softer subgrade soil, which would compromise the structural integrity of your driveway over time. Overlap seams by at least 12 inches.
Building the Base: Strength from the Ground Up
Now, this is where it gets interesting, and where the true strength of your driveway is established. A robust base layer is paramount, ensuring your driveway can withstand the weight of vehicles for decades to come. This particular approach (which we've refined over years) delivers real results.
1. Aggregate Base Layer: Start adding your crushed aggregate base material in lifts – typically 4-6 inches at a time. After spreading each lift evenly, moisten it slightly (don't saturate) and compact it with your plate compactor. Make at least two passes in intersecting directions. Repeat this process until you reach the desired base thickness. For a residential driveway, our team usually recommends a compacted base of 6-8 inches, sometimes more if the underlying soil is particularly poor or heavy traffic is expected. Ensuring proper compaction here is the single most important factor in preventing future rutting and settlement when you're figuring out how to lay paving stones for a driveway.
| Base Material Type |
Pros |
Cons |
Typical Use |
| Crushed Gravel |
Excellent drainage, strong, cost-effective |
Can be dusty, requires heavy compaction |
Driveways, patios, walkways |
| Recycled Concrete |
Environmentally friendly, good compaction |
Variable quality, can contain contaminants |
Commercial projects, heavy-duty driveways |
| Washed Stone |
Very good drainage, clean |
Less compaction, not ideal for base |
Decorative, drainage beds, permeable paver systems |
| Road Base (ABC) |
Superior compaction, stable, durable |
Higher cost, requires expertise |
High-traffic driveways, commercial applications |
2. Screeding the Bedding Layer: Over your compacted base, spread your coarse concrete sand (or washed concrete sand) for the bedding layer. Don't use too much; a uniform 1-inch thickness is ideal. Use screed rails (metal pipes or straight 2x4s) set at the correct grade to create a perfectly level and consistent surface. Pull a straightedge across the rails, removing excess sand. This layer is not compacted before laying pavers; it acts as a cushion and allows for minor adjustments. This precise screeding is critical for a smooth, even finished surface. Any imperfections here will be visible in your final paver layout.
Edge Restraints: The Unsung Guardians
Often overlooked by those new to how to lay paving stones for a driveway, edge restraints are the unsung guardians of your beautiful pavement. Without them, your pavers will gradually migrate outwards, creating gaps, unevenness, and ultimately, structural failure. It’s becoming increasingly challenging to maintain a pristine aesthetic without this critical boundary.
Install your chosen edge restraints (typically plastic or concrete) along the entire perimeter of the driveway, securing them firmly into the compacted base with long spikes. These restraints hold everything in place, preventing the lateral movement of your pavers and the bedding sand. We can't stress this enough; a well-installed edge restraint system ensures the integrity and longevity of your investment. It’s a small detail with a huge impact on the overall quality and durability of the installation.
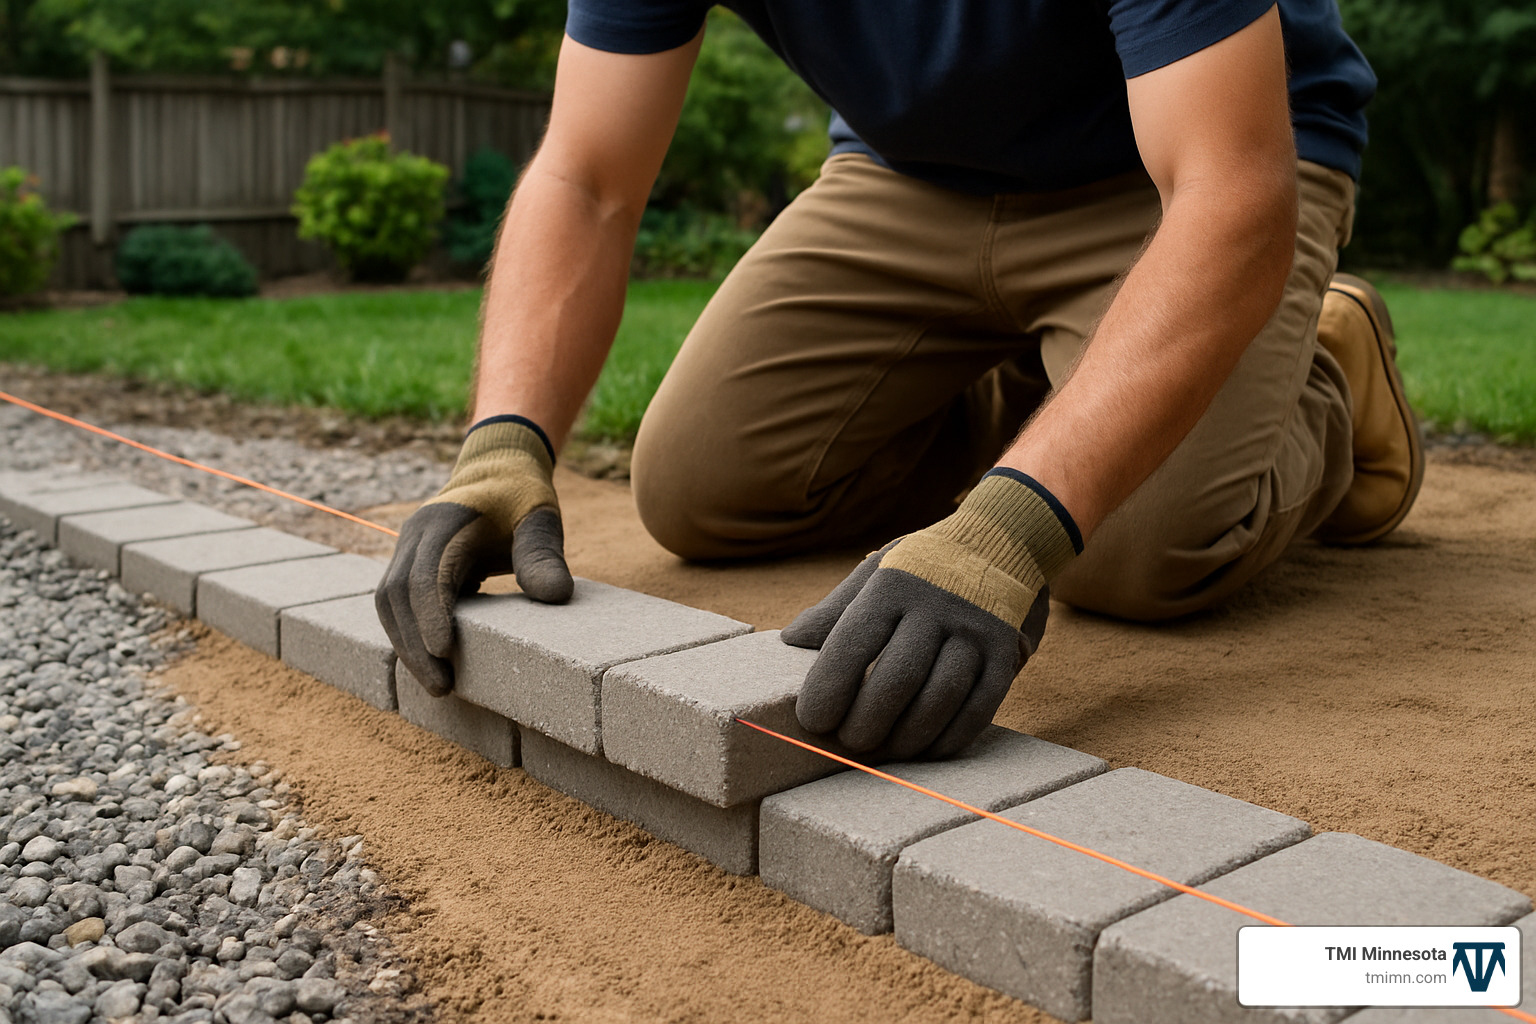
The Art of Laying Pavers
Now, for the satisfying part: actually laying the paving stones for a driveway. This is where your design comes to life, but precision remains paramount. Start in a corner or along a straight edge, working your way outwards. It's often helpful to work off the pavers you've already laid, standing on them to avoid disturbing the screeded sand bed.
1. Pattern and Placement: Lay the pavers gently onto the sand bed, maintaining consistent joint spacing. We typically aim for 1/8 to 3/16 inch joint widths. Use string lines or chalk lines frequently to keep your rows straight and your pattern consistent. Don't slide pavers into place; set them down vertically to avoid disturbing the sand. We recommend pulling pavers from multiple pallets simultaneously to ensure a good color blend, as natural stone or concrete pavers can have slight color variations between batches. This attention to detail dramatically enhances the finished look of your driveway.
2. Cutting Pavers: Inevitably, you'll need to cut pavers to fit edges, curves, or intricate patterns. This is where your wet saw comes into its own. Measure carefully, mark your cuts, and make clean, precise cuts. Always wear appropriate safety gear, including eye and ear protection, when operating power tools. Our team takes immense pride in seamless cuts that make the entire driveway look professionally installed – because it is.
Compaction & Sanding: The Interlocking Magic
Once all your full and cut pavers are laid, it's time for the steps that truly lock them into place and create a unified surface. This interlocking magic is what gives paver driveways their incredible strength and flexibility.
1. Initial Compaction: Lightly sweep the surface to remove any loose debris, then make an initial pass over the entire paved area with your plate compactor. For this step, it's absolutely crucial to attach a rubber mat to the bottom of the compactor to prevent chipping or scuffing the pavers. This initial compaction settles the pavers into the bedding sand, evening out any minor height differences.
2. Spreading Jointing Sand: Spread your chosen jointing sand – we highly recommend polymeric sand for its superior performance – evenly over the entire surface. Use a stiff broom to sweep the sand into all the paver joints, ensuring they are completely filled. This is a crucial, non-negotiable step when you're learning how to lay paving stones for a driveway. The sand, especially polymeric sand, is what creates the interlock, preventing individual paver movement and inhibiting weed growth.
3. Final Compaction: After sweeping in the sand, make several more passes with the plate compactor (still with the rubber mat) over the entire driveway. This vibratory action helps the sand settle deeply into the joints, further interlocking the pavers. Sweep more sand into any joints that appear low and compact again if necessary. This process is repeated until the joints are completely filled and consolidated.
4. Activating Polymeric Sand: If you're using polymeric sand, carefully follow the manufacturer's instructions for activation. This typically involves lightly misting the surface with water. Be very careful not to use too much water, as this can wash the polymers out of the sand and stain your pavers. We've seen this happen, right? A gentle spray is all it takes to bind the sand particles together.
Sealing and Maintenance: Protecting Your Investment
Congratulations! You've learned how to lay paving stones for a driveway. But the job isn't quite finished. To truly protect your investment and maintain its impeccable appearance for years, sealing and routine maintenance are key. It’s a simple addition that offers significant, sometimes dramatic, returns.
1. Sealing: While not always mandatory, applying a high-quality paver sealant offers numerous benefits. It enhances the paver's color, protects against stains from oil, grease, and tire marks, and helps inhibit weed growth. Our team often recommends sealing within a few weeks of installation, after the polymeric sand has fully cured. Ensure the driveway is completely clean and dry before applying sealant, following the product's specific instructions. This extra layer of protection is particularly valuable for driveways, which face more wear and tear than patios or walkways.
2. Routine Maintenance: Regular sweeping to remove debris, occasional washing, and prompt stain removal will keep your driveway looking its best. Reapply sealant every 3-5 years, or as needed, depending on traffic and environmental exposure. For any specific concerns, or if you're exploring other outdoor enhancements like Artificial Turf SAN Diego or Patio Covers Pergolas SAN Diego, our team is always ready to assist.
Common Pitfalls and Why Professional Expertise Matters
While mastering how to lay paving stones for a driveway is certainly achievable for dedicated DIYers, there are common pitfalls that can derail a project or compromise its longevity. Uneven subgrade compaction, insufficient base depth, improper drainage, incorrect jointing sand application, and poor paver cutting are all frequent issues we've encountered. These aren't minor inconveniences; they can lead to significant problems requiring costly repairs down the line.
This is where the collective expertise of a company like Modern Yardz truly shines. We handle every step, from initial Landscape Design SAN Diego to the final touches, ensuring a cohesive and durable outdoor space. Our professionals possess the specialized equipment, the nuanced understanding of soil mechanics and drainage, and the sheer experience to avoid these common mistakes. We're not just building driveways; we're crafting enduring outdoor environments. We've built countless projects, from stunning Outdoor Fire PIT Chula Vista installations to expansive Concrete SAN Diego surfaces, and our commitment to quality is unwavering. When you're considering how to lay paving stones for a driveway, asking yourself if you have the time, the tools, and the sheer grit for such a demanding project is a crucial first step. If the answer isn't a resounding 'yes,' then partnering with a seasoned team is your best bet for a flawless outcome. We've seen it work.
We understand that homeowners have demanding schedules and high expectations. That's why we pride ourselves on delivering not just beautiful results, but also a smooth, transparent process from start to finish. Our team is dedicated to bringing your vision to life, whether it's a new driveway, custom Seat Retaining Walls, or sophisticated Landscape Lighting SAN Diego.
Anyway, here's what makes the difference: our commitment to quality, our local roots, and our dedication to creating spaces where memories are made. We’re here to help homeowners create outdoor spaces that are as functional as they are beautiful. If you're envisioning a new paved driveway or any other outdoor transformation for your property in 2026, we invite you to explore our full range of services on our website. Ready to start your project? We encourage you to BOOK MY FREE CONSULTATION with our team today. It's the first step towards realizing the outdoor space you've always dreamed of. We're confident you'll appreciate the difference true expertise makes when you're deciding how to lay paving stones for a driveway.
FAQs: Your Paved Driveway Questions Answered


.webp)
.webp)