A sloped yard can feel like a curse. It's that beautiful patch of land you own but can't really use. Patios tilt, gardens slide, and usable space just shrinks. It's a common headache we see all the time. The solution? A formidable, unflinching concrete retaining wall. It’s more than just a barrier; it’s a way to reclaim your landscape, creating functional, beautiful tiers out of a once-unruly hill. But the question of how to build a retaining wall with concrete is a big one, packed with critical details that separate a weekend project from a catastrophic failure.
Here at Modern Yardz, we've spent years perfecting the art and science behind these structures. We've seen homeowners tackle this with inspiring success, and we've also been called in to fix projects that went sideways. This guide is the culmination of that experience. We’re pulling back the curtain to give you the unvarnished truth about what it takes. This isn't just a list of steps; it's a deep dive into the methodology, the physics, and the crucial details that ensure your wall stands strong against the relentless pressure of earth and water for decades to come. Let's be honest, this is a serious undertaking, but with the right plan, it's absolutely achievable.
Before You Even Touch a Shovel: The Critical Planning Phase
Jumping straight into digging is the fastest way to create a problem, not solve one. The success of this entire project hinges on what you do before a single speck of dirt is moved. Our team has found that 90% of wall failures can be traced back to a failure in planning. Seriously. So, where do you start when planning how to build a retaining wall with concrete? First, define the wall's purpose. Is it a small, decorative garden wall under two feet tall, or is it a massive structural element holding back a significant slope? The answer dramatically changes the scope, materials, and engineering required.
Every municipality has rules. We can't stress this enough: check your local building codes. Many areas require a permit and engineered plans for any wall over three or four feet in height. This isn't just red tape; it's a safety measure. A poorly built wall of that size can collapse, causing immense damage. In our professional Landscape Design SAN Diego consultations, this is always our first checkpoint. You also need to call 811 to have underground utilities marked. Hitting a gas line or electrical conduit is a disastrous, and entirely avoidable, mistake. Finally, understand your soil. Sandy, loose soil behaves very differently from dense, heavy clay. Clay soil expands and contracts with moisture, putting immense hydrostatic pressure on your wall. This knowledge will directly influence the design and, most importantly, the drainage system for your wall. Proper planning is the bedrock of understanding how to build a retaining wall with concrete that lasts a lifetime.
Poured Concrete vs. Concrete Blocks: Which is Right for You?
When you decide on concrete, you have two primary paths: classic poured concrete or versatile concrete retaining wall blocks (often called segmental retaining wall or SRW blocks). There's no single 'best' answer; the right choice depends entirely on your project's scale, your budget, your skill level, and the aesthetic you're after. Our experience shows that for most DIY projects under four feet, concrete blocks are the more forgiving and accessible option. For taller, structural walls, poured concrete often provides superior strength. Here’s a breakdown our team uses to help clients decide.
| Feature |
Poured Concrete Wall |
Concrete Block (SRW) Wall |
| Strength |
Exceptionally strong and monolithic when reinforced with rebar. The gold standard for tall, load-bearing walls. |
Very strong, but strength comes from the interlocking system and mass. Best for walls under 4-6 feet without an engineer. |
| DIY-Friendliness |
Difficult. Requires building precise forms (formwork), extensive bracing, and managing a large, time-sensitive concrete pour. |
High. The blocks are manageable, and the process is more forgiving. You can work at your own pace, stacking course by course. |
| Cost |
Can be higher due to the cost of forms (renting or buying), rebar, and potentially a concrete truck delivery. |
Generally more cost-effective for smaller projects. The primary cost is the blocks themselves and the base material. |
| Appearance |
Can be finished in many ways: smooth, stamped, stained, or faced with veneer like stone or brick. Offers a clean, modern look. |
Blocks come in various colors, textures, and styles (from rustic split-face to modern smooth). Offers a consistent, patterned look. |
| Installation Speed |
The pour itself is fast, but the prep work (building forms) is slow and meticulous. Curing also takes time. |
Slower, more methodical build process. However, there's no waiting for forms to be built or concrete to cure before backfilling. |
Thinking through how to build a retaining wall with concrete means making this fundamental choice early on. If you're envisioning a sleek, modern wall that's integrated into a patio, our work with Concrete SAN Diego often leans towards a poured application. For a terraced garden, the texture of blocks might be a better fit.
Gathering Your Arsenal: Tools and Materials You'll Need
Alright, you've got a plan. Now it's time to gear up. Nothing stalls a project faster than realizing you're missing a critical tool halfway through a step. A successful project on how to build a retaining wall with concrete requires the right equipment. Let's break it down into essentials.
For the excavation and base, you'll need a pointed shovel for digging, a square-nosed shovel for moving material, a wheelbarrow, a heavy-duty steel rake, and a hand tamper or plate compactor. We strongly recommend renting a plate compactor for the foundation; it's a non-negotiable element for achieving proper compaction. You'll also need a 4-foot level, a tape measure, string line, and stakes to keep your layout perfectly straight and level. This is where precision pays off. For a block wall, add a dead blow hammer or rubber mallet for setting blocks, a masonry chisel, and a masonry saw (rentable) for any necessary cuts.
If you're tackling a poured concrete wall, the list expands significantly. You'll need materials for the formwork—typically 3/4-inch plywood and plenty of 2x4 lumber for studs and bracing. You'll also need form ties, rebar, tie wire, and a rebar bender/cutter. And, of course, you'll need concrete. For small jobs, you can mix bags of concrete mix, but for anything substantial, ordering ready-mix concrete from a truck is far more efficient. The process of how to build a retaining wall with concrete becomes much more manageable when you have everything on site before you begin.
The Foundation is Everything: Excavation and Footing
We're going to say it again: the foundation is everything. A retaining wall is only as strong as the ground it sits on. This is where you absolutely cannot cut corners. The first step is to excavate a trench for the footing or base pad. The general rule of thumb is that the trench depth should be about one-eighth the height of the finished wall, plus the thickness of your base material (usually 6 inches). So, for a 4-foot (48-inch) wall, you'd dig a trench 6 inches deep for the wall's embedment, plus another 6 inches for the gravel base, for a total trench depth of 12 inches. The width should be twice the width of your block or the planned thickness of your poured wall.
Once the trench is dug, the next step is compaction. You need to compact the native soil at the bottom of the trench with a hand tamper or plate compactor. After that, you'll add your base material, which should be a compactible gravel or crushed rock. Add it in 2-3 inch layers, compacting each layer thoroughly before adding the next, until you have a solid 6-inch base. This base is critical because it creates a stable, level platform and allows water to drain away from the bottom of the wall. Our team's expertise in creating durable Seat Retaining Walls is built, quite literally, on this foundational work. For a poured wall, you'll place your rebar grid within the trench before pouring the concrete footing. This footing is the monolithic base that distributes the wall's immense weight. Honestly, this is the most physically demanding part of learning how to build a retaining wall with concrete, but it's also the most important.
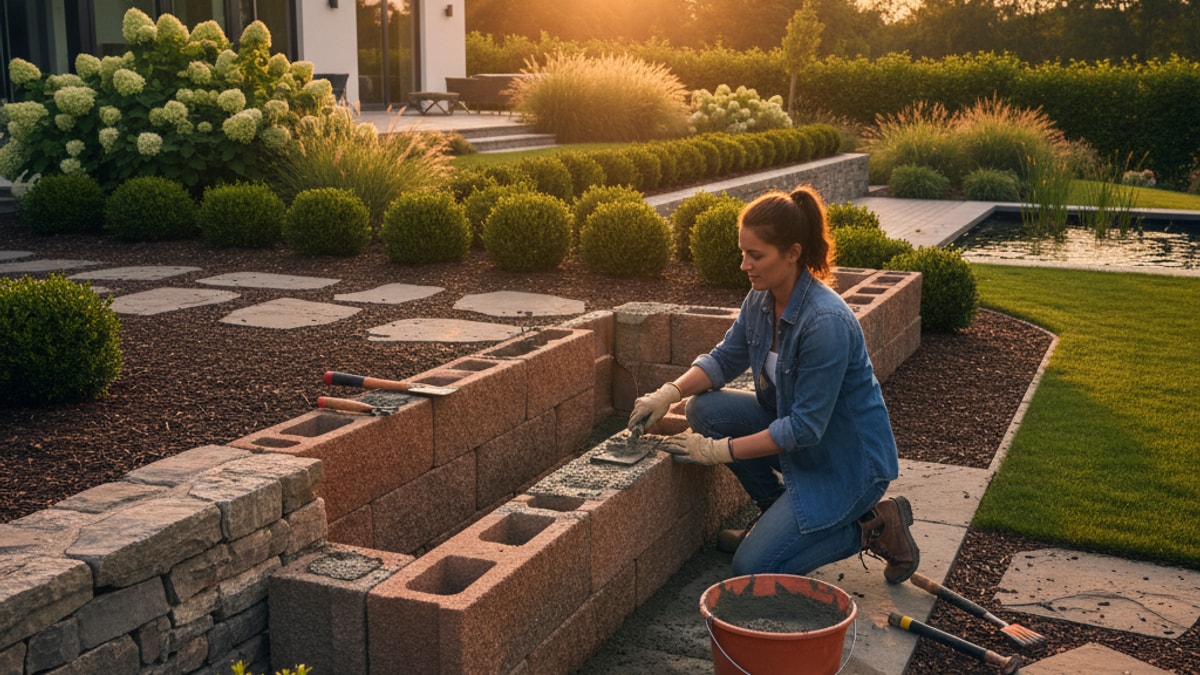
Building Up: A Step-by-Step Guide for Concrete Blocks
With your rock-solid base prepared, you can begin the satisfying process of building up. This is where your vision starts to take shape. The first course (the bottom layer) of blocks is the most critical for a block wall. It must be perfectly level, both front-to-back and side-to-side. Take your time here. Use your string line as a guide and use your level on every single block. If your first course is off, every subsequent course will be off, and the error will multiply as you go higher.
Set the first block and level it. Then set the next block right beside it, tapping it into place with your dead blow hammer until it's snug and perfectly level with the first. Repeat this process for the entire first course. We recommend burying about half of this first course below the final grade level; this provides extra stability against shifting and washout. Once the first course is set and perfect, the rest is relatively simple. Most modern SRW blocks have an interlocking lip or pin system that automatically creates the required 'setback' or 'batter'—a slight backward lean into the hillside that gives the wall its strength. As you stack, you'll sweep each block clean to ensure a solid connection. You'll also begin backfilling with drainage gravel as you go, typically filling the space about 12 inches behind the wall. The method for how to build a retaining wall with concrete blocks is methodical, but it's a rhythm you'll quickly get into.
As you build, check for level every few courses. For walls over 3-4 feet, you may need to incorporate geogrid reinforcement. This is a strong, flexible mesh that you lay across the blocks and extend back into the hillside, burying it with compacted soil. The geogrid essentially ties the wall to the earth behind it, dramatically increasing its strength. This is a crucial step that is often overlooked in amateur attempts at how to build a retaining wall with concrete.
The Pro-Level Pour: Constructing with Poured Concrete
If you've opted for a poured wall, your challenge is less about stacking and more about construction. This is a masterclass in precision carpentry. You'll need to build two parallel walls of formwork from plywood and 2x4s, creating a void where the concrete will be poured. The forms must be perfectly plumb (vertically level) and braced relentlessly. The sheer weight and pressure of wet concrete is immense, and it will exploit any weakness in your formwork, leading to a blowout—a messy, expensive, and demoralizing failure. We've seen it happen. Use form ties to connect the two sides of the formwork and prevent them from spreading apart.
Inside the form, you'll construct a cage of steel rebar, both vertical and horizontal, tied together with wire. This steel skeleton is what gives the concrete its tensile strength, allowing it to resist the forces that want to bend or break it. Once the formwork and rebar are in place and triple-checked, it's time for the pour. For any wall of significant size, mixing by hand is not feasible. You'll need to coordinate a ready-mix truck. The pour needs to be managed carefully to avoid air pockets. You'll want to use a concrete vibrator (another rental item) to consolidate the concrete and ensure it fills every corner of the form. The process of how to build a retaining wall with concrete this way is complex, but the result is an incredibly strong, seamless structure. After pouring, you'll need to let the concrete cure for several days (or even weeks, depending on the weather) before you can 'strip' the forms. Patience is key.
Drainage: The Unsung Hero of a Long-Lasting Wall
Water is the enemy of a retaining wall. The number one reason walls fail is due to hydrostatic pressure—the force of water building up in the soil behind the wall. This is a relentless, powerful force. Your wall isn't just holding back dirt; it's holding back a potential swimming pool of waterlogged soil. That's why drainage isn't an afterthought; it's a co-star in this entire production. Anyone who truly knows how to build a retaining wall with concrete knows that managing water is paramount.
There are three key components to a bulletproof drainage system. First is the gravel backfill. Immediately behind your wall, you should have a column of clean, crushed drainage rock at least 12 inches wide, extending from the footing to just below the top of the wall. This creates a path of least resistance for water, allowing it to flow down freely instead of pushing against your wall. Second is a perforated drain pipe (or 'weep drain'). This pipe, wrapped in landscape fabric to prevent clogging, sits at the very bottom of your gravel column, resting on the footing. It's designed to collect all that water and carry it away, daylighting at the ends of the wall or connecting to another drainage system. Third are weep holes. These are small pipes or gaps placed in the wall itself (for both block and poured walls) that allow any trapped water to escape. A proper drainage system is the life insurance policy for your wall.
Finishing Touches That Make a Difference
Your wall is built, strong and stable. Now it's time to make it beautiful and integrate it into your landscape. This final stage is what elevates a functional structure into a stunning feature. For block walls, the most common finishing touch is a capstone. These are flat, solid blocks that are glued onto the top course using a concrete adhesive, providing a clean, finished look and protecting the core of the blocks from water infiltration. This simple step transforms the look of the wall. This is how a simple structure becomes part of a cohesive design, perhaps complemented by Fire Features or an outdoor seating area.
For a poured concrete wall, your options are even broader. You can leave the raw concrete for a modern, industrial aesthetic. You can apply a stucco finish for a smooth, colored surface. Or, for a high-end look, you can apply a stone or brick veneer. This gives you the unmatched strength of poured concrete with the classic look of masonry. Finally, consider the landscaping around the wall. Planting cascading foliage over the top can soften its appearance. Adding strategic Landscape Lighting SAN Diego can turn your wall into a dramatic feature at night, highlighting its texture and form. The details of how to build a retaining wall with concrete extend beyond the structure itself to how it lives in your yard. Ready to Upgrade Your Backyard? These finishing touches are how you do it.
Building a retaining wall is a formidable challenge, but it is one of the most rewarding home improvement projects you can undertake. It fundamentally transforms the landscape, creating value, beauty, and—most importantly—usable space where there was none before. It's a testament to good planning, hard work, and the power of solid construction. Every step, from the initial design to the final capstone, is a critical piece of the puzzle.
We hope this guide has demystified the process and given you the confidence to evaluate your own project. Whether you're planning a small garden terrace or a major structural overhaul, the principles of solid footing, proper drainage, and meticulous construction remain the same. It's a project that demands respect, but the results speak for themselves. And if you find the scope of the project daunting, that's what we're here for. Let’s Design the Outdoor Space You’ve Been Dreaming Of, together.


.webp)
.webp)