How to Install Artificial Grass on Concrete: The Pro Way
Your Concrete Patio is Begging for a Makeover
Let’s talk about that slab of concrete. Maybe it’s a patio that’s seen better days, a rooftop with a killer view but zero personality, or a balcony that’s just… gray. It’s functional, sure, but it’s not inviting. It’s not a space where you want to kick off your shoes and relax. Our team at Modern Yardz has seen this scenario play out all over San Diego, from Chula Vista to Oceanside. You have this potentially amazing outdoor area, but it's being held back by cold, hard, unforgiving concrete.
Transforming that space with artificial grass is a significant, sometimes dramatic shift. It’s not just about adding a patch of green; it’s about creating an outdoor room, a usable and comfortable extension of your home. The idea is brilliant. The execution, however, is where things can get tricky. We’ve seen DIY projects go wonderfully right and catastrophically wrong. The difference almost always comes down to knowledge and preparation. That’s why we put together this guide—to share what our experience shows and walk you through how to install artificial grass on concrete the right way.
Why Lay Artificial Grass Over Concrete in the First Place?
It might seem counterintuitive at first. Grass grows in soil, right? But the appeal of turfing over a hardscape is undeniable once you see the results. It’s an instant aesthetic upgrade, covering stains, cracks, and the general bleakness of old concrete with a permanently lush, green carpet. It’s soft underfoot, making it a perfect play area for kids or a comfortable spot for outdoor yoga. And—let’s be honest—this is crucial for our busy San Diego lifestyles: it’s incredibly low-maintenance.
No watering, no mowing, no fertilizing. You get the beauty of a perfect lawn without the relentless weekend work. For balconies and rooftops, it’s a game-changer, introducing a natural element where traditional landscaping is simply impossible. It turns a forgotten space into a destination. That's the goal.
Before You Begin: The Non-Negotiable Prep Work
Jumping straight to the green stuff is a temptation we understand, but we can't stress this enough: your project's success is determined long before you unroll the first piece of turf. The prep work is everything. Skimp here, and you’ll be dealing with pooling water, lumps, and lifting edges for years to come.
A Brutally Honest Surface Assessment
First, you need to look at your concrete with an unflinching, critical eye. Is it perfectly flat? Probably not. Our teams find that most concrete slabs have low spots where water can puddle. They also have cracks, from hairline fractures to more formidable fissures. You have to address these.
Walk the entire surface. Use a long level to identify dips and high spots. Mark them with chalk. Any crack wider than a pencil needs to be filled. Why? Because over time, the turf will settle, and every single imperfection in the concrete below will become visible and felt underfoot. It’s a critical, non-negotiable element of a professional-looking job.
The All-Important Drainage Question
This is the big one. This is where a DIY project can become a genuine disaster if not handled correctly. Concrete is largely non-porous. Water needs a place to go, or you'll end up with a smelly, stagnant, swampy mess under your beautiful new lawn. Our experience shows there are two main situations you'll face:
Concrete with a Slope: Most professionally laid patios and walkways have a slight, almost imperceptible slope designed to guide water away from the house. If you pour a bucket of water on the surface and it flows steadily toward an edge or a drain, you're in good shape. Your main job is to ensure you don't block that flow.
Perfectly Level Concrete (The Problem Child): Rooftops, some balconies, and older, poorly-laid slabs are often dead-level. Water poured here will just sit. You absolutely must create a drainage solution. This could mean drilling drainage holes (we recommend about a half-inch hole every 6-8 inches) through the concrete, but this is an intensive step and may not be feasible for everyone, especially renters. The more common and effective solution is using a specialized drainage underlayment—a layer that sits between the concrete and the turf, creating channels for water to flow freely to the perimeter.
Ignoring drainage is not an option. We mean this sincerely—it will ruin your investment.
Gathering Your Arsenal: Tools & Materials
Having everything on hand before you start makes the entire process smoother. There’s nothing worse than getting halfway through a step only to realize you’re missing a critical tool. Here's what our teams typically have on-site for a concrete installation:
Cleaning: A power washer, stiff-bristled broom, and a good concrete degreaser.
Repair: Concrete crack filler, self-leveling compound for low spots, and a trowel.
Cutting: A sharp utility knife with plenty of extra blades (turf backing is tough and dulls blades fast), a measuring tape, and a chalk line.
Installation: Your chosen artificial grass, underlayment/shock pad (optional but highly recommended), seaming tape, and a specialized turf adhesive. A heavy-duty caulk gun is needed for the adhesive.
Finishing: The correct type and amount of infill, a seed/drop spreader, and a power broom (you can rent one—it's worth it).
When it comes to adhesives and underlays, you have choices. Each has its place depending on the project's scale and use case.
Small to medium-sized patios, balconies where full adhesion isn't needed.
Small, contained areas like a balcony; temporary setups.
Adhesive
Trowel-applied, two-part turf adhesive across the entire surface.
A thick bead of turf adhesive or outdoor construction adhesive around the perimeter only.
No adhesive used. The turf is held in place by its own weight and the weight of the infill.
Pros
Extremely secure, no risk of lifting or bubbling.
Less adhesive needed, easier installation, allows for better drainage if not fully sealed.
Easiest and fastest method, completely reversible, ideal for renters.
Cons
Labor-intensive, expensive, makes removal very difficult, can impede drainage if not done correctly.
Edges are secure, but the center could potentially shift or bubble over time in large areas.
Not suitable for larger areas or high-traffic zones; seams can be a weak point.
Our team generally recommends a perimeter-secure method for most residential concrete applications. It provides a fantastic hold while allowing the main field of the turf to drain more effectively.
The Modern Yardz Step-by-Step Installation Process
Alright, you’ve done your assessment and gathered your gear. Now for the satisfying part—bringing it all together. Follow these steps meticulously, and you'll get a result you can be proud of.
Step 1: The Deep Clean
We're not talking about a quick sweep. You need to get that concrete surgically clean. Any dirt, grease, or debris left behind will compromise the adhesive and can even lead to mold or mildew growth. Start by scraping off any old paint, glue, or gunk. Then, power wash the entire surface thoroughly. If there are any oily or greasy spots, hit them with a concrete degreaser. Once it's clean, you have to let it dry. Completely. This might take a full 24-48 hours, depending on the San Diego weather. Don't rush it.
Step 2: Addressing Imperfections
Now, tackle those cracks and low spots you identified earlier. Use a quality concrete crack filler and a trowel to patch up any fissures, making sure the patch is flush with the surrounding surface. For any significant dips or puddling areas, use a self-leveling compound. You mix it up, pour it into the low spot, and it naturally smooths itself out to create a perfectly level patch. Again, allow everything to cure completely according to the manufacturer's instructions.
This is a tedious step. We get it. But a smooth, stable base is the foundation for a flawless turf installation.
Step 3 (Optional but Recommended): Installing the Underlay
If you're using a shock pad or drainage underlayment, now is the time to install it. These typically come in rolls, just like the turf. Roll it out, cut it to fit the area, and secure it to the concrete. For some types, a few dabs of adhesive are all that's needed to prevent it from shifting while you work. An underlay adds softness, which is great for play areas, and—most importantly—it can provide those crucial drainage channels we talked about. Our About page highlights our commitment to quality, and for us, this step is often a key part of a premium installation.
Step 4: Rolling Out and Positioning Your Turf
Artificial grass is heavy and cumbersome. This is a two-person job, minimum. Roll out your first piece, letting it overlap any edges by a few inches. If you have multiple pieces, roll them out next to each other, making sure the direction of the grass blades (the “grain”) is pointing the same way on every piece. This is a critical detail for a seamless look. Let the turf relax in the sun for at least an-hour, or even a few hours if you can. This helps flatten out any wrinkles or creases from being rolled up.
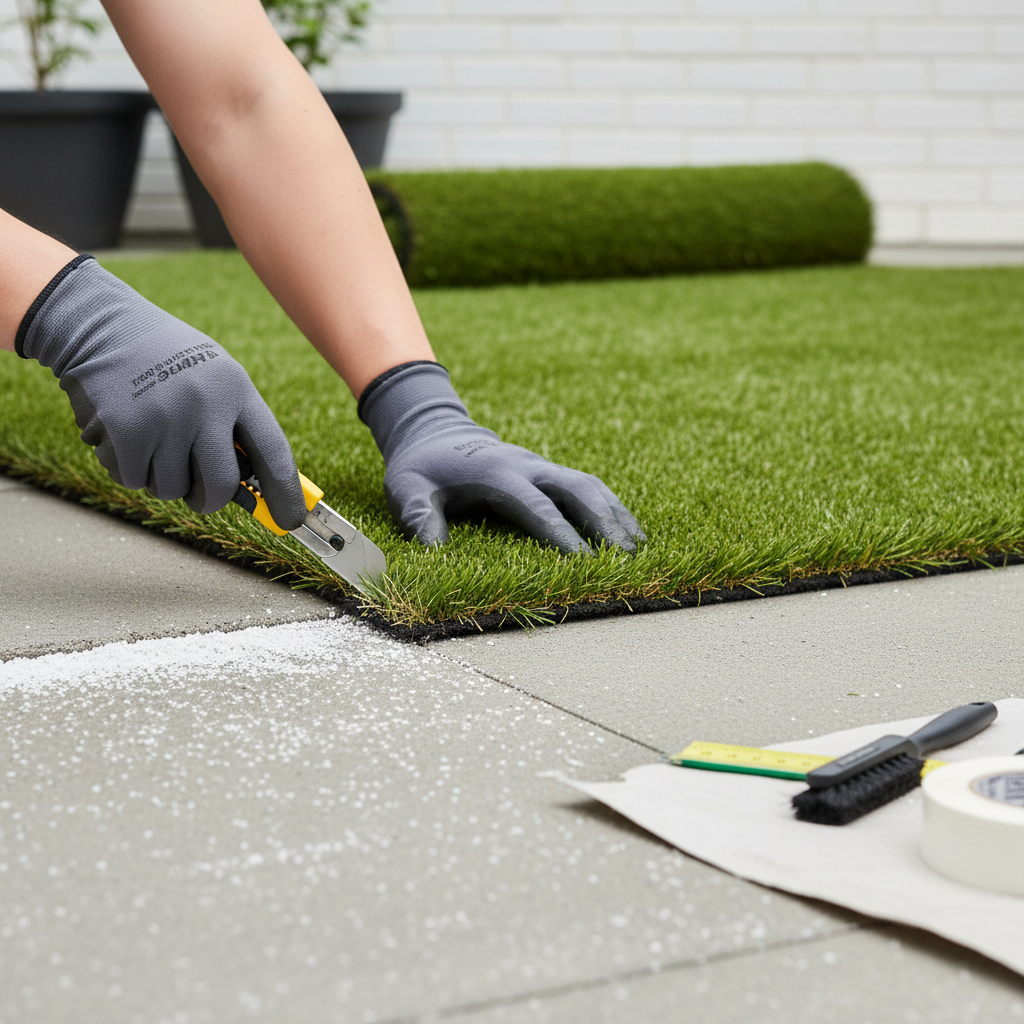
Step 5: The Art of Cutting and Trimming
Precision is key. For edges against a wall or a hard border, press the turf firmly into the corner and use your sharp utility knife to cut from the back of the turf. The black backing is much easier to cut through than the grassy side. Change your blade frequently—a dull blade will tear the backing and give you a ragged, unprofessional edge. Take your time. Measure twice, cut once. It's an old saying for a reason.
How to Install Fake Grass with DaznDi (Steps to Install Fake Grass)
This video provides valuable insights into how to install artificial grass on concrete, covering key concepts and practical tips that complement the information in this guide. The visual demonstration helps clarify complex topics and gives you a real-world perspective on implementation.
Step 6: Seaming It All Together
If you have more than one piece of turf, creating an invisible seam is the hallmark of a professional job. Here's how our team does it: Lay the two pieces side-by-side, with a tiny gap between them—about 1/8 of an inch. You shouldn't butt them up tight against each other. Fold back the edges of both pieces. Roll out your seaming tape on the concrete in the gap, adhesive-side up. Apply a generous, zig-zagging bead of turf adhesive to the tape. Carefully fold the turf edges back down onto the tape, pressing them firmly into the glue. Be careful not to get any adhesive on the grass blades themselves. It’s a mess to clean up. Walk along the seam to ensure good contact and then let it cure.
This takes practice. Honestly, though, this is the step that separates the pros from the amateurs.
Step 7: Securing the Perimeter
Based on the method you chose from our table earlier, it's time to lock it down. For a perimeter-secure installation, run a thick bead of turf adhesive around the entire edge of the concrete slab, about two inches in from the edge. Press the perimeter of the turf firmly into the adhesive. You can place heavy objects like bags of infill, bricks, or buckets of water along the edges while the glue cures to ensure a strong bond.
Step 8: Applying the Infill
Your lawn might look finished, but it’s not. The infill is the final, crucial component. It’s typically a specialized sand or rubber crumb that you spread over the top of the grass. What does it do? It provides weight to hold the turf down, helps the grass blades stand up straight for a more natural look, protects the backing from UV rays, and helps keep the turf cool. For pet owners, we often recommend a zeolite-based infill, which helps neutralize odors from pet urine.
Use a drop spreader (like you’d use for grass seed) to apply the infill evenly across the entire area. You'll need a specific amount per square foot, which the turf manufacturer will specify. Once it's spread, use a power broom or a very stiff push broom to work the infill down into the base of the grass fibers. You shouldn't see it when you're done—it should be nestled deep within the blades. Brush against the grain of the grass to help the blades stand up tall and proud.
Common Pitfalls and How to Sidestep Them
We’ve been called in to rescue more than a few DIY turf projects. The same mistakes pop up time and time again.
Visible Seams: This is almost always caused by cutting the pieces incorrectly or not leaving the proper 1/8-inch gap. It can also happen when the grain of the two pieces runs in different directions. The fix? Unfortunately, it often means re-doing the seam entirely.
Pooling Water & Bad Smells: A clear sign of a failed drainage plan. If you didn't create a way for water to escape, it's now trapped between the turf backing and the concrete, creating a stagnant, smelly bog. Prevention is the only real cure here. Proper sloping, drainage holes, or a drainage mat are non-negotiable.
Lumps and Bumps: This goes back to shoddy prep work. If you didn't level the concrete and fill the cracks, every imperfection will eventually telegraph through the turf. It's a ghost of the poor foundation beneath.
Lifting Edges: Usually a result of skimping on adhesive or not cleaning the concrete perimeter properly. The glue needs a clean, porous surface to bond to. Any dust or grime will prevent a solid connection.
Is This a DIY Project or Should You Call in the Pros?
So, can you do this yourself? It depends. A small, square balcony with excellent drainage? Absolutely. It’s a great weekend project. A sprawling 1,000-square-foot patio with significant cracks and a tricky drainage situation? We’d advise against it.
Artificial grass is heavy, the tools can be specialized (like a power broom), and the techniques, especially for seaming, require a level of finesse that comes with experience. The materials themselves are a significant investment. A mistake can be costly and frustrating. If you're looking at your space and feeling even slightly overwhelmed by the scope of the prep work or the technical steps, that's a good sign it's time to call in a professional team. Our Services extend beyond just design; we handle the entire installation process, ensuring every detail is perfect. We've got the equipment, the experience, and the team to do it efficiently and correctly, the first time.
Transforming an outdoor space should be exciting, not stressful. If you're ready to turn that drab concrete slab into a vibrant, usable outdoor living area but want to ensure it's done to the highest standard, don't hesitate to get in touch. You can reach out to our team through our Contact page, and we’d be happy to discuss your project. Your boring concrete has so much potential, and with the right approach, it can become the most-loved spot in your home.
Frequently Asked Questions. Here are some common questions. Find the answers you're looking for below.
Can artificial grass on concrete get too hot to walk on?
Yes, like any dark surface, artificial grass can get hot in direct sun, especially during San Diego summers. We recommend choosing a lighter-colored turf and using a specialized cooling infill, like silica sand, which helps reflect heat and keep the surface temperature more comfortable.
How do you clean pet urine from turf installed on a concrete patio?
For pet-friendly installations, proper drainage is key. Hose the area down regularly to flush the urine through. For persistent odors, we recommend using an enzyme-based artificial turf cleaner and a zeolite infill, which actively works to trap and neutralize ammonia odors.
Do I absolutely need to use an underlay on concrete?
While not strictly mandatory, our team highly recommends it. An underlay provides cushioning for comfort and safety, and more importantly, it creates crucial channels for drainage, preventing water from getting trapped between the turf and the non-porous concrete.
How long will artificial grass last on a concrete surface?
A professionally installed, high-quality artificial turf system can last 15-20 years on concrete. The lifespan depends on the quality of the turf, the amount of foot traffic, and proper installation—especially ensuring good drainage to protect the backing.
Will installing artificial grass damage my concrete?
If you use the perimeter-secure or floating installation methods, the impact on the concrete is minimal and often reversible. A full glue-down installation is more permanent and will require significant effort and potential grinding to remove the adhesive residue if you ever decide to change it.
Can I install turf on cracked or uneven concrete?
You shouldn't install turf directly over cracked or uneven concrete without preparing it first. All significant cracks should be filled and any low spots leveled with a self-leveling compound to ensure a smooth, stable base for a professional-looking result.
What is the best infill to use for turf on a concrete rooftop?
For a rooftop, we often suggest a rounded silica sand infill. It's heavy enough to weigh the turf down, non-toxic, and helps keep the surface cooler. Its rounded shape is also less abrasive on the turf fibers compared to angular sand.
How do you handle seams to make them invisible?
The key is to ensure the grain of both turf pieces runs in the same direction. Cut from the back for precision, leave a tiny 1/8-inch gap between the pieces, and use high-quality seaming tape and adhesive to bond them securely from below.
Is it possible to have weeds grow through turf on concrete?
It's extremely unlikely. The concrete base and the turf's durable backing create a formidable barrier that prevents weeds from growing through from underneath. Any growth you see is typically airborne seeds landing on the surface, which are easily removed.
What's the biggest mistake people make when installing turf on concrete?
By far, the most common and damaging mistake our team sees is neglecting drainage. Failing to ensure water can escape leads to pooling, odors, and premature degradation of the turf backing. It's the one step you absolutely cannot afford to skip.
Can I use regular sand from a hardware store as infill?
We strongly advise against it. Regular play sand or construction sand is often angular, which can act like sandpaper and wear down turf fibers. It also compacts easily, hindering drainage. Always use a specialized, rounded turf infill.


.webp)
.webp)