How to Cut Artificial Grass: A Pro’s Guide for Perfect Edges
Your Guide on How to Cut Artificial Grass
So, the rolls of lush, green artificial turf have arrived. The excitement is real. You can already picture the perfect, low-maintenance lawn you’ve been dreaming of for your San Diego home. But then you’re faced with the most crucial—and honestly, the most intimidating—part of the installation process: making the cuts. It’s the moment of truth where a beautiful project can become a frustrating, costly mistake. Don’t worry. We’ve been there.
Our team at Modern Yardz has spent years perfecting the art of artificial turf installation, and we've learned that the quality of the final product hinges almost entirely on the precision of the cuts. It's not just about trimming edges; it's about shaping a seamless, natural-looking landscape that integrates perfectly with your patios, walkways, and garden beds. This isn't just a guide; this is the culmination of our team's hands-on experience, distilled into actionable steps to help you get it right. We’re going to walk you through exactly how to cut artificial grass like a seasoned professional.
Why the Cut Matters More Than You Think
Let’s be honest—it’s easy to underestimate this step. You roll out the turf, it looks great, and you figure a quick trim is all that’s needed. But the cut is what separates a DIY-looking job from a truly professional, integrated landscape. A bad cut screams “fake grass.” It creates visible gaps, uneven lines, and seams that stick out like a sore thumb. A great cut, on the other hand, is invisible. It’s seamless. It makes the turf look like it was always meant to be there.
Think about it. Your artificial lawn has to contend with hard edges like concrete patios, the soft curves of flower beds, and immovable objects like sprinkler heads or tree trunks. Each of these requires a different approach, a different technique. Our experience shows that rushing this stage is the number one cause of installation headaches. An improper cut can lead to wasted material (which is expensive) and a finish that you’ll never be quite happy with. It’s the difference between a pristine outdoor living space and a constant, nagging reminder of a project gone slightly wrong.
We can't stress this enough: patience and the right tools are your best friends here. This is where the meticulous planning from our Services team pays off dividends. Taking the time to measure twice (or even three times) and using the proper techniques will elevate your entire project from good to impeccable.
The Tools of the Trade: What Our Pros Actually Use
Having the right equipment is non-negotiable. You wouldn't try to paint a masterpiece with a house brush, right? The same logic applies here. Forget the kitchen scissors or that dull blade you have lying around in the garage. To get clean, professional lines, you need tools designed for the job. Our installation crews carry a specific set of tools on every project, and we’re sharing our go-to list with you.
The Unsung Hero: The Utility Knife
This is, without a doubt, the most important tool in your arsenal. But not just any utility knife will do. You need a sturdy, comfortable knife with a retractable blade. And—this is the critical part—you need a mountain of fresh, sharp blades. We mean it. An artificial turf backing is incredibly tough and abrasive. It’s designed to withstand decades of foot traffic and weather. That same durability will dull a razor blade with shocking speed. Our pros often swap out a blade after just 15-20 feet of cutting to ensure every single cut is perfectly clean. A dull blade will snag, tear, and fray the turf backing, leading to a messy, unprofessional edge. Don’t skimp here. Buy a contractor pack of blades. You’ll thank us later.
For the Long Haul: The Loop Pile Cutter
A specialized turf cutter, often called a loop pile or carpet cutter, is a fantastic tool for making long, straight cuts from the top side of the turf. It functions by trapping the turf between two plates and using a blade to slice through, which helps keep your lines incredibly straight. While a standard utility knife is more versatile for detailed work, for long seam cuts, a dedicated turf cutter can be a massive time-saver and accuracy-booster.
The Detail Work: Heavy-Duty Scissors or Shears
Sometimes, a knife isn’t the right tool, especially for small, intricate relief cuts or trimming around delicate objects. A pair of sharp, heavy-duty industrial shears gives you a level of control that a knife can’t always offer. They are perfect for snipping away at backing around a sprinkler head or carefully shaping a corner. We’ve found that having both a knife and shears on hand covers virtually every situation you’ll encounter.
Here’s a quick breakdown of what our team recommends:
Tool
Primary Use
Pro-Tip from Modern Yardz
Best For
Heavy-Duty Utility Knife
All-purpose cutting, seams, edges
Always cut from the back. Change blades every 15-20 feet for a clean cut.
Straight lines, curves, general use
Loop Pile Turf Cutter
Long, straight cuts
Keep consistent downward pressure for a uniform cut.
Seams, long perimeter cuts
Industrial Shears
Detail work, relief cuts
Use for trimming grass fibers and making small, precise snips.
Cutting around pipes, sprinklers, tight corners
Measuring Tape
Measurement and marking
A 25-foot or 50-foot tape is essential. Measure everything multiple times.
Planning, marking cut lines
Chalk Line or Marker
Marking straight lines
Snap a chalk line on the back of the turf for a perfectly straight guide.
Long, straight cuts, seaming
Prepping for the Perfect Cut
Before a blade ever touches the turf, there’s crucial prep work to be done. Rushing into the cutting process without proper preparation is a recipe for disaster. This is the methodical part of the job, and it’s where precision begins.
First, unroll your turf and let it rest. This is a step many people skip. Artificial grass is shipped in tight rolls, and the material (especially the backing) develops a memory. Letting it lay flat in the sun for at least an hour—or even a full day if you have the time here in sunny San Diego—allows it to relax and expand. Cutting it while it’s still cool and coiled can result in the piece shrinking or shifting after you’ve made your cuts, throwing off your entire layout. We’ve seen it happen, and it’s a frustratingly avoidable mistake.
Next, position your turf piece so you have a bit of excess—what we call an overcut—on all edges. We generally recommend leaving at least 2-3 inches of extra material along any hardscapes, like patios or walkways. This gives you a margin of error. You can always trim more off; you can never add it back on. This simple buffer is your safety net.
For seaming two pieces together, the same principle applies. Overlap the two pieces by a few inches. This will allow you to make a single cut through both layers at the same time, creating a perfectly matched seam. We’ll dive deeper into that technique in a moment.
And finally, mark your lines. For long, straight cuts, nothing beats a chalk line snapped on the back of the turf. It provides a clear, undeniable guide to follow. For curves, a flexible garden hose or rope can be laid out to create a smooth, flowing line that you can trace with a marker. Taking five minutes to mark a clear path is infinitely better than trying to eyeball it and ending up with a wobbly, unprofessional edge.
Ut Field Day Rough Height of Cut Eevaluations
This video provides valuable insights into how to cut artificial grass, covering key concepts and practical tips that complement the information in this guide. The visual demonstration helps clarify complex topics and gives you a real-world perspective on implementation.
The Art of the Straight Cut: A Step-by-Step Approach
This is your bread and butter. Mastering the straight cut is fundamental to understanding how to cut artificial grass correctly.
Always Cut from the Back: This is the golden rule. The flat, black backing of the turf is your canvas. Cutting from the back allows you to see your marked lines clearly and, more importantly, it prevents you from accidentally cutting the grass fibers themselves. When you cut from the top, you inevitably shear off the green blades, creating a noticeable “bald” line along the cut edge. Cutting from the back parts the fibers naturally, leaving the grass blades intact and creating an invisible edge once it’s laid down.
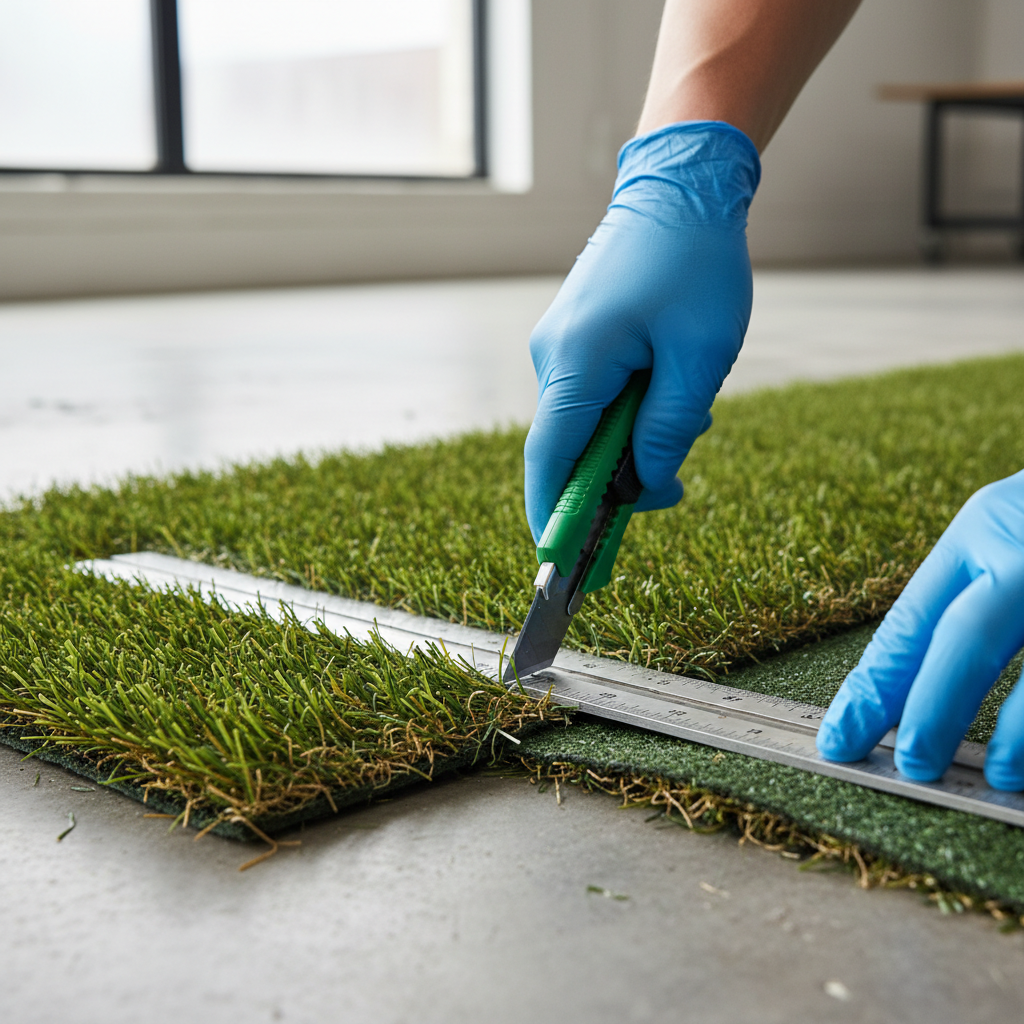
Use a Straightedge: For ultimate precision, use a long metal ruler or a straight piece of lumber as a guide for your knife. Press it down firmly along your chalk line. This prevents your knife from wandering and ensures your cut is perfectly linear. It’s a simple technique that makes a world of difference.
Apply Firm, Consistent Pressure: When you make the cut, press down firmly with your utility knife and pull it towards you in a smooth, continuous motion. Don’t try to saw back and forth. A single, confident pass with a sharp blade is what you’re aiming for. You should feel the blade slice cleanly through the backing. If you feel it snagging or tearing, stop immediately. It’s time for a new blade.
That’s it. It’s a simple process, but one that demands focus. Remember—fresh blade, cut from the back, use a guide. Master that, and you’re halfway there.
Tackling Curves and Complex Shapes
Straight lines are one thing, but most landscapes designed by our About team feature beautiful, organic curves around planters, trees, and walkways. This is where your skills are truly tested. The principles remain the same, but the technique needs a little finesse.
For gentle, sweeping curves, you’ll still cut from the back. After marking your curved line, you’ll use your utility knife to make the cut. The key here is to go slow. Instead of one long pull, you’ll make a series of shorter, connected cuts, carefully following the line. Keep the blade angled slightly to help it navigate the turn. It’s more like tracing than slicing.
For very tight curves or cutting around objects like pipes or sprinkler heads, the knife-from-the-back method can be cumbersome. This is where your heavy-duty shears come into play. First, make a series of “relief cuts” from the edge of the turf in towards the object. These are straight cuts that allow the turf to lay flat around the obstruction without bunching up. Once the piece is lying flat, you can use the tips of your shears to carefully snip away the excess material from the top side, getting a snug and perfect fit. It’s a delicate process, but it’s the only way to get a clean finish around small, fixed objects.
Seaming: Where Precision Is Everything
Ah, the seam. Nothing separates the amateur from the pro like a well-executed seam. A bad seam is a visible line that disrupts the entire illusion of a natural lawn. A perfect seam is completely invisible, making two or more pieces of turf look like a single, sprawling carpet of green.
Here’s how our team creates flawless seams:
Lay and Overlap: Position your two pieces of turf so they overlap by about 2-3 inches. Make sure the “grain” or the direction of the grass blades is running the same way on both pieces. If the grain is opposed, the difference in light reflection will make the seam stick out, no matter how well you cut it.
The Double Cut: This is the secret. Place a straightedge in the middle of the overlapped section. Now, using a fresh, sharp blade, make a single, firm cut down through both layers of turf at the same time. This is why a sharp blade and firm pressure are so critical.
Remove the Scraps: Once the cut is made, you can peel back the edges. You’ll have a scrap strip from the top piece and a scrap strip from the bottom piece. Discard them. What you’re left with are two edges that are perfectly matched—a mirror image of each other.
Fold and Tape: Carefully fold back both newly cut edges. Roll out your seaming tape (the non-adhesive side down, adhesive side up) on the sub-base directly underneath where the two edges will meet. Apply your turf adhesive to the tape in a serpentine pattern.
Marry the Edges: Slowly and carefully, lay one edge of the turf onto the glue-covered tape. Then, bring the second edge in to meet it. The goal is to bring the backings together so they are touching but not overlapping. You don’t want to press them together so hard that they create a ridge, nor leave a gap that will be visible. It’s a fine balance. Once they are in place, walk along the seam to press the backing firmly into the adhesive.
After the adhesive has cured, you can use a stiff-bristled broom or a power broom to “bloom” the grass fibers along the seam, helping to blend them together and completely hide the join. This meticulous process is standard on every project we undertake, from a small backyard patch to a sprawling commercial installation. If you’re ever unsure, don’t hesitate to Contact our experts for advice.
Common Mistakes We See (And How to Avoid Them)
Over the years, we've been called in to fix a few DIY projects gone wrong. It almost always comes down to a handful of avoidable cutting errors.
Using a Dull Blade: We’ve said it before, and we’ll say it again. It’s the most common and most damaging mistake. A dull blade rips the backing instead of slicing it, leading to frayed, ugly edges that are nearly impossible to seam properly. Solution: Be religious about changing your blades.
Cutting from the Top: This is a close second. Cutting through the grass fibers themselves creates a sheared, unnatural look that is impossible to hide. Solution: Always, always cut from the back whenever possible.
Not Letting the Turf Acclimate: Cutting a cold, stiff roll of turf will lead to measurement inaccuracies as the material expands in the heat. Solution: Give it time to relax in the sun before you even think about cutting.
Measuring Once, Cutting Once: The old carpenter's adage holds true here. Rushing the measuring and marking phase leads to gaps or wasted material. Solution: Measure, mark, double-check your marks, and then cut.
Forgetting the Grain Direction: Laying two pieces with opposing grain directions will create a visible seam due to the way the light hits the fibers, even with a perfect cut. Solution: Check and double-check that the blades on all pieces are pointing in the same direction.
Learning how to cut artificial grass is a skill that takes patience. But by avoiding these common pitfalls, you put yourself on the path to a result that looks clean, professional, and beautiful. It's the kind of attention to detail that we pride ourselves on at our Home base in San Diego, and it's what truly makes a landscape shine.
Ultimately, cutting artificial turf is the final, defining step in your installation. It’s where craftsmanship and attention to detail come to the forefront. While it can seem daunting, breaking it down into these manageable steps—gathering the right tools, prepping meticulously, and using the proper techniques for each type of cut—demystifies the process. Take your time, trust the process, and you’ll be able to create those clean edges and invisible seams that are the hallmark of a stunning, professional-grade artificial lawn. It’s a satisfying final touch to creating an outdoor space you'll love for years to come.
Frequently Asked Questions. Here are some common questions. Find the answers you're looking for below.
Can I use regular scissors to cut artificial grass?
We strongly advise against it. Regular scissors aren't strong enough and will likely produce a frayed, jagged edge. For small, detailed snips, a pair of heavy-duty industrial shears is acceptable, but a sharp utility knife is the primary tool.
What's the absolute most important tip for cutting turf?
Our team agrees: always cut from the black backing, not the green, grassy side. This prevents you from cutting the grass fibers, which creates a noticeable 'bald' line, and allows you to follow your marked lines with precision.
How often should I really change my utility knife blade?
More often than you think. The backing material is extremely abrasive. We recommend a fresh blade for every 15-20 feet of cutting to ensure every cut is clean and effortless. A dull blade is the number one cause of poor results.
What's the best way to cut a circle in artificial grass, like for a tree?
For cutting around a tree or pole, make several 'relief' cuts from the edge of the turf in towards the object. This allows the turf to lay flat. Then, use heavy-duty shears to carefully trim the excess material for a snug fit.
How do I make sure my seams are invisible?
The key is the 'double cut' method. Overlap the two pieces, and cut through both layers at once with a straightedge. This creates perfectly matching edges. Also, ensure the grain of the turf is running in the same direction on both pieces.
Do I need a special 'turf cutter' tool?
While not strictly necessary, a specialized turf cutter can make long, straight seam cuts much faster and more accurate. For a typical DIYer, a high-quality utility knife is sufficient, but for large projects, a turf cutter is a great investment.
What if I cut a piece too short?
Unfortunately, you can't stretch turf. This is why we always recommend cutting pieces with a few inches of excess (overcut). If a piece is too short, you may need to use the leftover material to create a small, well-hidden seam, or in a worst-case scenario, replace the piece.
Is it better to cut turf when it's warm or cold?
It's best to let the turf acclimate in the sun for at least an hour before cutting. This allows it to expand to its natural size. Cutting it while cold and stiff can lead to it shrinking or expanding later, throwing off your measurements.
How do I cut turf around a sprinkler head?
Feel for the sprinkler head through the turf and make a small 'X' cut with your utility knife directly over it. From there, you can use shears or your knife to carefully trim a small circle, creating a clean opening for the sprinkler to pop up.
What should I use to mark my cutting lines on the back of the turf?
A chalk line is the best tool for marking long, straight lines. For curves or more intricate shapes, a white or silver permanent marker shows up very well against the black backing and won't smudge easily.
Will cutting the turf cause it to unravel or fray over time?
Not if you use a sharp blade. A clean cut through the polyurethane or latex backing will be very stable. Fraying is typically caused by a dull blade that tears the woven backing instead of slicing it cleanly.


.webp)
.webp)