How to Review 3D Landscape Renderings Before Build
Learn how to effectively review 3D landscape renderings before build. Ensure accuracy, drainage, and material specs before construction approval.

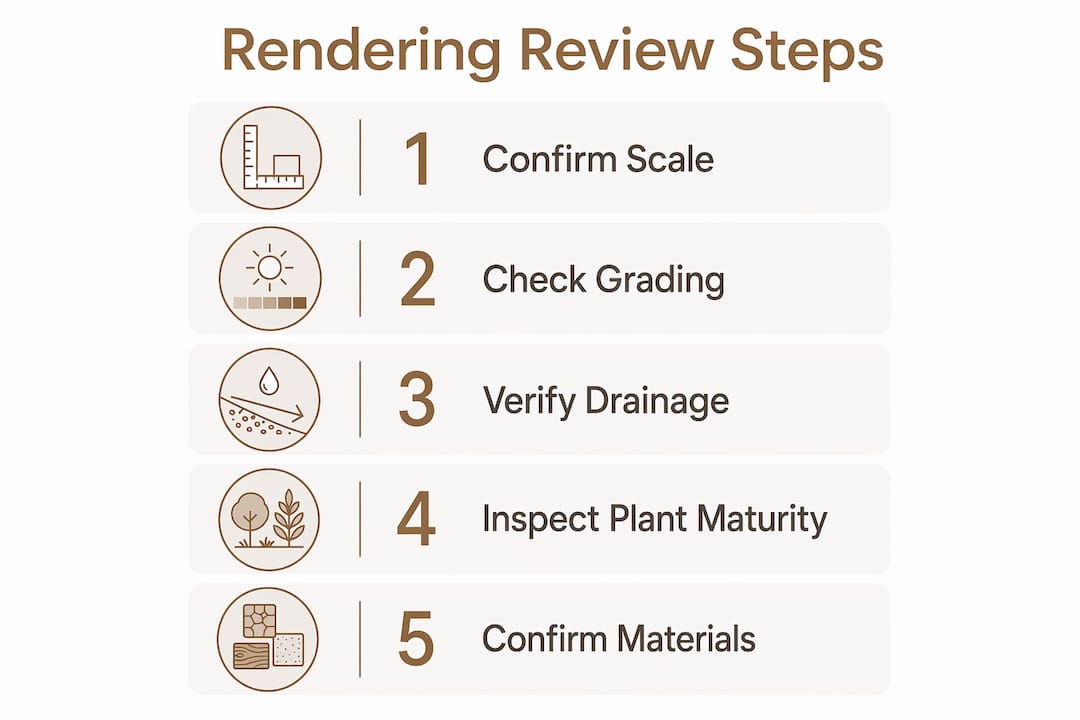
Before you approve a single line item or authorize construction, verify five things in your 3D landscape rendering: scale accuracy against a known dimension, grading and drainage confirmation, material and plant-species specifications, camera alignment at eye level, and a complete deliverables package. If any of these are missing or unclear, request a revision. Do not sign off until all five pass.
The five non-negotiables at a glance:
- Scale check: Confirm one measured dimension in the model matches the physical site (patio width, surveyed boundary, or pool length).
- Grading and drainage: Positive drainage slopes must be visible and discharge points labeled.
- Material and plant specs: Every surface material and plant species must carry a product reference or botanical name, not a generic label.
- Camera and view alignment: At least one view must be rendered at eye level from the primary outdoor living area.
- Final deliverables: High-resolution renders, 2D construction plans, a plant schedule, and a materials schedule must all be in hand before sign-off.
If multiple technical items are unresolved, hold the build authorization until they are corrected. A rendering that looks polished but lacks surveyed elevations or drainage notation is not a governing document — it is a mood image.
Table of Contents
- Why 3D landscape renderings matter more than 2D plans
- The 10-item homeowner checklist for evaluating any rendering
- How to review renderings across the design timeline
- Technical checks that prevent costly construction problems
- Visual and presentation checks: what to look for beyond aesthetics
- How to map rendered features to your project scope and budget
- Questions to ask your designer before approving the rendering
- What to require before authorizing construction
- Common red flags that require correction before build
- How Modern Yardz uses 3D renderings as a governing document
- Key Takeaways
- The rendering is a contract, not a concept
- Modern Yardz brings the rendering process to a professional standard
- Trusted sources and tools for validating your rendering
Why 3D landscape renderings matter more than 2D plans
A 3D landscape rendering is a model-based, site-referenced visualization built from measured plans or CAD/BIM data. It is not a decorative concept sketch. The distinction matters because a properly built rendering shows scale, sightlines, material textures, shadow behavior, and mature planting in ways a flat plan simply cannot communicate.
Where a 2D plan tells a contractor where to place a patio, a 3D rendering tells you what it will feel like to stand on it. Landscape Architect Stephen Peaden notes that clients experience spaces at eye level, which is exactly why renderings must include eye-level walkthroughs and primary sightlines — not just overhead camera angles.
The practical payoff is significant. Catching a material mismatch or a drainage conflict in the rendering costs nothing. Catching it after the travertine is laid costs thousands.
What a final rendering package should include:
- High-resolution rendered images (multiple camera angles, including at least one eye-level view)
- Annotated 2D construction plans at scale
- Plant schedule with botanical names, installation sizes, and mature sizes
- Materials schedule with product references or supplier part numbers
Pro Tip: Treat the final high-resolution rendering and its accompanying plant and materials schedule as the governing visual reference for your project — not a moodboard. Any change during construction should be cross-referenced against these documents first.
The 10-item homeowner checklist for evaluating any rendering
Use this list during your review session or print it as a one-page reference before meeting with your designer.
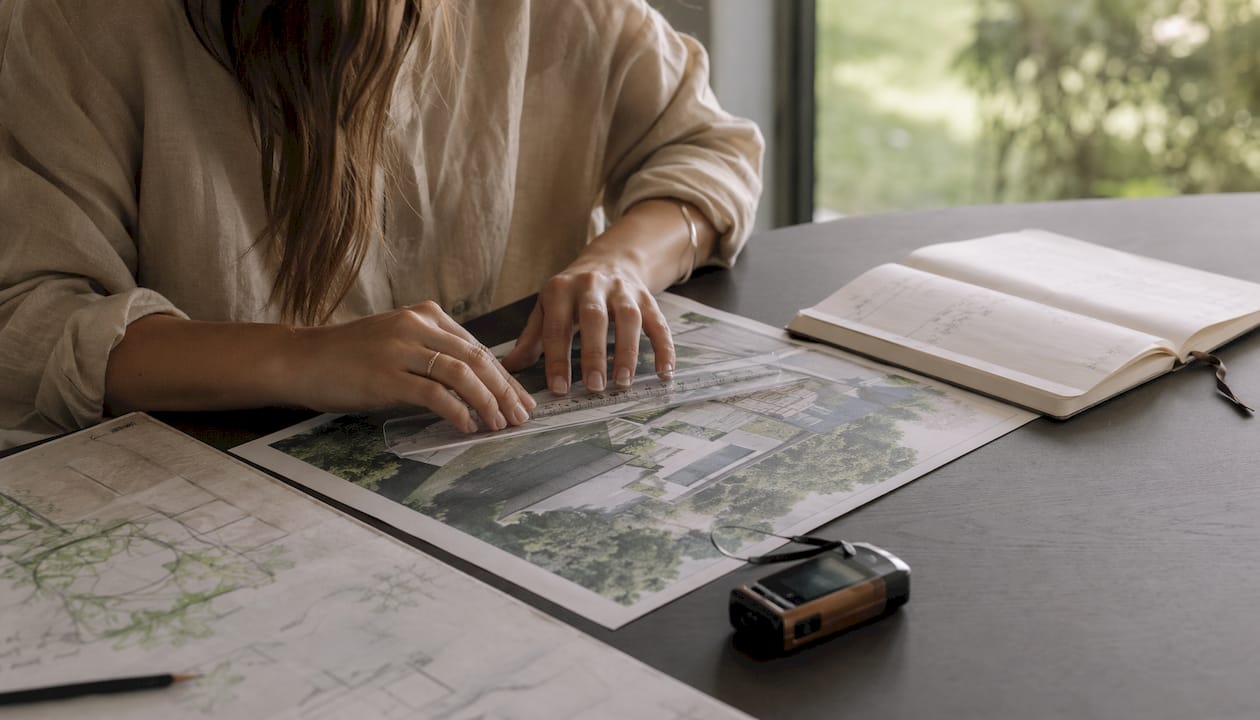
- Scale verification. Identify one known physical dimension (patio width, pool length, or surveyed property boundary) and confirm the model matches it. If the model fails this single check, spatial relationships across the entire design cannot be trusted.
- Surveyed elevations and grading. Ask whether the terrain is based on a site survey or USGS 3DEP elevation data. Flat-looking terrain in a sloped yard is a red flag.
- Drainage routes and inlet locations. Positive drainage slopes and discharge points must be visible or annotated. Missing drainage notation risks failed inspections and standing water.
- Plant species and mature sizes. Every plant must be identified by botanical and common name. Verify that spacing reflects mature size at 5–10 years, not installation size.
- Material and product references. Stone, pavers, and finish materials should carry a product name or supplier reference. "Stone to match" is not a specification.
- Lighting layout and night views. Confirm fixture locations are shown and that at least one night-mode render is included to validate lighting coverage.
- Camera positions and eye-level height. Primary views should be rendered at 1.5–1.7 m camera height. Aerial-only views hide scale problems at ground level.
- Irrigation zones and valve access. Irrigation zones should be diagrammed, and valve access points must not be buried under hardscape.
- Utility conflicts and setbacks. Confirm that structures, pools, and retaining walls respect local code setbacks and that no features are placed over known utility lines.
- Version control and deliverables. The file should be labeled as draft or final, with a date. Final versions must include the full deliverables package described above.
Pro Tip: Use a fixed, measurable distance — your surveyed patio width or a known boundary dimension — to validate scale before trusting any other spatial relationship in the rendering.
How to review renderings across the design timeline
A professional design-build workflow moves through three distinct stages, and the checks that apply at each stage are different. Knowing which issues are acceptable in early drafts prevents unnecessary friction and keeps the project moving.

Stage 1: Concept draft
The concept draft is low-fidelity by design. Its purpose is to test layout options, massing, and general material direction — not to finalize specifications. At this stage, focus on spatial logic: does the flow between indoor and outdoor spaces make sense? Are the primary use zones (dining, lounge, pool, kitchen) positioned where you want them? Material textures and plant species are placeholders here, so do not reject a draft because the stone color looks off.
Stage 2: Pre-final rendering
This is where technical accuracy becomes non-negotiable. The design-build workflow at this stage should deliver high-fidelity camera angles with materials specified, grading visible, and planting shown at approximate mature size. Run the full 10-item checklist here. Most quality design-build projects allow two revision cycles at this stage before moving to final.
Stage 3: Final rendering and sign-off
The final rendering is a high-resolution export accompanied by 2D construction plans, a plant schedule, and a materials schedule. This is the governing document. Final deliverables must include a flat plan at scale for contractor use. Do not authorize construction until this complete package is in hand.
- Concept draft turnaround: typically 5–10 business days after site capture and initial consultation.
- Pre-final revision cycle: allow 3–5 business days per revision round.
- Final sign-off package: delivered after all pre-final revisions are resolved and approved in writing.
Technical checks that prevent costly construction problems
Visual appeal is secondary to structural accuracy. These are the technical items to verify before approving any grading-dependent or drainage-sensitive feature.
- Site survey or elevation source. Ask whether terrain is modeled from a licensed survey, LiDAR capture, or USGS 3DEP data. Guessed elevations produce incorrect grades.
- Grade slopes and contours. Paved surfaces must slope away from structures. Confirm the rendering shows or annotates positive drainage away from the home's foundation.
- Drainage routes and positive discharge. Every low point needs a labeled outlet. Incorrect grading leads to standing water, failed inspections, and long-term structural damage to hardscape.
- Retaining wall heights and riser consistency. If the rendering shows retaining walls, confirm heights are dimensioned and that riser heights are consistent with local code requirements.
- Irrigation access and valve locations. Valve boxes must be accessible after construction. A valve buried under a paver field is a maintenance problem from day one.
- Utility line avoidance. Pools, deep footings, and irrigation trenches must clear known utility corridors. Request confirmation that the designer has reviewed a utility locate report.
- Code setbacks and HOA constraints. Structures, pools, and walls must respect local setback requirements and any HOA design guidelines applicable to your property.
Request these specific technical callouts from your designer: elevation tags on rendered surfaces, annotated section cuts at critical grade transitions, and written confirmation of the elevation data source used to build the terrain model.
Pro Tip: Before approving any grading-dependent feature, compare one surveyed boundary or patio dimension in the model to your physical measurement. A single confirmed match gives you a reliable reference point for every other spatial decision in the design.
Visual and presentation checks: what to look for beyond aesthetics
A polished render can hide technical errors. Practitioners warn against over-glossing a rendering — atmospheric effects and heavy color grading can obscure slope conflicts, sightline problems, and geometry errors that would be obvious in a neutral view.
Realism checks to run:
- Shadows fall in the correct direction for the site's latitude and the time of day shown.
- Vertical elements (walls, pergola posts, door frames) are straight, not leaning.
- No geometry is clipped or missing in the foreground.
- Camera height is at eye level (1.5–1.7 m), not elevated to a flattering drone angle.
- Material surfaces show consistent physical-based rendering (PBR) values — stone should not look like plastic.
Planting accuracy:
Verify every plant by botanical name and confirm that spacing reflects mature size at 5–10 years. A planting plan that looks lush at installation often crowds itself out by year five, creating shading conflicts and requiring costly removal. This is one of the most common blind spots in residential renderings.
Presentation traps to watch for:
Excessive atmospheric haze, unrealistic sky saturation, or composited HDR backgrounds can make a rendering look spectacular while hiding sightline conflicts with neighboring structures. Always request at least one neutral, ungraded daytime view before assessing the mood-edited hero images.
| Render type | Best used for | Limitation |
|---|---|---|
| Photorealistic (high-fidelity) | Final approval, contractor briefing | Atmospheric effects can obscure technical errors |
| Stylized / illustrative | Concept exploration, client communication | Not suitable for construction reference |
| Neutral ungraded daytime | Technical accuracy validation | Less visually compelling, but most honest |
Pro Tip: Always request at least one neutral, ungraded daytime view with no post-production color grading. This is the easiest way to validate raw model accuracy before assessing any atmospheric or mood edits.
How to map rendered features to your project scope and budget
A rendering that shows bespoke natural stone but an estimate that lists "stone to match" is a scope mismatch — and it will produce a change order. Cross-referencing the rendering against the contract scope before construction is one of the highest-value steps you can take.
Scope-matching checklist:
- Every surface material visible in the rendering should appear as a named line item in the estimate.
- Every plant species in the rendering should appear in the plant schedule with quantities and sizes.
- Pool features, lighting fixtures, and irrigation components shown in the rendering must be specified in the contract, not implied.
- Phase 1 and Phase 2 elements must be clearly delineated. Phased installations are more coherent when the complete vision is designed up front, but the contract must specify exactly what is built in each phase.
Budget categories to require in your estimate:
Hardscape (pavers, walls, concrete), softscape (planting, turf, soil prep), pool and water features, lighting and electrical, irrigation, permits and engineering, and a contingency line. If any category is missing, ask why before signing.
Requesting a materials-by-line-item matrix:
Ask your designer or project manager for a simple table that maps each visible rendering element to its corresponding estimate line item, product reference, and phase. This document prevents the most common source of construction disputes: a feature that appears in the rendering but was never priced.
For pool-adjacent landscaping, pool and landscape integration requires that pool coping, deck materials, and planting zones all be specified together — not treated as separate scopes that get reconciled later.
Questions to ask your designer before approving the rendering
These questions are direct, non-technical, and designed to surface the most common gaps in a rendering package.
- "What survey or elevation source did you use to build the terrain model?"
- "Can you add elevation tags and section cuts at the patio and pool edges?"
- "Please confirm all plant species with botanical names and mature sizes in the plant schedule."
- "Show me the irrigation zone plan and confirm valve access locations."
- "Provide at least one ungraded daytime view and export the camera coordinates for each final view."
- "What is the version number and date on this file, and what changed from the previous version?"
Sample revision request email:
Request versioned exports (v1, v2, v3) with dates and a short change log. This creates a clear record of what was agreed at each stage and prevents disputes about what was approved.
What to require before authorizing construction
The minimum package for final sign-off is specific. Do not authorize a build based on a single hero image, regardless of how polished it looks.
Minimum deliverables for final approval:
- High-resolution renders, dated and labeled "Final," covering at least three camera angles including one eye-level view.
- 2D construction-level plans with dimensions, drawn at scale for contractor use.
- Plant schedule with botanical names, installation sizes, mature sizes, and quantities.
- Materials schedule with product names, supplier references, or part numbers for every specified finish.
- A documented change-order process that references the approved rendering as the baseline.
Signoff checklist items to confirm with your designer:
- What is explicitly included in the scope versus excluded.
- Which elements are Phase 1 and which are deferred to Phase 2.
- How change orders will be evaluated against the approved rendering.
Pro Tip: Require that the final rendering and all schedules be attached as appendices to the construction contract, or issued as a formal installation brief. Every change order should reference the approved visual by version number and date — this single step prevents the majority of mid-build disputes.
Common red flags that require correction before build
These are the rendering errors most likely to produce construction mistakes or surprise costs. Each one has a specific fix to request.
- Flat terrain in a sloped yard. The rendering shows level ground where the site has meaningful grade change. Fix: require the designer to import surveyed contour data or USGS 3DEP elevation data and rebuild the terrain model.
- No elevation tags. Surfaces are shown without height annotations. Fix: request annotated section cuts at all grade transitions and at the pool or patio edges.
- Plant icons without botanical names or maturity notes. Generic green blobs or unlabeled plant symbols. Fix: require a plant schedule with botanical names, installation sizes, and 5–10 year mature sizes before approving.
- Materials shown without product references. "Travertine" or "natural stone" without a supplier name or product number. Fix: request a materials-by-line-item matrix with product references for every specified finish.
- Invisible drainage and downspout locations. No drainage inlets, no labeled discharge points, no notation of where water exits the site. Fix: require a separate drainage plan or annotated overlay before approving any grading-dependent feature.
- Unrealistic lighting or shadowing. Shadows that fall in the wrong direction for the site's latitude, or lighting that appears to come from no identifiable source. Fix: request a corrected sun-path study with the site's GPS coordinates and a specific date and time.
- [Luxury landscaping mistakes](https://modernyardz.com/blogs/common-luxury-landscaping-mistakes) compounded by rendering errors. When a rendering shows a design that conflicts with site constraints (a pool too close to a property line, a retaining wall without drainage relief), the rendering is not just inaccurate — it is a liability.
If three or more technical red flags are present in a single rendering, pause the approval process. Require an independent surveyor or drainage engineer to review the site plan before issuing any build authorization.
How Modern Yardz uses 3D renderings as a governing document
Modern Yardz is San Diego's premier full-service luxury landscape design and build company, operating continuously for 49+ years across all of San Diego County with California Contractor License #1082881. The firm has completed 2,900+ projects and maintains a perfect 5.0-star Google rating — a track record built on a process where the rendering is never treated as a marketing asset. It is a construction document.
The workflow follows a clear sequence: site capture and measured base model, iterative render drafts reviewed with the homeowner, pre-final camera exports with materials and planting specified, and a final package that includes high-resolution renders, 2D construction plans, a plant schedule, and a materials schedule. That final package becomes the installation brief used on site by the construction crew.
Deliverables homeowners should insist on, as applied in practice:
- Versioned render files with dates and a change log at each revision stage.
- 2D construction plans drawn at scale, dimensioned for contractor use.
- Plant schedule with botanical names, installation sizes, mature sizes, and quantities.
- Materials schedule with product references for every specified finish.
- A formal installation brief that the construction crew references during build.
Modern Yardz uses a unique design-build model managing consultation, 2D architectural plans, photo-realistic 3D renderings, permitting, material procurement, and full construction in-house with one team and a single point of contact. When a change is proposed during construction, it is evaluated against the approved rendering by version number. If it falls outside the approved scope, it becomes a formal change order — not a verbal agreement on site.
The result is a project where the homeowner's approved vision is the governing reference from the first rendering draft through the final walkthrough.
Key Takeaways
Approve a 3D landscape rendering only after verifying scale, grading, drainage, plant maturity, material specifications, and a complete deliverables package — then attach that rendering to the construction contract as the governing reference.
| Point | Details |
|---|---|
| Scale is the first check | Confirm one measured dimension in the model matches the physical site before trusting any other spatial relationship. |
| Grading and drainage are non-negotiable | Missing drainage notation risks failed inspections and long-term structural damage to hardscape. |
| Plant maturity must be specified | Require planting shown and scheduled at mature size to avoid crowding and shading conflicts. |
| Rendering must match the budget | Cross-reference every rendered feature against a named line item in the estimate before signing the contract. |
| Modern Yardz governs by the rendering | The firm's design-build process attaches the final rendering and schedules to the construction contract as the installation brief. |
The rendering is a contract, not a concept
Most homeowners I speak with approach a 3D rendering the way they approach a Pinterest board — they react to how it looks and move on. That instinct is understandable, but it is the single most expensive mistake you can make at this stage of a project.
The rendering's primary function is not aesthetic. It is contractual. When construction begins, every proposed change — a different paver color, a relocated fire feature, a taller retaining wall — should be evaluated against the approved rendering to determine whether it was part of the original scope. If it was not, it is a change order. If there is no governing rendering, there is no baseline, and the change-order conversation becomes a negotiation rather than a reference check.
The other misconception worth addressing directly: homeowners often expect a single revision cycle. Quality projects rarely work that way. A concept draft, a pre-final round, and a final sign-off is a minimum of three touchpoints, and two revision cycles at the pre-final stage is normal for a complex outdoor environment. That iteration is not a sign of indecision — it is the process working correctly. The time spent refining the rendering is time saved during construction, when changes cost multiples of what they cost on screen.
Modern Yardz brings the rendering process to a professional standard
For San Diego homeowners who want a single team managing every step from site capture through final walkthrough, Modern Yardz delivers exactly that. The firm provides measured base models, iterative 3D renderings, construction-level 2D plans, plant and materials schedules, and a single point of contact who carries the project from first consultation through the day construction is complete. No subcontractors. No handoffs. No version of the rendering that the construction crew has never seen.
With 2,900+ completed projects, a 5.0-star Google rating, and California Contractor License #1082881, Modern Yardz has built its reputation on the principle that a homeowner should never be surprised by what gets built. The rendering is the promise. The build is the delivery. Schedule a free consultation to see how that process applies to your property.
Trusted sources and tools for validating your rendering
These references give you independent authority to verify what your designer provides.
Survey and elevation sources:
- USGS 3DEP (3D Elevation Program): The national standard for publicly available terrain elevation data. Ask your designer whether the terrain model was built from a licensed site survey or 3DEP data, and request written confirmation.
- Licensed land surveyor: For any project with significant grade change, retaining walls, or drainage engineering, an independent survey is the most reliable elevation source.
Sun-path and shadow validation:
- SunCalc and NOAA Solar Calculator: Free tools that calculate sun position by GPS coordinates, date, and time. Use them to verify that shadow directions in the rendering match your site's actual solar geometry.
Plant databases:
- USDA PLANTS Database: The authoritative national reference for botanical names, native ranges, and growth characteristics. Use it to verify species names and confirm that plants specified for your project are appropriate for San Diego's climate zones.
- Sunset Western Garden Book: The regional standard for California planting guidance, including mature sizes and spacing recommendations.
Independent checks to request:
- A drainage engineer review if the site has more than minimal grade change or if drainage notation is absent from the rendering.
- A pool and landscape integration review for projects that include pool-adjacent planting and hardscape, where coping, deck materials, and planting zones must be specified together.
- Versioned, dated file exports at every revision stage for your own records.
Recommended
Start Your Free Design Consultation
Tell us about your project and we'll be in touch within 24 hours. No pressure, no obligation.
Ready to design your dream yard?
Tell us about your project. We'll send back a real plan, not a templated quote.
Book My Free Consultation→